WP Page Setup [ 4, 5 & 6 ]
How to set up header, footer & main pages/blog page templates in beaver builder after installation using beaver themer. For detailed step-by-step scenario-based instructions on how to use Beaver Themer to edit theme components, or on how to use the blog post and product layouts found on the demo site, view the information on the "Using Beaver Themer" page. Standard and Premium WordPress Setup Ends after step [6], then you will begin Site Design - reference Site Design Flow by Vertical as you build. For Woo sites, after [6] continue to Step [7] from the "Initial Setup" tab.
Create A Header [ 4 ]
Layout & Settings
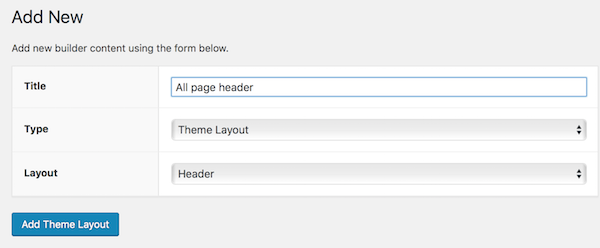
- Create a Themer Layout
dashboard > hover over beaver builder > click themer layouts > add new
- Add Themer Layout
title: header
type: themer layout
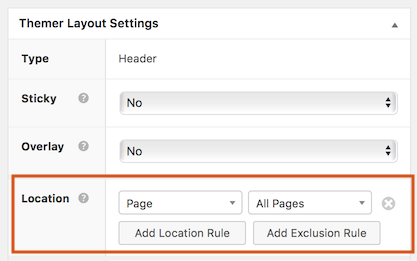
layout: header - Themer Layout Settings
location: entire site (unless you have different headers for different pages)
users: all users
publish > launch beaver builder - Choose A Header
once in beaver builder, on the screen top right > click "+" sign > select templates > from the "group" drop-down > select Header Templates
- Replace Default Layout
select desired template > click "replace existing layout" > proceed to style as needed
References:
Responsive Layout
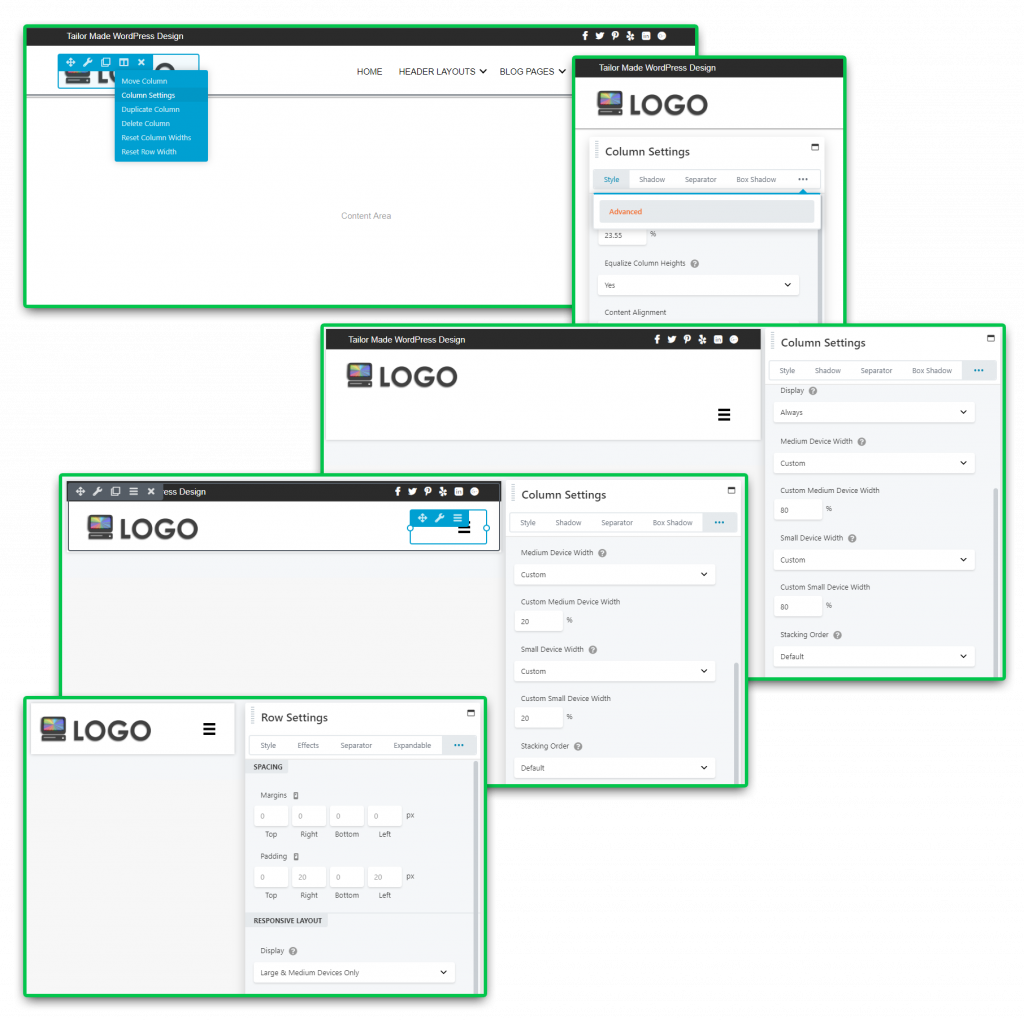
Although the pre-loaded header layouts are already responsively styled, its always good to check anyway and slightly adjust the layout on smaller screens to best accommodate the logo size/text and any other information included in the layout. Make sure the column heights are equalized and centered so the items vertically align in the middle - you can also choose to hide certain rows on smaller screens.
- Column Settings
in beaver builder, select the column holding the logo and click "column settings > go to advanced tab
- Layout Preview
click the little monitor icon to change the layout to tablet or mobile view
- Adjust Column Widths
change the width of the column holding the logo to about 80% > then change the width of the column holding the menu to about 20% (The exact widths don't matter as long as they add up to 100%)
Important details and useful info from beaver themer knowledgebase:
Create A Footer [ 5 ]
Layout & Settings
- Create a Themer Layout
dashboard > hover over beaver builder > click themer layouts > add new
- Add Themer Layout
same steps as above except replace "title" and "layout" with "footer"
- Themer Layout Settings
location: entire site (unless you have different footer for different pages)
users: all users > publish > launch beaver builder - Choose A Footer
once in beaver builder, on the screen top right > click "+" sign > select templates > from the "group" drop-down > select Footer Templates
- Replace Default Layout
select desired template > click "replace existing layout" > proceed to style as needed
References:
Blog / Shop Layouts [ 6 ]
Set up Blog/Shop Landing Page
The page you assign as the default post or shop page will assume this template.
- Create a Themer Layout
dashboard > hover over beaver builder > click themer layouts > add new
- Add Themer Layout
title: blog landing page OR shop landing page
type: themer layout
layout: archive - Themer Layout Settings
location: change this to "post archive" OR "product archive"
users: all users > publish > launch beaver builder - Choose A Landing Page
once in beaver builder, on the screen top right > click "+" sign > select templates > from the "group" drop-down > select Blog OR Shop Templates
- Replace Default Layout
select desired template > click "replace existing layout" > proceed to style as needed
References:
Set Up a Post/Product Category Page
Whenever you create a blog post category or a product category, it will assume this template.
- Create a Themer Layout
dashboard > hover over beaver builder > click themer layouts > add new
- Add Themer Layout
same steps as above except replace "title" with "post category page" OR "product category page" and set "layout" to "archive"
- Themer Layout Settings
location: change this to "post > all posts" OR "product > all products"
users: all users > publish > launch beaver builder > repeat steps 4 & 5 from above
Note: after selecting a template on a category archive, click on the posts/products module used and make sure the content is set to "main query"
Set Up a Singular Post/Product Page
Whenever you create a single blog post or a product, it will assume this template upon publish.
- Create a Themer Layout
dashboard > hover over beaver builder > click themer layouts > add new
- Add Themer Layout
same steps as above except replace "title" with "single post" OR "single product" and set "layout" to "singular"
- Themer Layout Settings
location: change this to "post category archive" OR "product category archive"
add a location rule: set this to "post/product tag archive"
users: all users > publish > launch beaver builder > repeat steps 4 & 5 from above
Next Steps
If its a Woo Site, the next step is to create cart, checkout and account pages. For WP builds, continue to site functionality.


