Care Best Practices
This page contains information on some of the ways to make the most use of Beaver Builder's functionality to help a build take less time while maintaining consistency across the site.
General Rules
- Check to see if plugin updates are available through GD Core and make sure to update before starting any Website Care Tickets.
- Check if a Favicon is in place, if there is no Favicon, add one now.
- If there is no logo to pull a Favicon from, please create one in Photoshop using the letters of the business name. Favicons should be 512px square.
- Read ALL requested items before starting the update.
- Keep an eye out for builders notes in the copy and DO NOT add notes to the website.
- Complete ALL changes that can be completed first BEFORE submitting a content clarification for items that you cannot complete.
- Update plugins before requesting a technical clarification.
- If you update plugins check site pages to make sure nothing broke.
- After all changes have been made, flush the cache and check your work in an incognito or private window to be sure they have all published correctly.
New Content
Add a New Page
The new page should be consistent with other pages styling (e.g.: interior pages need to match other interior pages)
- Same content width
- Same hero style; width/height as interior pages
- Same heading font style
- Same subheading font style
- Same body font style
- Same image style
- Bring over any shared content that is on every page (e.g.: same call to action is present on every page, this should be added to this page as well)
Run SEO tool for the new page following SEO standards outlined here: https://styleguide.wdsgallery.com/seo-best-practices/
New page needs to be added to navigation unless directed otherwise
Check new page on all responsive devices: 360px, 768px, 1024px, 1280px
Add New Content to an Existing Page
Text Content
New content will match relative existing content
Examples:
- New callout will match other callouts, font style/color
- New H1 matches other H1
- Body text matches other body text font/style
- Pages sections are consistent throughout the site: rows, shared content, etc
New Images
Placement and size is consistent to relative image content
Examples:
- Logos added to partners page are added as same size of other logos
- If Images on the page have a border or other styling new images will also have this border or other styling
- If images are cropped in a gallery crop new to match
Add New Email Form
- Name the form appropriately, do NOT name it Contact 2 or any variation of this. It should be relevant to what the form is meant for
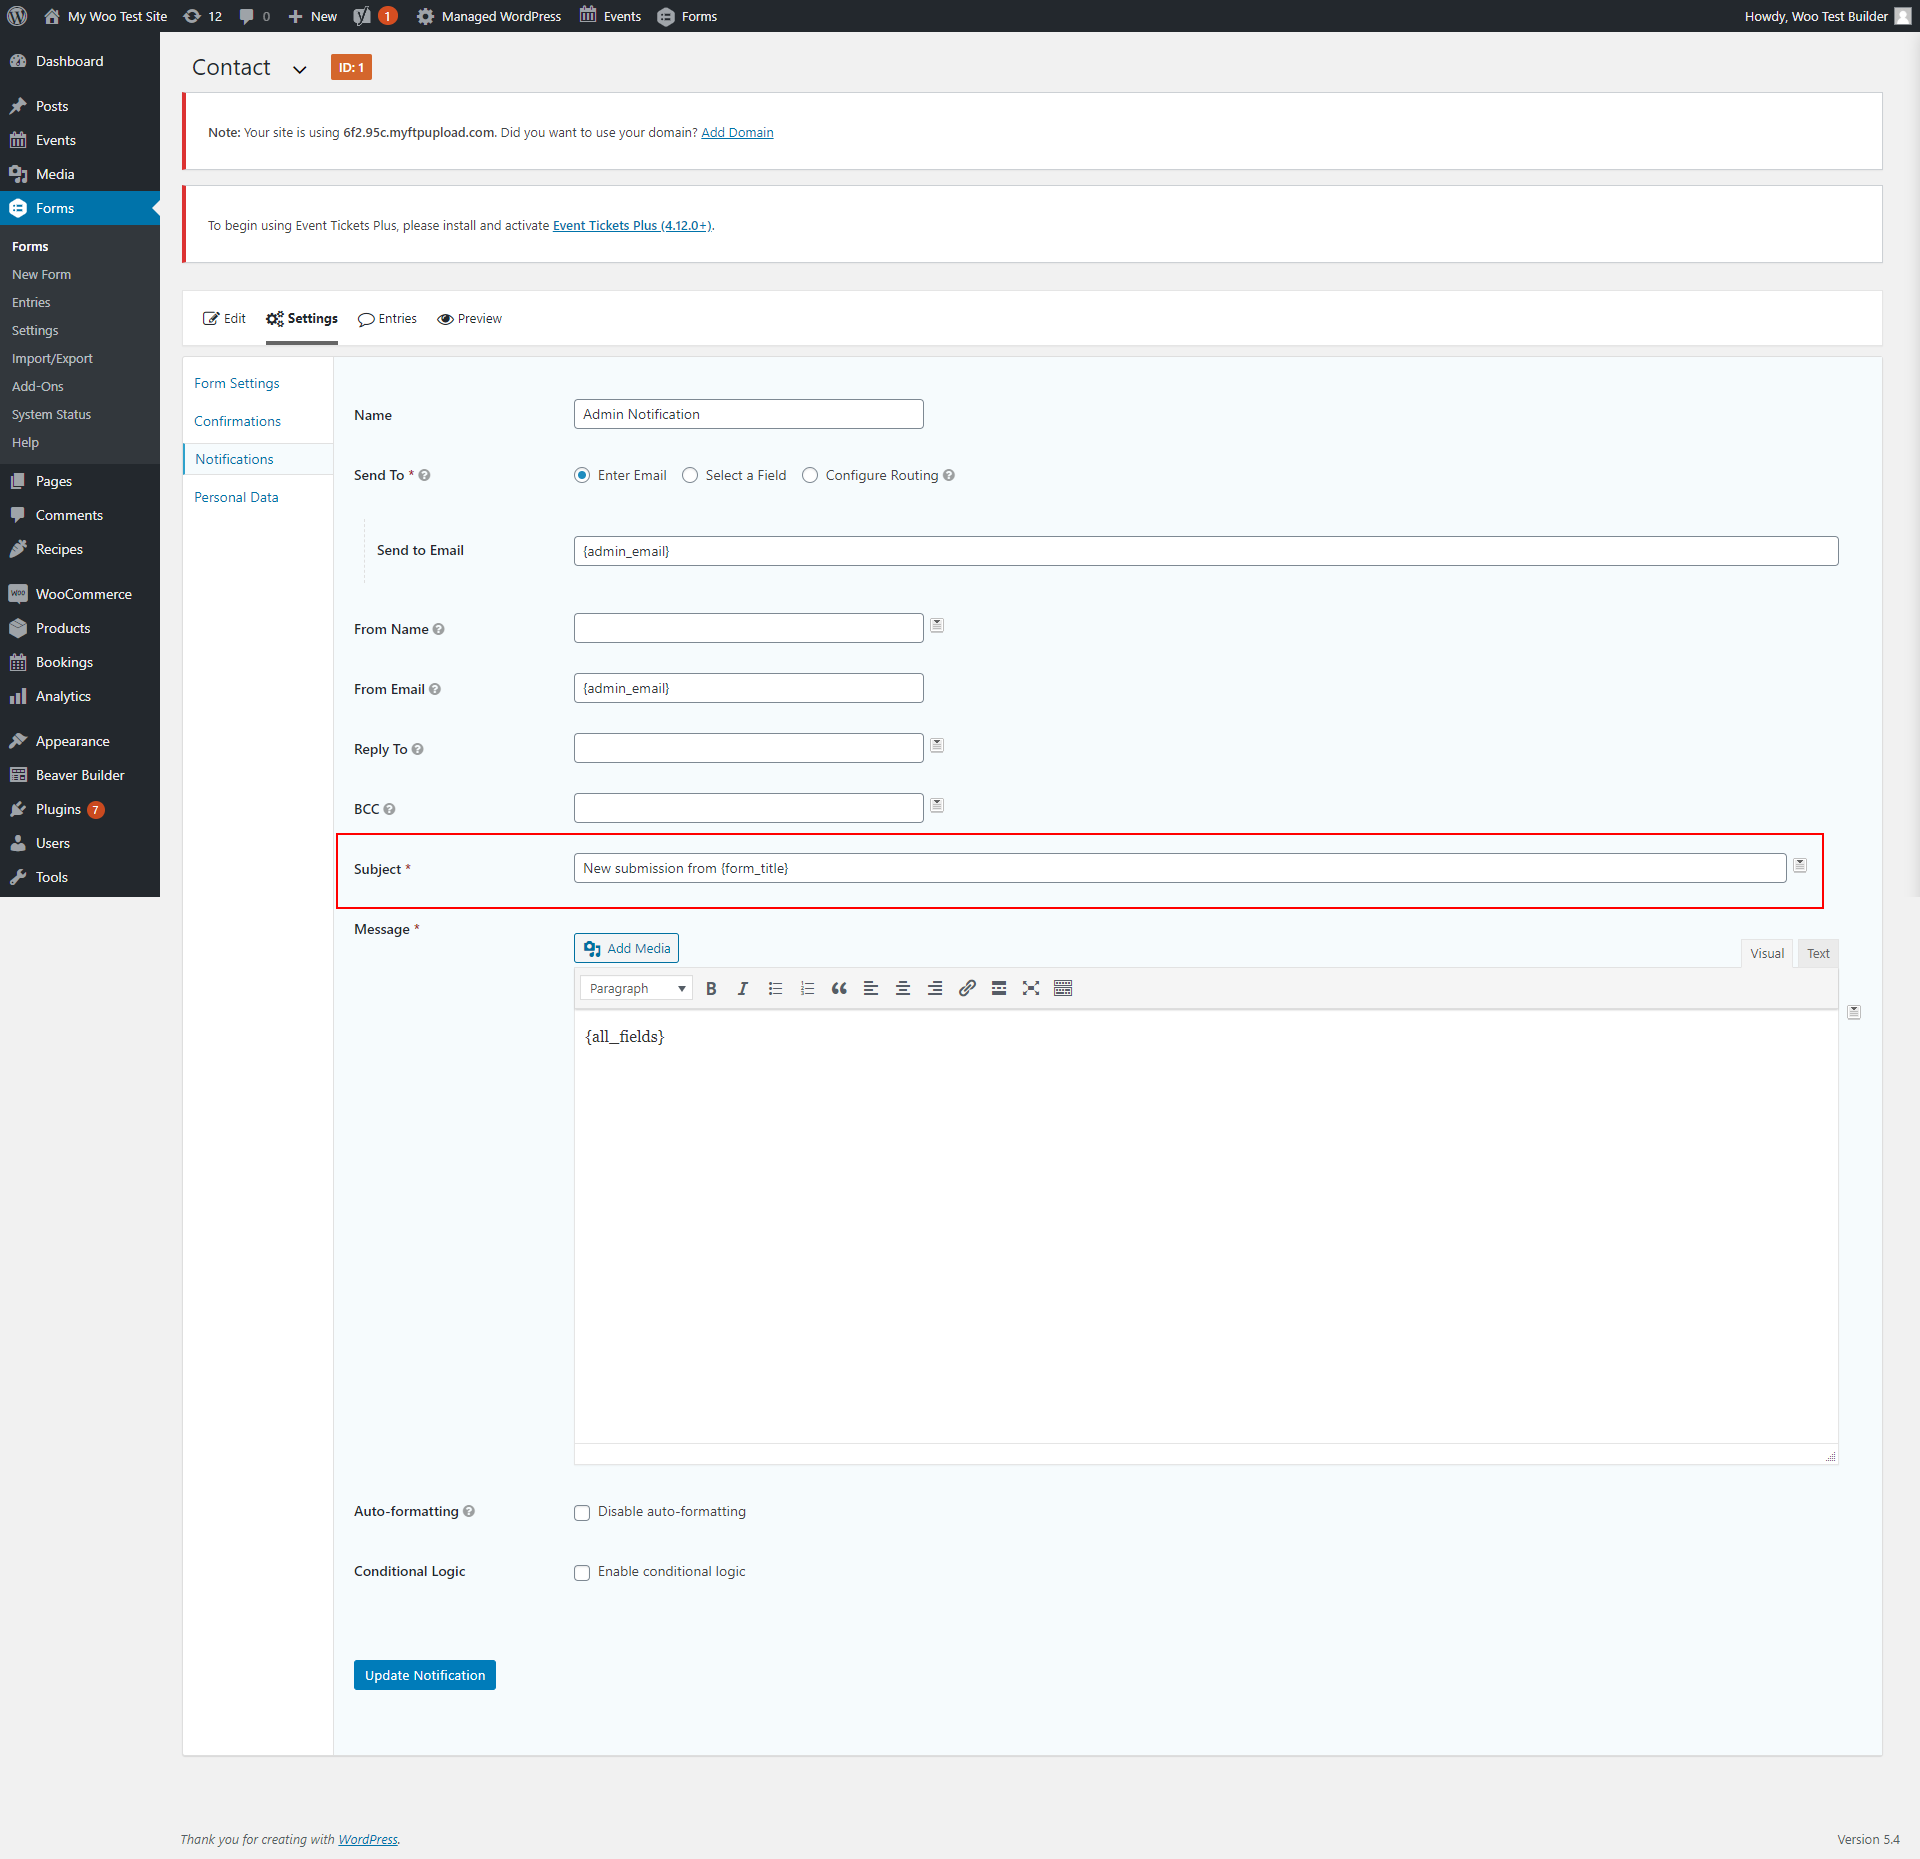
- ALWAYS change the subject on the email form in the notification settings
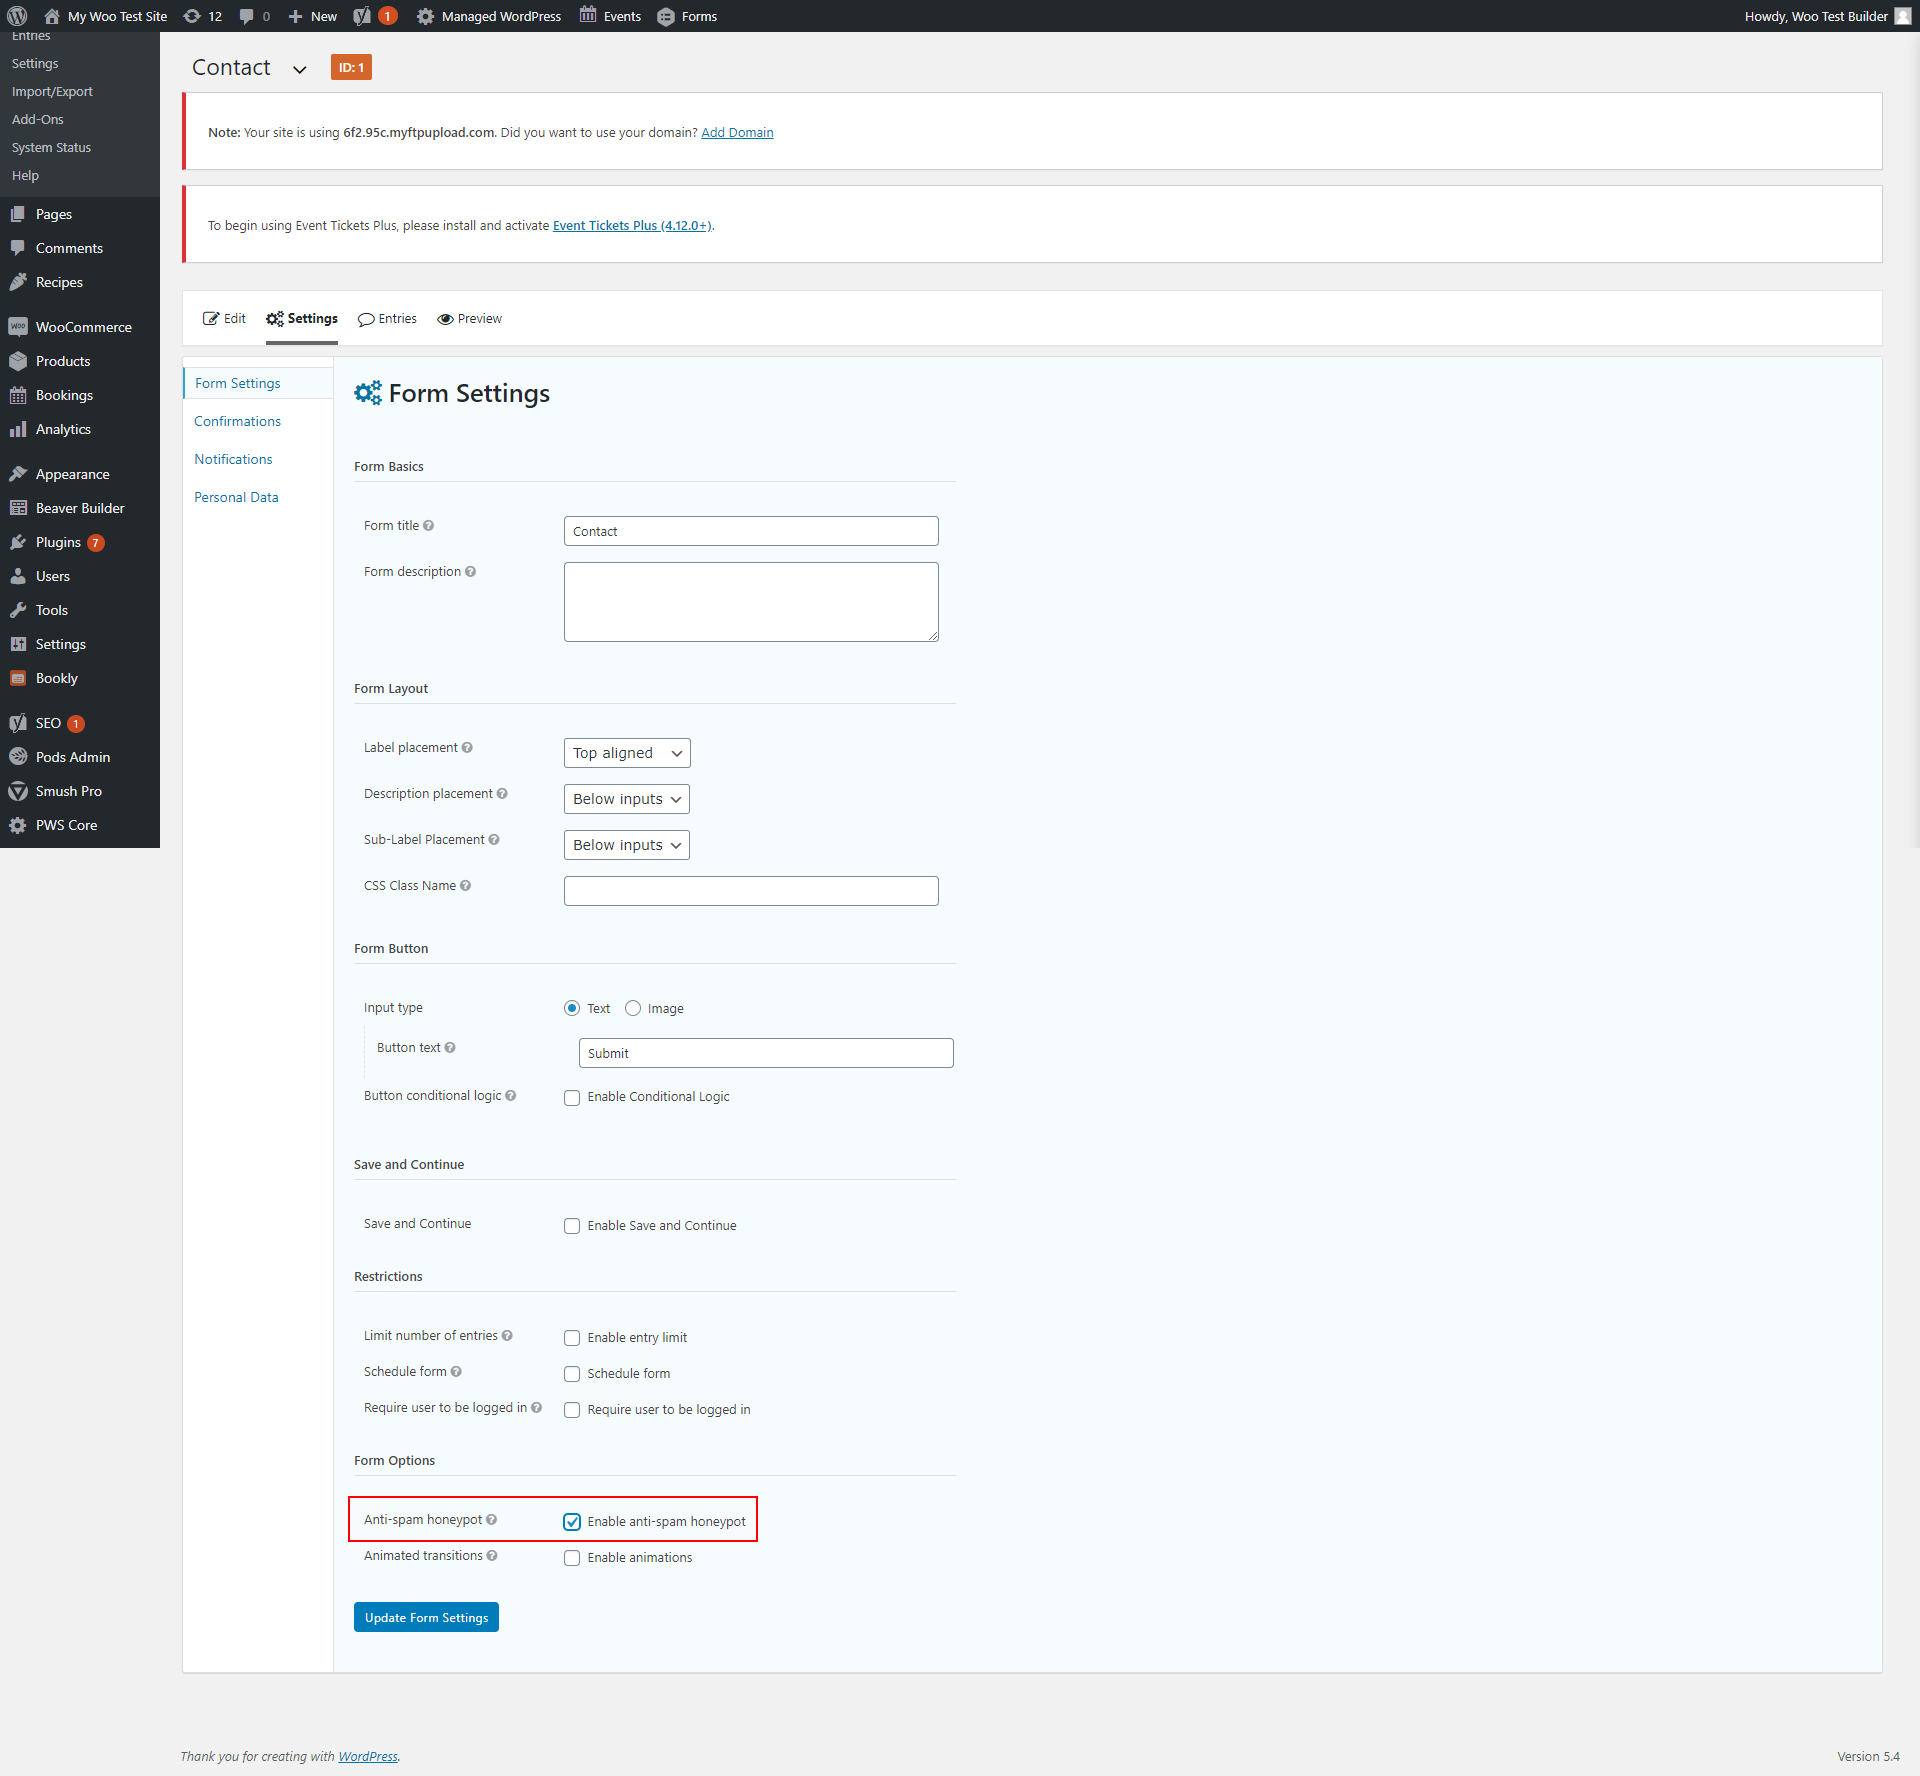
- Enable Anti-spam Honeypot in form settings IF they do NOT have a captcha
Form Restrictions
We do not want to put private or personal information on a website.
We should never be asking the following information through an email form:
- Social Security Numbers or SSN#
- Bank Account information
- Credit Card Numbers or CC#
- Driver's License Number or DL#
Our goal should always be to protect our customers and C2 (customers’ customers)
Sitewide Changes
Change Colors
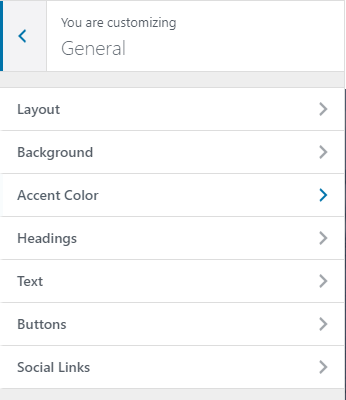
- Update the customizer settings first.
- General > Accent Color
- General > Headings
- General > Text
- Update each page, one by one with any colors that did not change.
- Check the Additional CSS tab in the customizer for the hex code of the original colors, and edit as needed.
Change Logo
- When changing the logo, first check to see if it can be cropped or simply adjusted to fit the existing layout.
- If the layout must be adjusted to accommodate the new logo, save a template of the header first, then adjust the layout. After all changes have been made to accommodate the new logo, make sure you send for a NTC so a rep can inform the customer of the new layout.
- Make sure you are also updating the favicon to match the new logo.
- 512px square is the standard for favicons
Change Site Title
- When changing the site title, first go to the customizer and adjust it here.
- Make sure the header and footer reflect the new name, if they do not, edit each to reflect the new name.
- Ensure the site title changes within the page content if applicable.
- Adjust any title/meta descriptions in the SEO settings for each page.
- If there is no Favicon, add one now.
- If there is no logo to pull a Favicon from, please create one in Photoshop using the letters of the business name. Favicons should be 512px square.
Adding Post Types
Adding Products/Blogs:
- Add a featured image, if no image is provided use the site logo in place of it. Make sure to size it appropriately
- If images have been provided for product options, such as color, add these images to the attribute so when selected it displays on the product page.
- Make sure you add the product to a category, if no catergory is provided, use best judgement and notate what category you have done.
- Make sure you are notating anything that cannot be completed and send for a NTC.
Adding Categories:
- Make sure you check the spelling
- Add a featured image and description if necessary
- Make sure you are nesting categories appropriately
- If there is not already a themer layout for categories, create one now. Follow the steps outlined here: https://styleguide.wdsgallery.com/wp-woo/wordpress-page-setup/
Adding Shop/Blog Pages:
Please follow the outlined process for adding themer layouts for shop/blog pages
https://styleguide.wdsgallery.com/wp-woo/wordpress-page-setup/
Pods
Is it Pods?
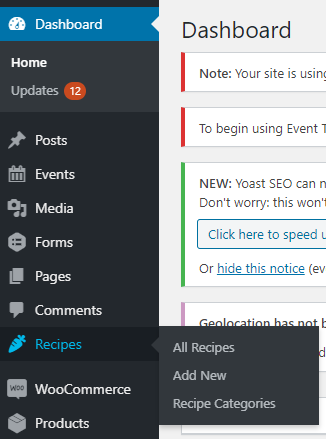
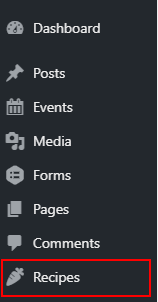
If you have a post with additional fields outside of the title, description, and featured image, it is more than likely pods. When looking at the dashboard you will see an extra menu item in the black menu bar on the left, under the menu item for "Comments". (screenshot to the right)
If you have been given a task to set up a post with more custom information, or if you recognize a set up that could benefit from pods, please submit a TC to have Pods set up on the site. Some good examples of pods are recipes, team bios, and book information.
Add new post to pods:
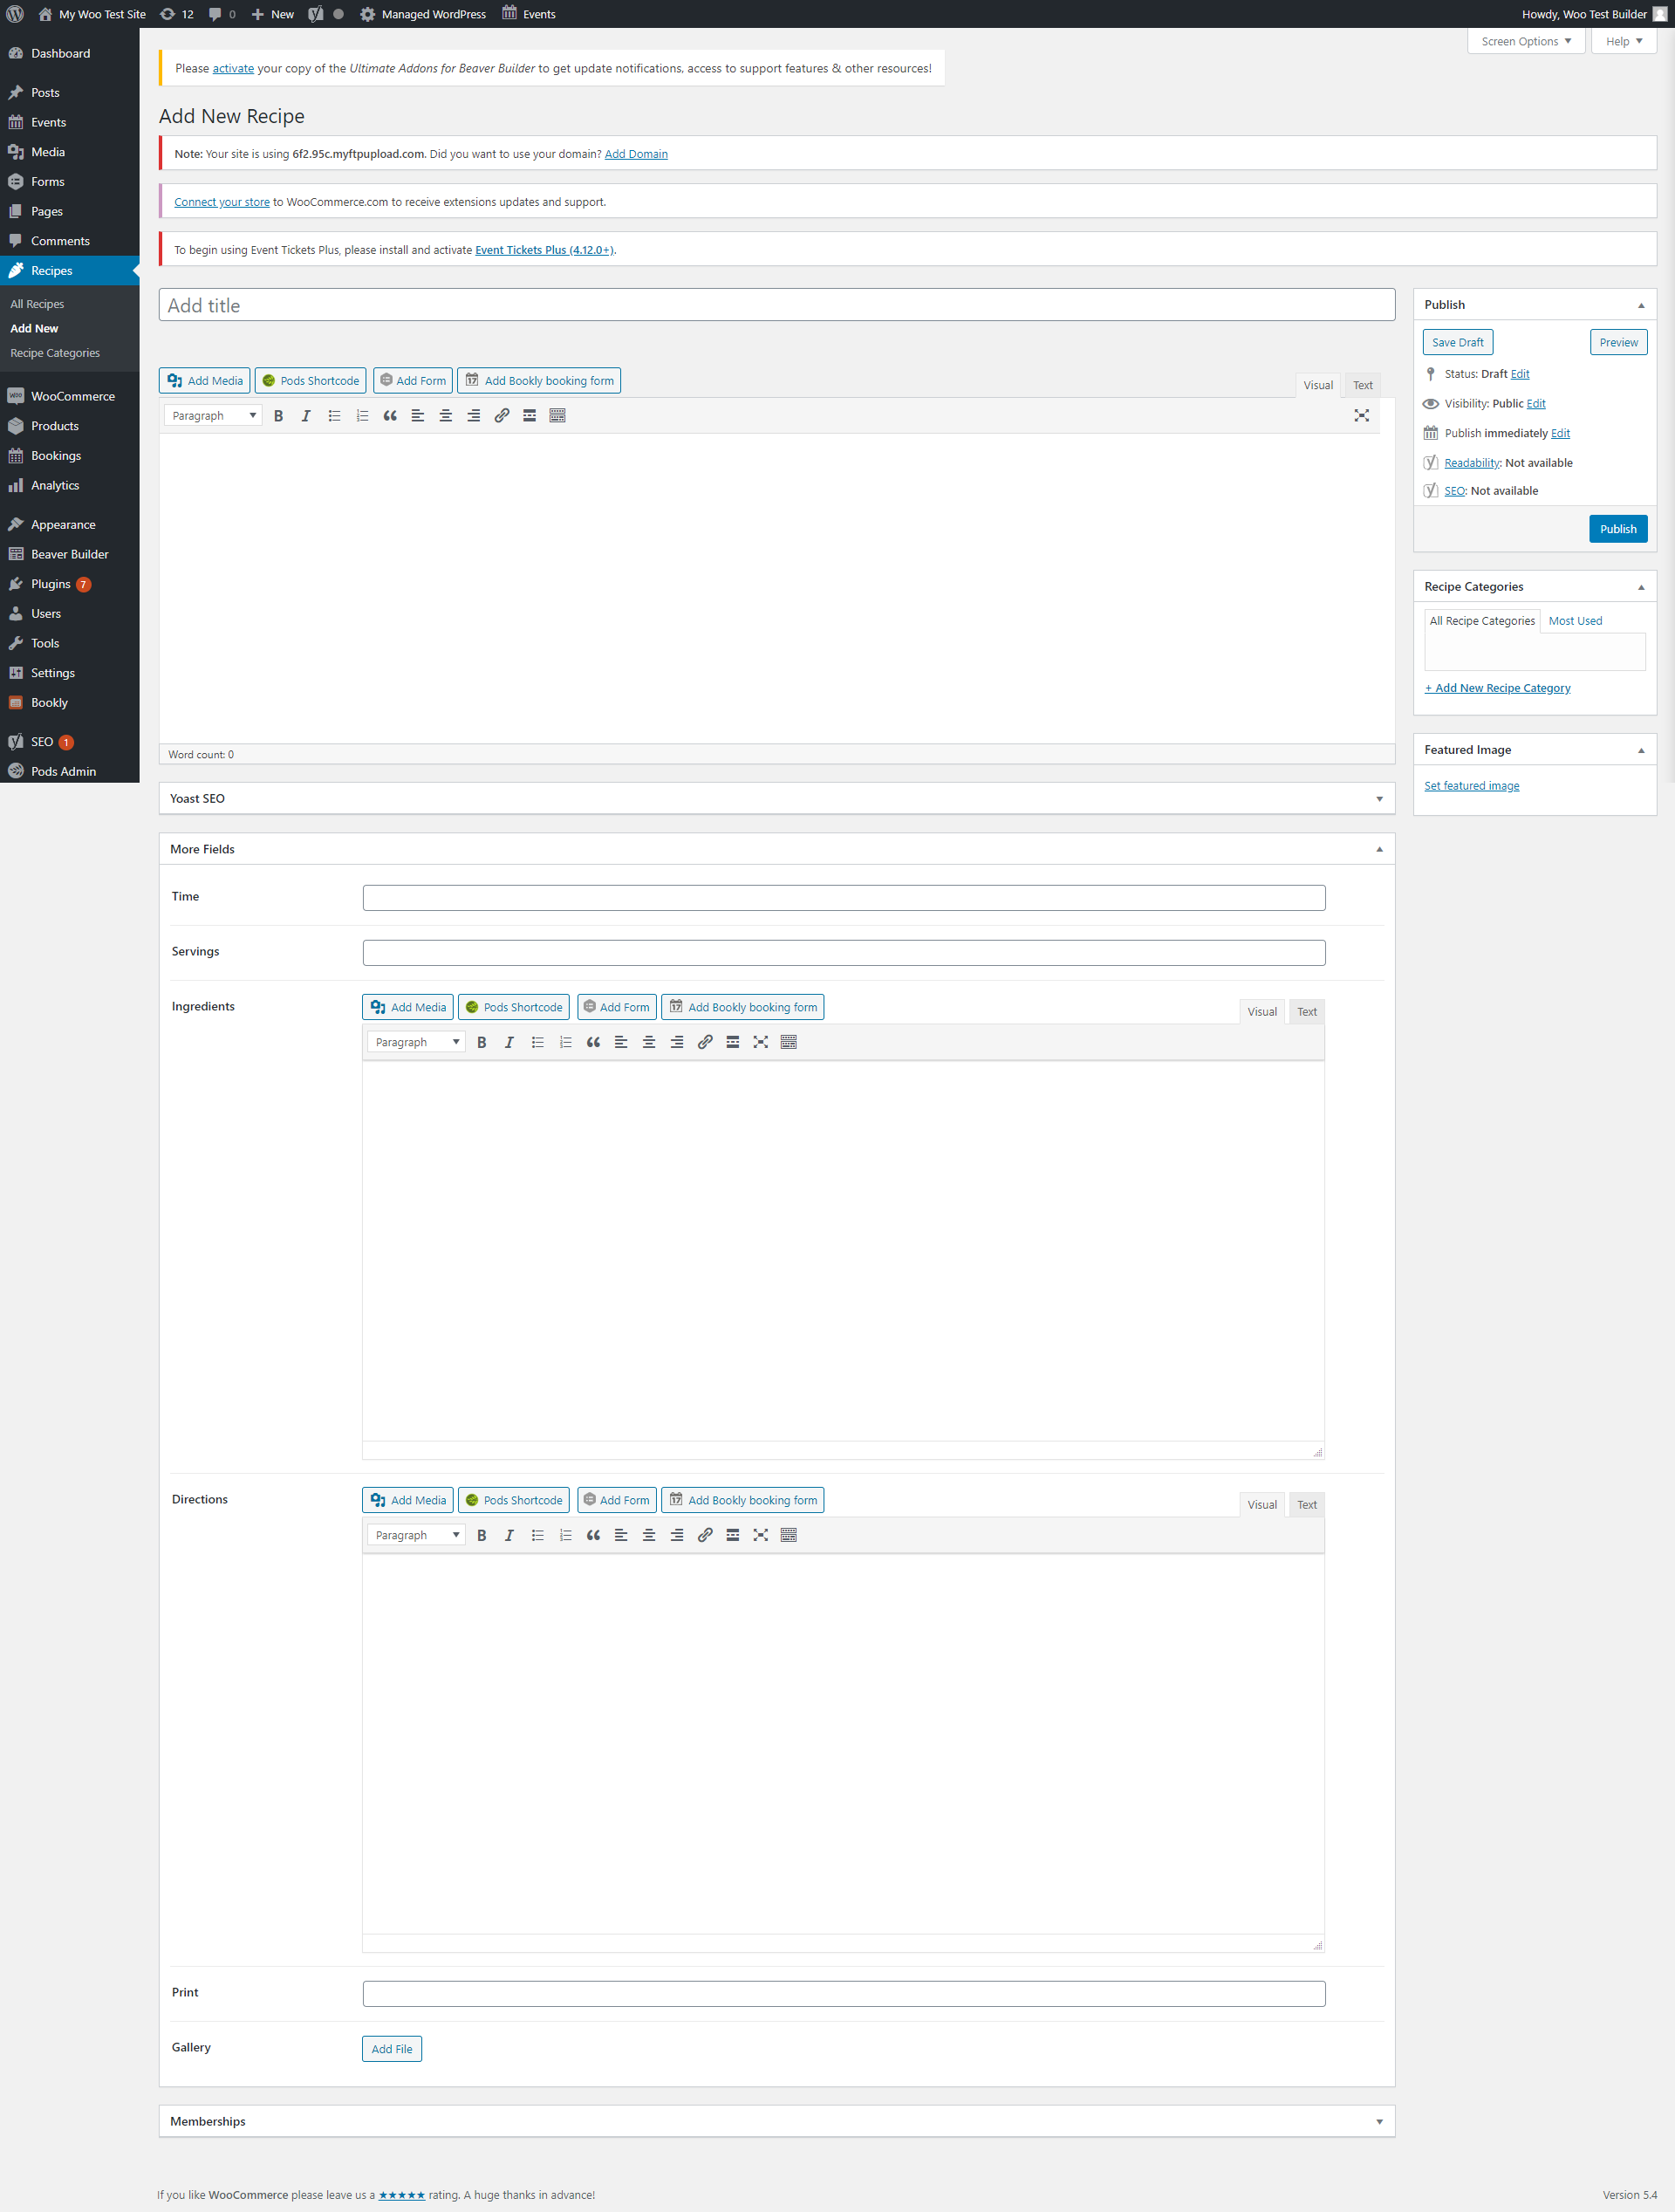
When you hover over the menu item that has been added, in the example this is labeled "Recipes", you will see an "Add New" option.
When you click on Add New you will see a view that is very similar to a blog post or product page. Enter all information that you can for this, do not forget a featured image or any categories it may require.
Then click Publish as you would normally.
