
Image Best Practices
The optimal file sizes, image resolution and the best way to achieve lossless compression using various methods.
Pro Tip: Images taken from our WDS Photo Gallery stock do not need to be smushed or compressed as they already have been optimized for web and any further compression will cause them to lose their quality appearance. Images that come from the customer or from Pexels or Getty Images should be checked before uploading to make sure they meet the max file sizes for their use as full-width backgrounds, content-width backgrounds or in the site body. If they exceed the maximum recommended file sizes for their respective uses, they should be compressed with one of the options discussed in detail below.
Image Specifications
File Size
The number of bytes the file takes up on your computer. This is the factor that can slow your website way down. A 15MB (megabyte) photo is huge. A 125KB (kilobyte) photo is much more reasonable. If your file size is really big, it’s an indicator that either your image dimensions are too large or the resolution is too high.
Pro Tip: File size can be reduced in batch using Smush Pro, Photoshop, Lightroom & Easy Thumbnails. If the image size and resolution is okay and the only issue is file size, then Smush may be the easiest solution.
Image Size
The actual dimensions of your image, in pixels. You probably think of traditional printed photos as 4×6, 5×7, or 8×10. But on the web, the height and width are measured in pixels. So for example, a typical image on a website or blog might be 795×300 pixels.
Pro Tip: Image size can be reduced in batch using Smush Pro, Photoshop, Lightroom & Easy Thumbnails. If the file size and resolution is okay and the only issue is image size, then Smush may be the easiest solution here as well.
Resolution
Left over from the world of print, resolution is the quality or density of an image, measured in dots per inch (dpi). A professional printer might require images to be at least 300dpi. But most computer monitors display 72dpi or 92dpi, so anything higher than that is overkill and makes your image unnecessarily large. When a design program has the option to “save for web”, it means saving it at a low, web-friendly resolution.
Pro Tip: Resolution can be reduced in batch using Photoshop, Lightroom & Easy Thumbnails. Typically if you reduce the file size and/or image size, the image gets resized enough for web and the resolution doesn't have to be touched.
Image Format
For images, the right format doesn’t exist; it depends on the kind of image and how you want to use it. In short, we recommend to:
- choose JPEG for larger photos or illustrations: it will give you good results in terms of colors and clarity with a relatively small file size;
- use PNG if you want to preserve background transparency;
- or, use WebP instead of JPEG and PNG. It will produce high quality results with smaller file sizes.
- use SVG for logos and icons. With help of CSS or JavaScript you can manage images in SVG format, for instance, resize them without loss of quality.Image File Name
Image SEO starts with the file name. You want Google to know what the image is about without even looking at it, so use your focus keyphrase in the image file name.
It’s simple: if your image shows a sunrise in Paris over Notre Dame Cathedral, the file name shouldn’t be DSC4536.jpg, but notre-dame-paris-sunrise.jpg. The main keyphrase would be Notre Dame, as that is the main subject of the photo, which is why it’s at the beginning of the file name.
Alt text and Title text
The alt text (or alt tag) is added to an image so there will be descriptive text in place if the image can’t be displayed to the visitor for any reason.
Be sure to add alt text to every image you use, and make sure the alt text includes the SEO keyphrase for that page (if appropriate). Most importantly, describe what’s in the image so both search engines and people can make sense of it. The more relevant information surrounding an image has, the more search engines deem this image important.
Pro Tip: For images in the body of the site, its best to keep the image size around -slightly larger than- the space that they'll likely be filling. For example if you place a 2000px image in a module within the body that will only ever stay a maximum width of 500px, the site will have to load the full sized 2000px image and then resize it to 500px before displaying it every time its visited. Since the image module is only set to display at a width of 500px, its an unnecessary waste of bandwidth to load an extra 1500px of image that wont even be seen.
That's why you MUST resize the body content images to save on load time.
Full-Width Image Sizes
For a hero or a background on a full-width row, its best to use images that are anywhere from 1600px to 2500px in width.
If you're going to give the row an overlay, you can use images in the range of 1500px to 1800px in width since the slight pixelation on larger screens will not be noticed. In cases where the full width of the image is to be see, its best to stick to images larger than 1920px in width only.
These images should optimally be around 250kb to 350kb and should NOT exceed 500kb in file size.


Content-Width Image Sizes
If the image is expected to fill the width of the content in a fixed row, the image size should be anywhere from 1100px in width (the default fixed width row size in Beaver Builder) to 1250px OR whatever size you decide to change the fixed row width to during the build.
These images should optimally be around 150kb to 300kb and should NOT exceed 350kb in file size.
Body Image Sizes
If the image is expected to sit in a column beside text, and is not expected to fill more than half of the page on the site, the recommended image size would be anywhere from 550px to 750px in width. For product images or call-out images that take up around a 3rd of the screen at most should have image sizes ranging from 350px to 550px in width.
These images should optimally be around 80kb to 150kb and should NOT exceed 300kb in file size.

Sources: JIMDO website tips | Google Web Fundamentals | A better lemonade stand
Using WP Smush Pro
For image optimization we currently use a plugin called WP Smush Pro. When PWS Core is installed and you install all required plugins, it will automatically install and configure this plugin to how we want. So there is actually very little you need to do other than know what is handling the image optimization. Allows adjustments of: file size and image size.
Pro Tip: Use Smush as a last resort to the Photoshop and Lightroom options below. When processing similar sized images that are really large in a bulk setting, it will take a long time to upload to the site, they will all have to be uploaded to the site before smush gets to resize them, and there are not a lot of settings on smush for you to control how the image is going to result or preview the results beforehand.
Smush is best for batch compression of file size on images that are already uploaded to the site. If you are starting a new site and have access to Photoshop CC or Lightroom Classic CC, use those resources first.
How it works
What smush is doing on the back end is every time an image is uploaded, it compresses it as much as it can without losing any quality. It also will strip metadata that's not needed on a website. If this plugin is installed after a site is built, you will need to follow the following steps:
Install/Activate Smush
Upon installing V3, smush is automatically installed and activated in PWS Core. You will update it, access it and make sure its active in dashboard > appearance > PWS Core > plugins.
Smush Pro Tab
Once you have installed the plugin, on the left hand side of your screen click the Smush Pro tab.
Bulk Smush Now
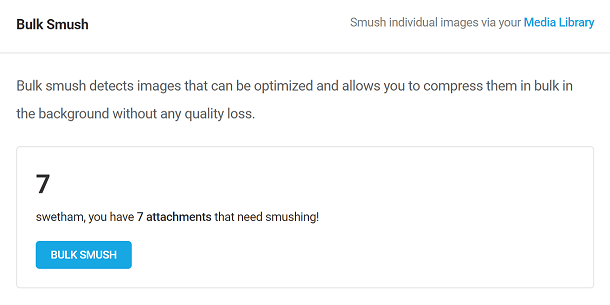
The Bulk Smush feature allows you to apply all your enabled features to any uncompressed images in your Media Library with a single click. You can trigger an immediate scan of your image library at any time by clicking Re-Check Images at the top of the screen.

The Bulk Smush module will alert you the uncompressed images in your Media Library. Click Bulk Smush to compress all un-Smushed images.
Bulk Smush Settings
The Bulk Smush Settings are your primary optimization tools and they apply only to Bulk Smush and thus to images in your Media Library only.
The Image Sizes feature allows admins to choose which thumbnails they want to be compressed and which ones Smush should ignore.
In order to serve scaled images, WordPress generates multiple copies in different sizes of every uploaded image. Some themes and plugins also require copies. These copies, called thumbnails, can add up quickly, so we recommend you compress all thumbnails.
Click Custom to reveal a list of the thumbnail sizes that WordPress is creating on your site. Select the checkboxes for the images you want to be compressed, and leave those you don’t want compressed unchecked. The image sizes you select will be compressed automatically upon upload if you have Automatic Compression enabled.

Resize uploaded images – This option lets you change the default max width and height threshold defined by WordPress to other dimensions.
Disable scaled images – Enabling this option completely disables the scaling functionality. When enabled, WordPress will no longer create scaled versions of the uploaded images, regardless of their size. This option ensures that the originally uploaded images are retained without any automatic resizing.
For example, If the dimensions of the original image are 4000x4000px and if only the Resize uploaded images option is enabled with max width and height values set to 3000x3000px, the original image is backed up, a scaled version is created, and the scaled version is then resized to 3000x3000px.
If only the Disabled scaled images option is enabled, no automatic resizing of the uploaded images, and the original image is retained as is.
If both options are enabled, the original image will be resized to the set threshold value (3000x3000px).

Click the slider to enable automatic compression, and Smush will compress every image copy WordPress generates as soon as it’s created. Smush will only automatically compress the image sizes you selected in the Image Sizes setting above.
Enabling this option will ensure that all images are automatically optimized when they’re uploaded to your Media Library, regardless of the method used to upload them: through the media library uploader, through WordPress or WooCommerce Rest API, or via WordPress mobile apps.

Sources: WordPress Tutorials - WPLearningLab | WPMUDEV plugin site
Adobe Photoshop CC
Adobe Photoshop is a great tool for individual image optimization with attention to detail, but it also has the option for bulk/batch processing if needed by using an "action" - a macro feature. Allows adjustments of: file size, image size and resolution.
Best for individual image resizing where there aren't a lot of images to process, where there are images that may be all different sizes, or that may have details that need individual attention.
Individual Image Size
Open the large image in photoshop
Select image > image size
[ Ctrl + Alt + I ] on PC
Adjust settings
make sure the "width" and "height" link icon is pressed inward so that the aspect stays uniform, make sure "resample" is selected and set to "automatic", adjust the width settings to the max width needed for the image - the height should auto-adjust > hit "ok"

Saving for Web
File > export > save for web (legacy)
Image Type (JPEG)
The file type will affect the quality and size of the output file
Image Quality (60 should usually work fine)
This is important and can heavily effect the final file size
Image Size / Dimensions (leave as is)
We already did this in the first step, so there’s no need to do it again, but if we didn’t do this in the first step, we could just change the dimensions for the image here

Batch Processing in Photoshop
You can create an "action" in Photoshop which acts as a macro and allows you to record an action to repeat. You'll be creating an action and record yourself saving an image for web, then running it across the source folder containing all the images you wish to apply the same settings to.
Pro Tip: Make sure all images in the folder are the similar dimensions or larger than the dimensions you'll be assigning them during the export - if there are smaller images present in the folder, they will expand to the dimensions chosen and there's no reason to do that.
Sort the image files
start by sorting all the images by size in the file explorer and placing all images of similar size range in a folder
Window > actions > create a new action
specify a name for the action like “batch save for web” - then, click the “Record” button to record your actions
Follow steps from "save for web" section above
Configure the image size, quality, and format in the promoted dialog. Save the compressed images into your specified folder. (Attention, this step is important!) When finished, Photoshop has recorded all your actions. Now, you can stop recording by clicking the “Stop recording” button.
File > automate > batch
Choose "batch save for web" action and source folder where you place original images. Then click “OK”. The batch process gets to work and all compressed pictures will be placed in the destination folder.


Pro Tip: No need to set the destination folder in the Batch dialog once again. End the action with the destination option “None” or “Save and Close”. This option is for the original images rather than the output and compressed images. The destination folder for the optimized images has been recorded when you are saving the first image for web.
Sources: Richard Lazazzera - A better lemonade stand | Brook Andrews - Wonderfulshare
Adobe Lightroom Classic CC
Adobe Lightroom is another quick way to batch resize images where you have more control over the file size. Make sure you're using Lightroom Classic CC, not Lightroom CC - Adobe Creative Cloud has both, but classic allows you to export for web with specific setting. Allows adjustments of: file size, image size and resolution.
Best for batch processing of high resolution images in bulk that need control over some details and the ability to preview results before export. Most simple solution and best for use when starting a new site that's heavy with image content.
Import Images
Start by importing the images that need resizing from the folder into Lightroom Classic. If needed, adjust them or crop them, otherwise select all and prepare to export them for web.
Export Settings
To export photos from Lightroom Classic CC to a computer, hard drive, or Flash drive, follow these basic steps:
Open the Export dialog box
Choose File > Export, or click the Export button in the Library module. Then, choose Export To > Hard Drive in the pop-up menu at the top of the Export dialog box.
File Settings
Image Format: JPEG
Color Space: sRGB
Quality: 60 (or pick an appropriate size)
Limit File Size To: Check this box and put something like 350 in the field - this will make sure all images are output at 350kb or less - modify this number based on the type of images you're exporting (full-width images/body images)Image Sizing
Image Format: If needed, you can resize the images to fit a certain width - if there are images in the folder that are smaller and shouldn't be enlarged then check the "don't enlarge" button
Resolution: If needed you can limit the file resolution or keep it default depending on what else you've chosen to compressExport images!


Pro Tip: No need to use all file settings and image sizing to compress the images. Use your best judgement based on the kind of images you start off with to decide what compression tactics would work best without too much loss in resolution. For example, for a hero image you may want to limit the file size to 300kb, resize the long edge to fit 1920px, and leave the resolution as is.
Sources: Adobe - Export photos from Lightroom Classic CC
Easy Thumbnails
Easy Thumbnails simplifies batch image resizing and optimization for web or other uses. You'll be setting parameters like dimensions and quality, then applying them to a folder of images all at once. Allows adjustments of: resizing, format conversion (jpeg, bmp, png, gif), quality adjustment, image rotation, brightness and contrast, edge effects, preview function, batch processing.
Using Easy Thumbnails
Launch the software, navigate to your folder using the file browser, and select it to display the images and follow these basic steps:
Set Dimensions
Go to the Settings tab > Enter the desired width and height for your images and check the "Maintain Aspect Ratio" box to avoid distortion.
Adjust Quality
Under the Settings tab > Use the Quality slider to control compression. A setting between 60–80 works well for web use.
Choose an Output Location
By default, resized images are saved in the same folder. > To select a different folder, go to Options > Output Folder and browse to your desired location.
Process Images
Click Make All to resize all the images in the folder using the settings you’ve applied.
Verify the Results
Navigate to your output folder and check the resized images to ensure they look as expected.
Easy Thumbnails is simple and efficient for batch resizing, perfect for web use or quick optimizations.
Table of Contents