WordPress Overview
Learn about the WordPress Dashboard and what settings are controlled by areas in the WP back-end.
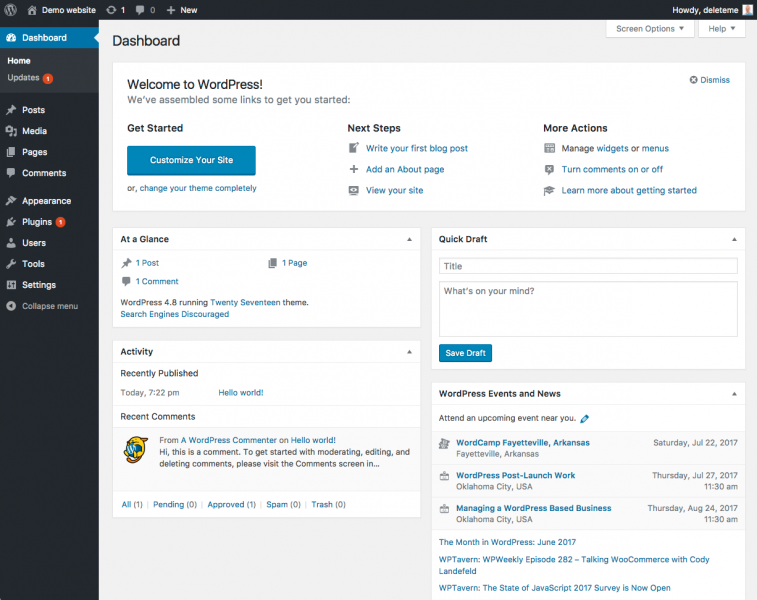
WordPress Dashboard
Screen Options
The Screen Options allow you to choose which widgets are displayed or not displayed.
- When you click on the Screen Options tab, the resulting screen shows the various Dashboard widgets with a check-box next to each widget. Check the box for each widget you want displayed, or uncheck the box to not display that widget.
- If you don't see the checkbox for "Open link in a new tab" when editing a menu, go to appearance > menus > then select screen options and check the box for "link target" under the heading "Show advanced menu properties"
Settings > General
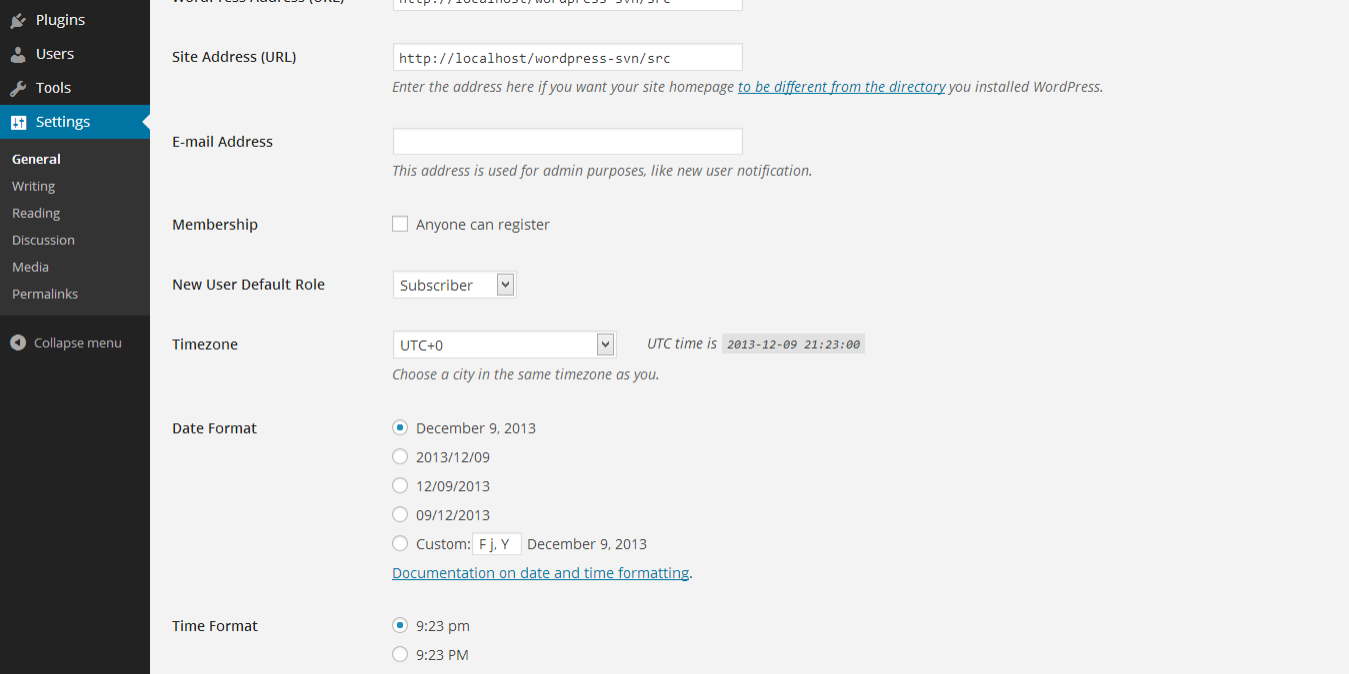
This Settings General Screen is the default Screen in the Settings Administration Screen and controls some of the most basic configuration settings for your site: your site's title and location, who may register an account at your site, and how dates and times are calculated and displayed.
Field: Email Address
- This address is used for admin purposes. Enter the e-mail address to which you want WordPress to send messages regarding the administration and maintenance of your WordPress site. If you change this we will send you an email at your new address to confirm it. The new address will not become active until confirmed.
- If you allow new users to register as a member of your site (see Membership below), then a notification will be sent through e-mail to this address.
- If the option, An administrator must always approve the comment, is set in Administration > Settings > Discussion, this e-mail address will receive notification that the comment is being held for moderation - Please note this is different than the address you supplied for the admin user account; the admin account e-mail address is sent an e-mail only when someone submits a comment to a post by admin.
- The address you enter here will never be displayed on the site. You can send messages to multiple admins by using an email address which forwards email to multiple recipients.
Field: Membership > New User Default Role
- This pull-down box allows you to select the default Role that is assigned to new users - Valid choices are Administrator, Editor, Author, Contributor, or Subscriber.
- This Default Role will be assigned to newly registered members or users added via the Administration > Users > Users Screen.
- This is where you would modify the new user default role when using a plugin like wp-members with a registration form.
Source: Codex - WordPress.org
Posts & Users
Settings > Reading
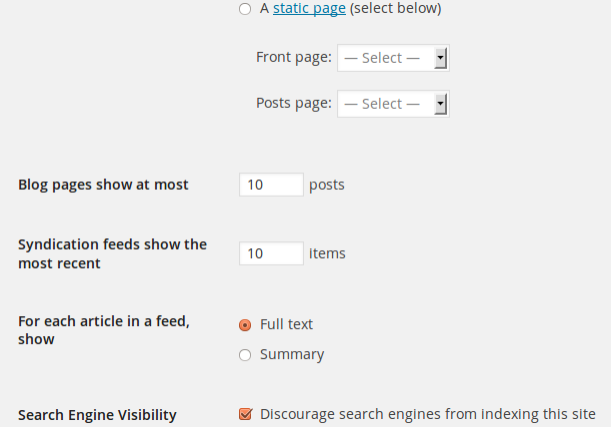
The options in the Settings Reading Screen are few in number, but still important. You can decide if you want posts or a "static" Page displayed as your blog's front (main) page. You can also adjust how many posts are displayed on that main page. In addition, you can adjust syndication feed features to determine how the information from your site is sent to a reader's web browser or other applications. The "Front page displays" section of the reading tab is the same one you'll find under homepage settings in the customizer, however the section below it can be important.
Field: Blog pages show at most
- At times when using a themer layout with a posts module on a blog page, you'll notice that in a 3 or 4 column layout, posts end up flowing into the second page of pagination with an uneven amount of posts in the bottom-most row. This is because the default amount of posts per page is set to "10".
- In the "blog pages show at most" field, change the number from "10" to a multiple of the number of columns used in the post module layout.
- For example if you have a 3 column layout, change the number to "9" or if you have a for column layout, change the number to "8" or "12", etc.
Settings > Discussion
The Settings Discussion Screen allows you to set the options concerning comments (also called discussion). It is here the administrator decides if comments are allowed, if pingbacks and trackbacks are acceptable, and what constitutes Comment Spam. On this Screen you also control the circumstances under which your blog sends you e-mail notification of certain events at your site.
Users
The Users Screen allows you to add, change, or delete your site's users. In addition, you can search for users, and you can make bulk changes and deletions to a selected group of users.
- When a site has been built out, especially if it has blogs where an "author" name is visible, you'll notice that the author by default is set to the username "pwsadmin" since that's the default username builders are assigned.
- Usernames cannot be changed - Once the site is built, the customer can choose to keep using this account since the email is technically their own, or they can choose to register themselves a new user admin account, deleting the current one.
- For presentation of the site to the customer, in the users tab, change the field "Nickname (required)" to their business name, or a username that makes sense for someone who would author their posts.
- Then select this new nickname from the "Display name publicly as" field dropdown.
Source: Codex - WordPress.org
Permalinks & Tools
Permalinks
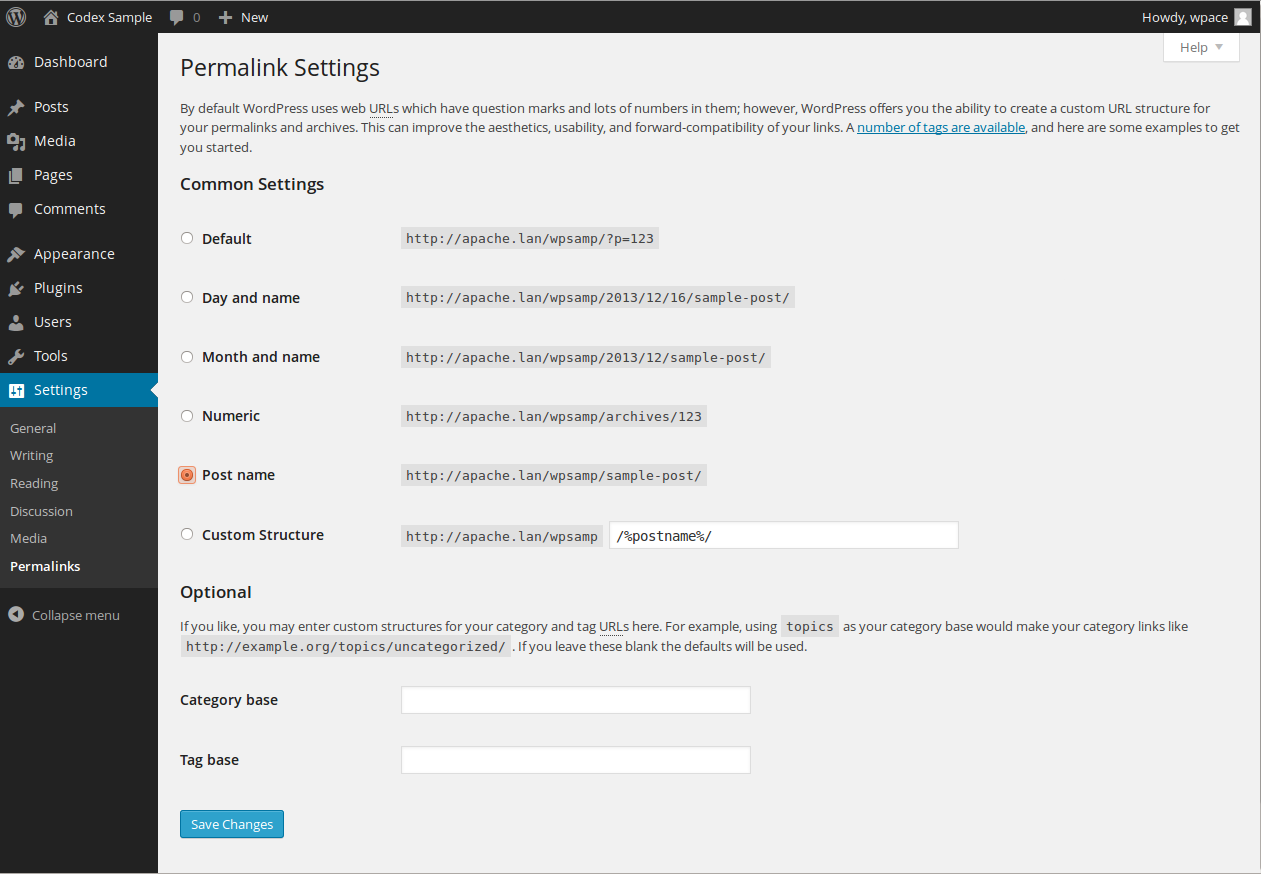
Permalinks are the permanent URLs to your individual weblog posts, as well as categories and other lists of weblog postings. A permalink is what another weblogger will use to link to your article (or section), or how you might send a link to your story in an e-mail message. The URL to each post should be permanent, and never change — hence permalink.
WordPress offers you the ability to create a custom URL structure for your permalinks and archives. Custom URL structures can improve the aesthetics, usability, and forward-compatibility of your links. A number of tags are available, along with some examples to get you started.
There are three basic types of WordPress permalinks:
Default: "Ugly"
The default looks like
http://example.com/?p=Nwhere N is the Post ID number. It works on all server environments, but it doesn't look as nice as some of the other options.mod_rewrite: "Pretty Permalinks"
Using mod_rewrite or lighttpd you can produce much nicer permalinks (see Pretty Permalinks). There are many different formats, but the most common, and most versatile looks like
http://example.com/2012/post-name/orhttp://example.com/2012/12/30/post-namePATHINFO: "Almost Pretty"
PATHINFO permalinks look very much like mod_rewrite permalinks but for one exception: they have /index.php inserted before them, like so:
http://example.com/index.php/yyyy/mm/dd/post-name/Otherwise, they are the same as the "pretty" mod_rewrite permalinks, and are similarly flexible. Anything that mod_rewrite permalinks can do, PATHINFO permalinks can do, with the help of that/index.phppart.
Tools
The Tools Screen presents the ability to use Google Gears to make WordPress work in a "Turbo" mode (discontinued in version 3.0, see below). In addition, the "Press This" bookmark tool and the Categories to Tags Converter are detailed.
Import
If you have posts or comments in another system, WordPress can import those into this site. To get started, choose a system to import from below (these are the most common forms of WordPress imports we interact with):
Wp importer
Import posts, pages, comments, custom fields, categories, and tags from a WordPress export file. (click here for more)
Rss importer
Import posts from an RSS feed. (click here for more)
Export
When you click the button below WordPress will create an XML file for you to save to your computer. This format, which we call WordPress eXtended RSS or WXR, will contain your posts, pages, comments, custom fields, categories, and tags.
Once you’ve saved the download file, you can use the Import function in another WordPress installation to import the content from this site.
All content
export all of your posts, pages, comments, custom fields, terms, navigation menus, and custom posts.
Posts
check this radio button to expose additional filtering when exporting posts.
Pages
check this radio button to expose additional filtering when exporting pages.
Beaver Builder Components
Themer layouts and Templates can be exported from here as an easy way to save templates or reuse them when rebuilding a site without having to rebuild layouts especially for archive pages or theme sections.
Download Export File
click this button and the file, with any filters selected, will be created and you will be asked to save that file to your local computer.
Source: Codex - WordPress.org
Begin New Build
Now that you know the basics, follow the steps to setup a new WP/Woo site.


