
Pods & Themer
Now that you know how post types work, what pods are, and how to use Pods to create a Custom Post Type and Taxonomy, its time to decide how these posts are going to visually appear. This section will show you how to use Beaver Themer to create a template for your pods and the importance of using "Field Connections" and "Magic Tags" when building both your themer template and your post archive page.
Field Connections & Shortcodes
Field Connections in Themer
Beaver Themer field connections work like variables. They let you connect certain row and module settings to external data on your site, such as:

Field connection shortcodes
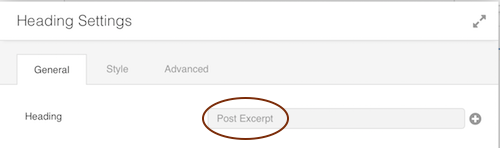
When you open a row or module for editing, you'll notice a plus sign next to some of the setting fields. These plus signs indicate that you can set field connections to eligible data from another area of your site. When you mouse over a field connection, you'll see a choice of Connect or Insert.
- Connect
To add the field connection as the only value in the row or module setting, click Connect.
- Insert
If you want to add additional text or more than one field connection to the row or module setting, click Insert to insert the shortcode.
Field connection shortcodes are essential in the following cases:
Note: Field connection shortcodes always substitute a text string, so they can only be used for module settings where you'd normally enter text.
Connect a Field Connection

Use a Field Connection Shortcode
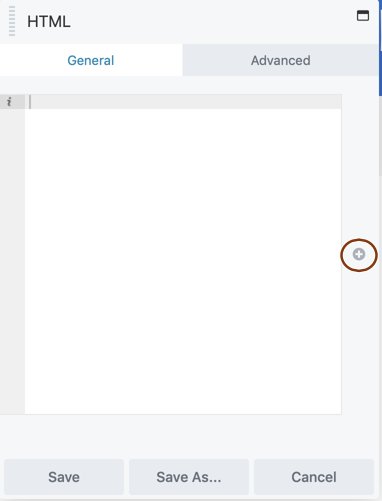
HTML Module > click the + sign
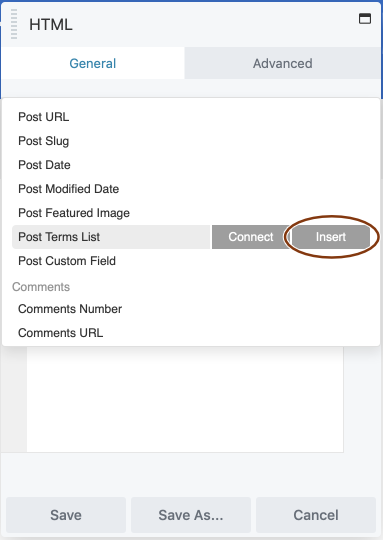
Click insert on the item you want a shortcode for
Finding Shortcodes & Parameters
There are two ways to find field connection shortcodes and parameters: One is to look through the field connection shortcode index from the manually-maintained Beaver Builder knowledge base. Another "dynamic" way is to access the shortcodes and their parameters through an HTML module. This way you can see a full list of field connections regardless of data type.
Important Links: Field Connections KB | Field Connections Shortcode Index
Custom Fields & Magic Tags
Custom fields that you've created with Pods work just like custom fields added using the core WordPress form. Just add the field name (key) using the Post Custom Field connection. How to do this will be shown in the singular themer layout section below.
Magic Tags are like the special variables used in Mail Merge Templates; you can use them to identify custom fields or post fields to be replaced in your Pods Templates. These magic tags take the form of {@field_name}. Pods automatically retrieves the value of the field name specified in the magic tag.
See the Pen Pods Custom Fields by Laila (@lucidscreams) on CodePen.
Important Links: Pods Shortcode | Pods Magic Tags | Pods Standard Fields Reference
Using Conditional shortcodes
Besides field connection shortcodes, which return the contents of field connections as text strings, Beaver Themer has conditional field connection shortcodes, which display custom text if the field connection shortcode meets the conditional if statement.
You can test for:
- Boolean if and if-else syntax
Tests whether the shortcode returns content or is empty
- Field Values
Test for text or integer value for WordPress custom fields
See the Pen Pods BB if Else Shortcode by Laila (@lucidscreams) on CodePen.
Important Links: Boolean if and if-else syntax | Test for Values in Custom Field Shortcode
Example: Approved Plugins
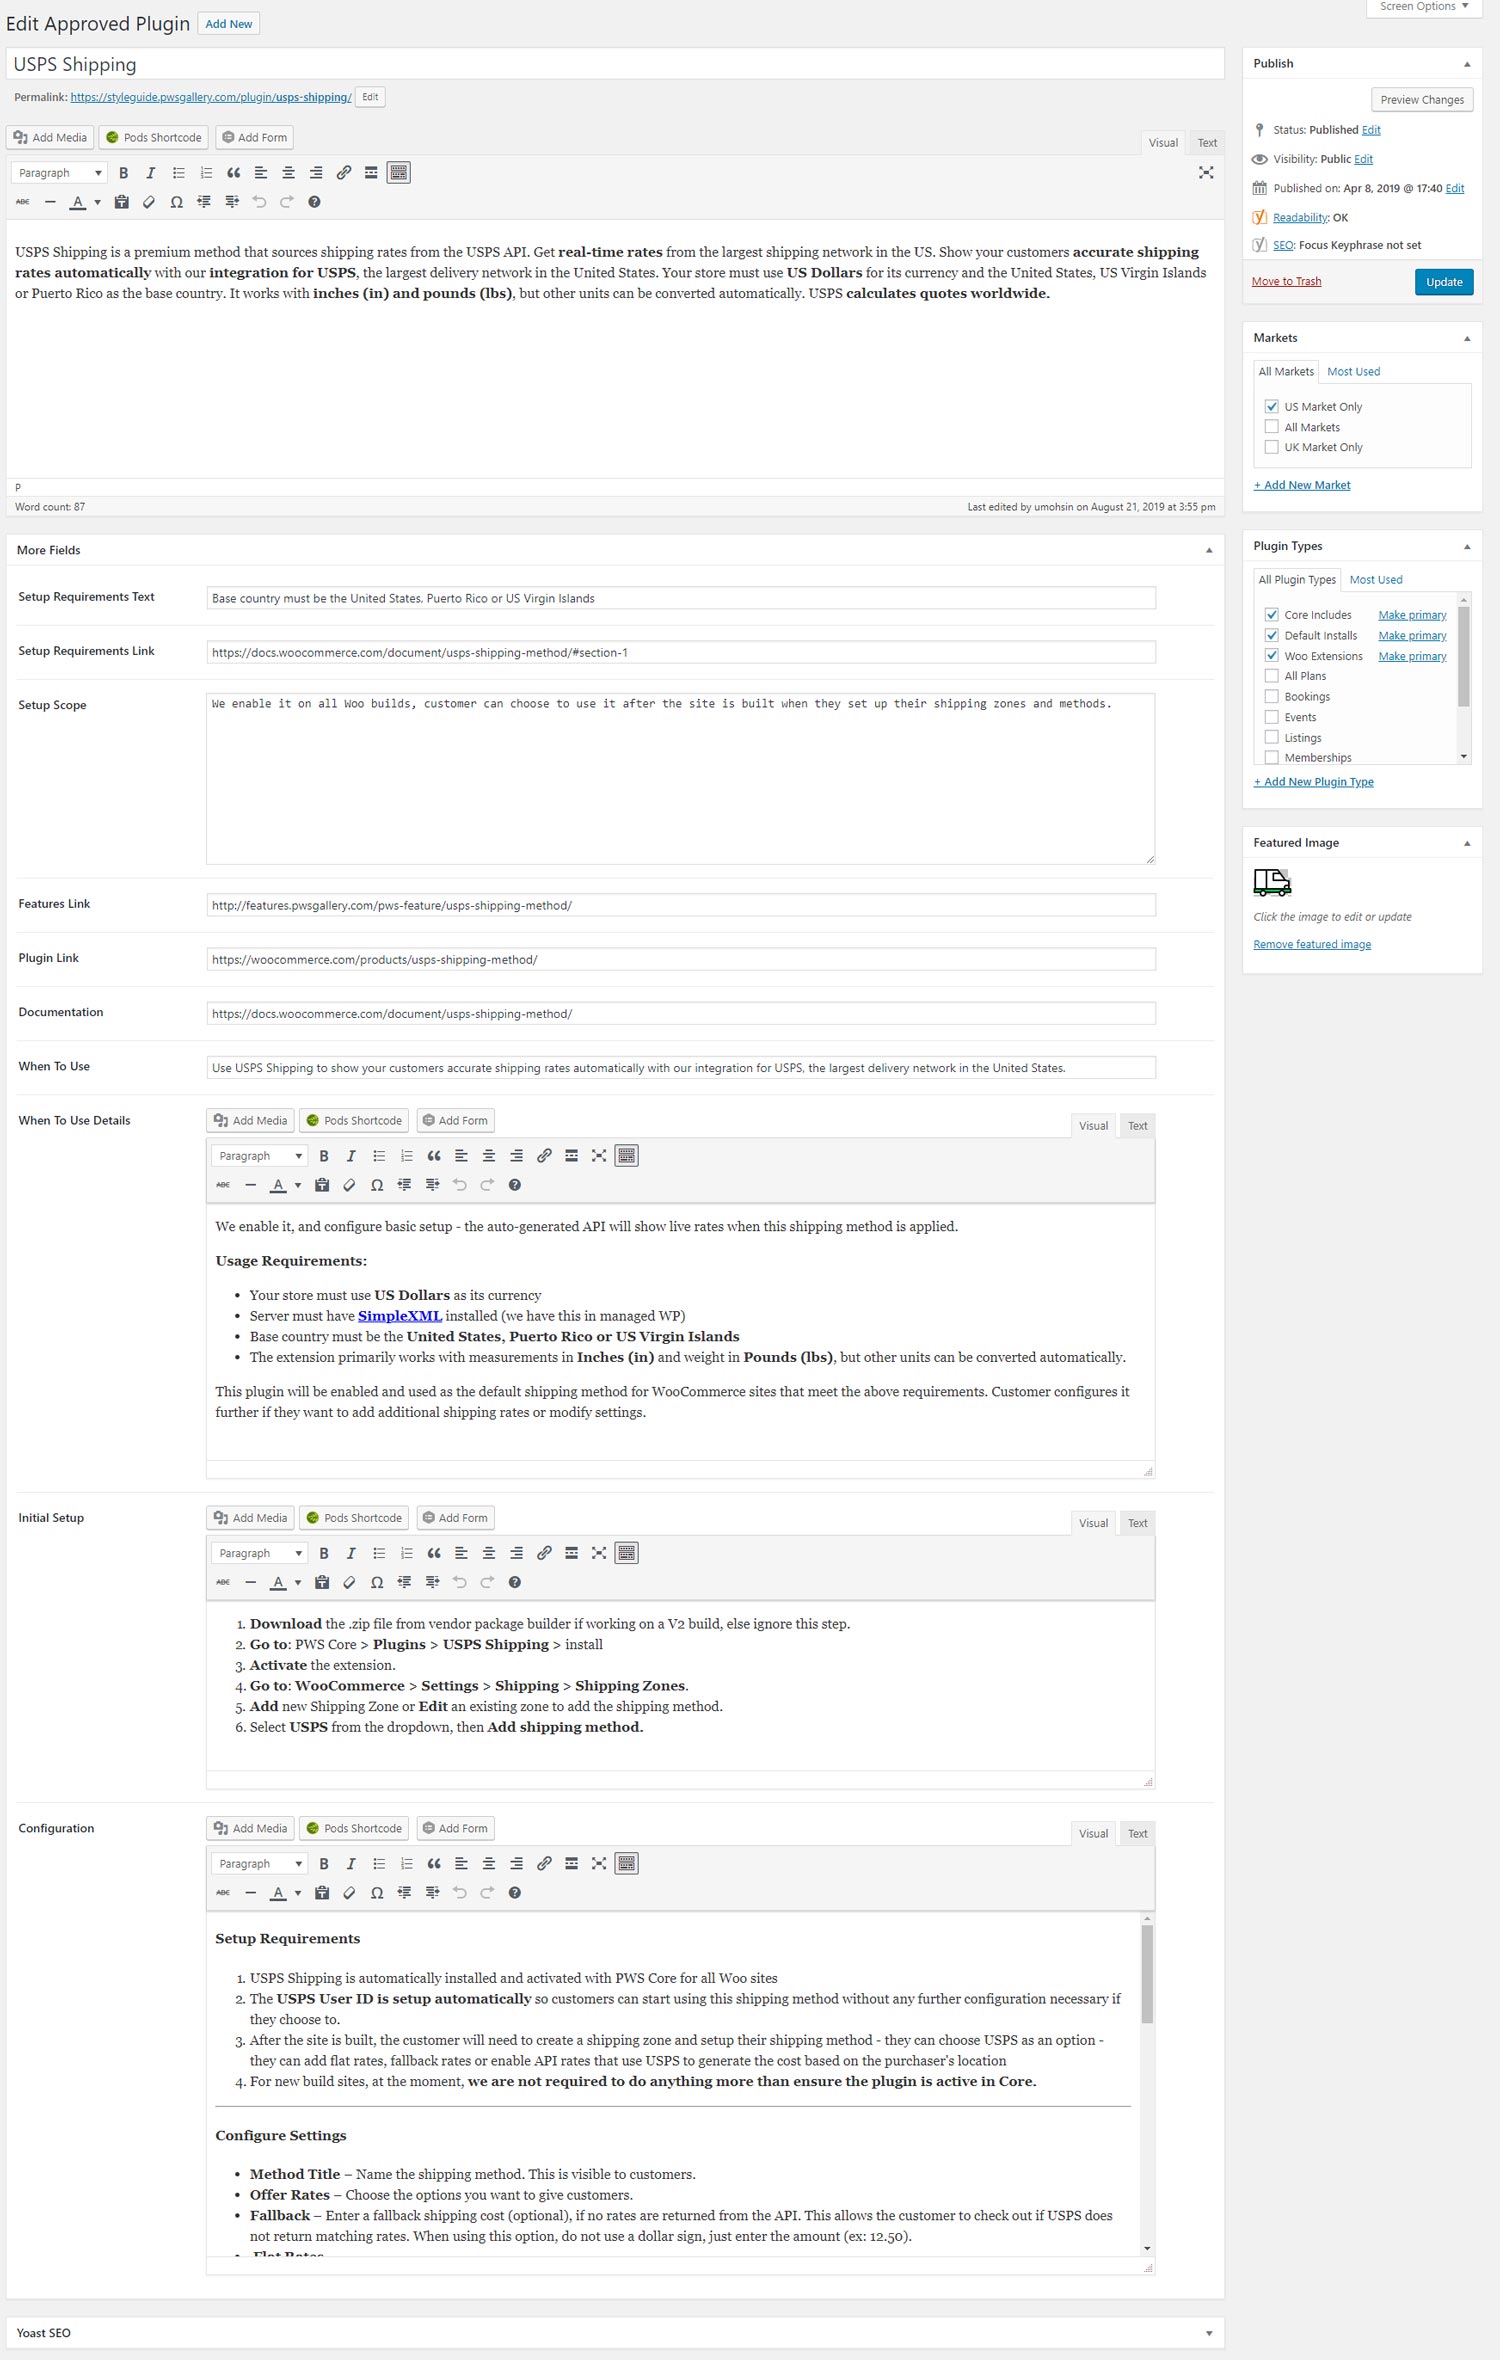
The Approved Plugins seen on this site were added using Pods. We're going to use the approved plugin pods as an example to demonstrate how to create a singular layout and archive layout for them in the sections below. We'll be focusing on the Custom Post Type "Approved Plugins," and the Custom Taxonomy "Plugin Types." For the Singular Post Layout walk-through, we will be looking at the "USPS Shipping" post and for the archive layout walk-through we'll be looking at the "Woo Extensions" category.

Custom post type pod "plugin"

Custom taxonomy pod "plugin type"

See all entries for the "plugins" custom post type

See all terms for the "plugin type" custom taxonomy
Post Type - Singular Layout
Before you Start
Make sure you have your custom post type built in Pods, your custom taxonomy built, and at least one of your custom posts added before you start building the themer layout so you have a post to view when connecting fields.
Look at the fields that your post type pod has - it helps to have the "edit post" view on your second monitor screen for easy reference. For this example, the post type's edit screen will be in the column to the left, and screenshots of the themer layout with connections to each field will be shown with captions on the right. The fields are color-coded to match the field connection screenshots to make it easier to follow.
Click to see "USPS Shipping" or any other approved plugin to see the singular themer layout's end result.
Post Title - default post component
Post Content - default post editor
Featured Image - default post component
Setup Requirements text - plain text field
Setup Requirements link - plain text field
Setup scope - plain text paragraph field
Link to features site - plain text field
Link to plugin site - plain text field
Link to plugin documentation - plain text field
When to use summary - plain text field
When to use full details - WYSIWYG field
Initial setup instructions - WYSIWYG field
Plugin configuration instructions - WYSIWYG field
Plugin Types - category checkboxes
Notice how the fields for the features, plugin and documentation links are added in pods as "Plain Text" field types rather than "Website URL" field types. This is because the "link" field inside a button module places its contents into an "a" tag. Using the "Website URL" field in pods also places anything entered into the field within an "a" tag. So, if you used the "Website URL" field type to hold these links, and then used the field connection to place the contents of the field into the link area of the button, the button module would end up placing an "a" tag within an "a" tag which can break it. Using a plain text field means you can put the field's connection shortcode or magic tag shortcode into the "href" of an "a" tag without any conflicts.

Insert terms list shortcode to show terms from the "plugin types" taxonomy
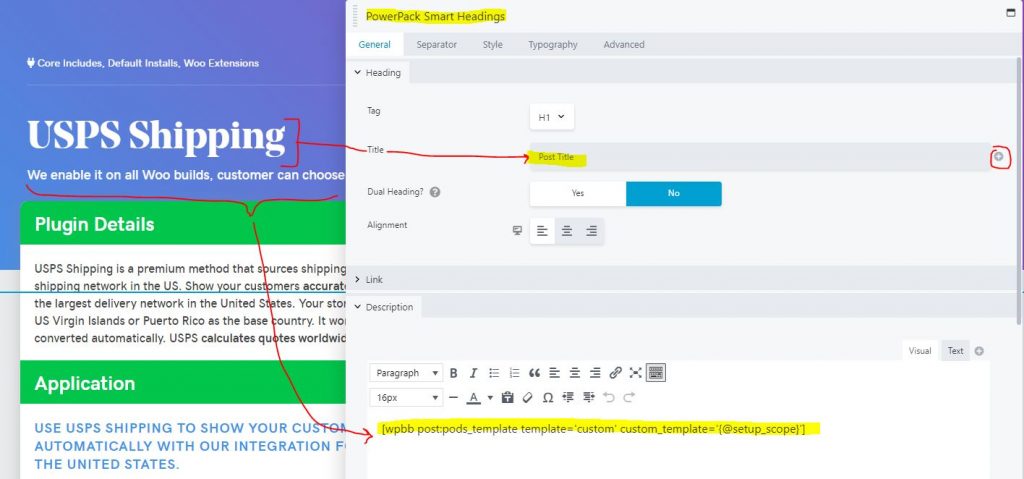
connect the post title and insert field "setup scope"
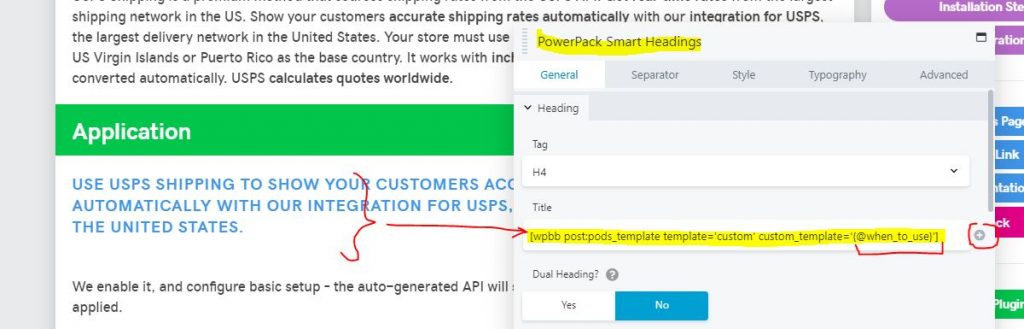
insert "when to use" field
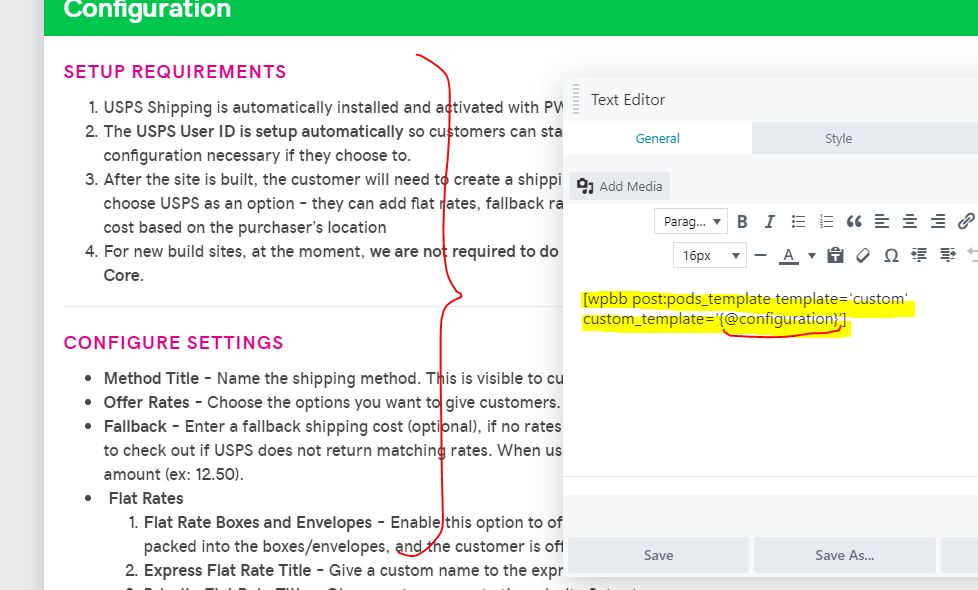
connect the WYSIWYG fields to text modules
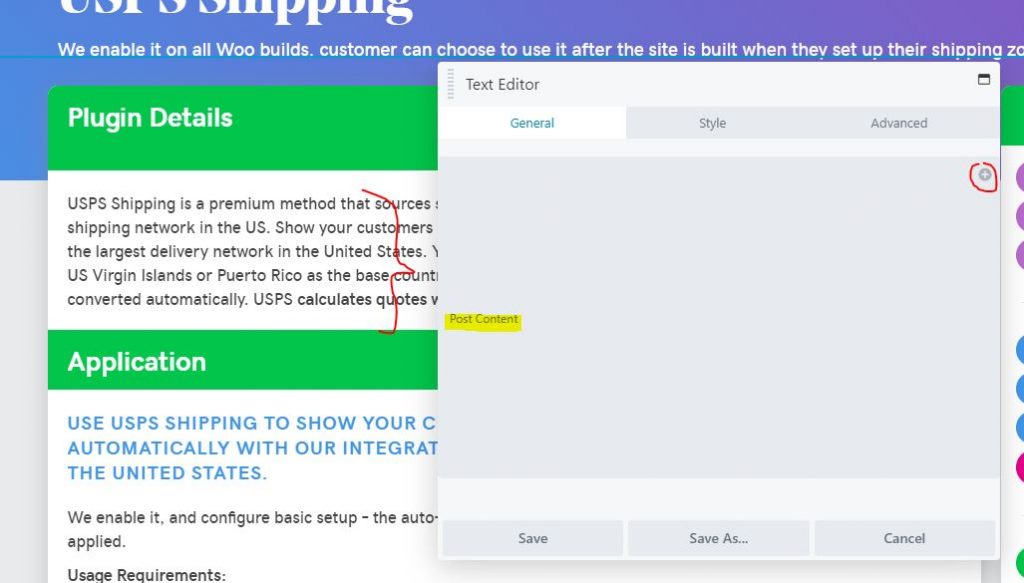
connect the post editor content

put the setup requirements link field magic tag shortcode in the "href" of an "a" tag, then put the setup requirements text field shortcode within the "a" tag
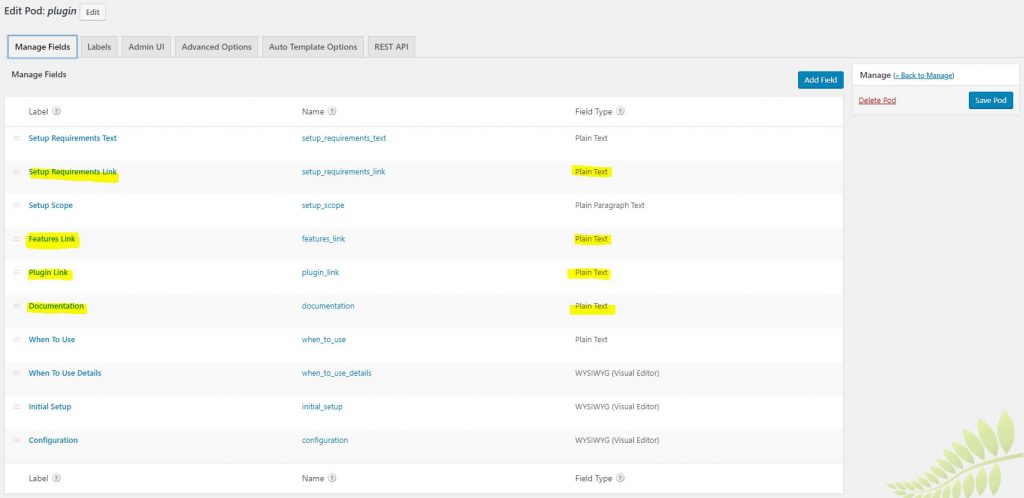
Pod post fields for links - added as plain text
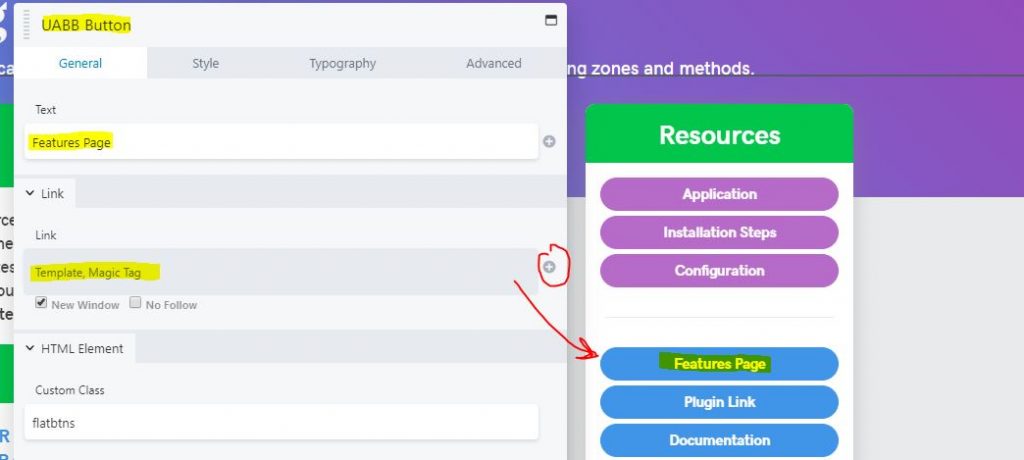
open field connections for the button link

choose pods field from "template, magic tag"

input the field name into the magic tag
Taxonomy - Archive Layout
Before you Start
Make sure you have your custom post type built in Pods, your custom taxonomy built, and at least 3 of your custom posts added before you start building the themer layout so you see how the posts in the archive will look.
What fields do you want to include?
Before you touch your post module's HTML layout, think about the fields from the post that you want to be shown for each post on the archive page. In the case of the "Woo Extensions" plugin type archive, the following fields were selected to show for each post:
See the image below on how the shortcodes were added into the HTML layout and how they correspond to the post module. The HTML layout has been styled with css to get the layout to look the way it does, but the important part was making sure the module was able to pull the fields from each post in the archive. Click to see "Woo Extensions" plugin type archive's end result.

Table of Contents
Add a header to begin generating the table of contents
Next Steps
Use the workflow to help you create your own pod OR import a pre-built layout.