
Image optimization guide
When adding images and logos to a site we want ensure that each image doesn't appear blurry or pixelated and all text is clear and sharp. In this guide we will be discussing options and solutions to optimize all images to make sure they are clear, sharp and readable.
Proper image size and module settings
Saving images at the proper size can have a major impact on image quality and page load speed. In the past you'd want to import images at the size they'd appear on the website (1 to 1 ratio). However, most modern website platforms adjust images based on the display that is being used, and with the advent of Retina/4k monitors this has made earlier practices outdated.
To best optimize images for current standards you want to make sure all images are saved at 2x the final size and then adjusted using the module settings. This is especially important for Essentials sites since W+M does not have further settings that can be adjusted to optimize image quality. The examples below illustrate the differences and preferred method for saving and importing images.
Resized - Actual Size
300px wide
Here a 1 to 1 ratio has been used, where the image has been saved and imported at the final image size of 300px. While this is the best option for load times, you'll notice the image, especially the text, is blurry and does not look good.
Full Size - Original Image
1920px wide
Here the full size image has been used and then resized to 300px in the module settings. While this does provide a clear and crisp image, it can cause increased load times, and should be avoided.
Resized - 2x Actual Size
600px wide
Here the image has been saved at 2x the actual size and then resized to 300px in the module settings. Saving at 2x is the best option for image quality and load times and is the recommend size for optimizing images for Retina/4k devices.
Background and large images
Properly saving background images and large images is just as important and will need to follow the same guidelines as outlined above to provide the best quality possible. Following the examples, we will also be discussing the Smush settings that will need to be updated to make sure the images are highly detailed yet maintain good load times and GLH scores.
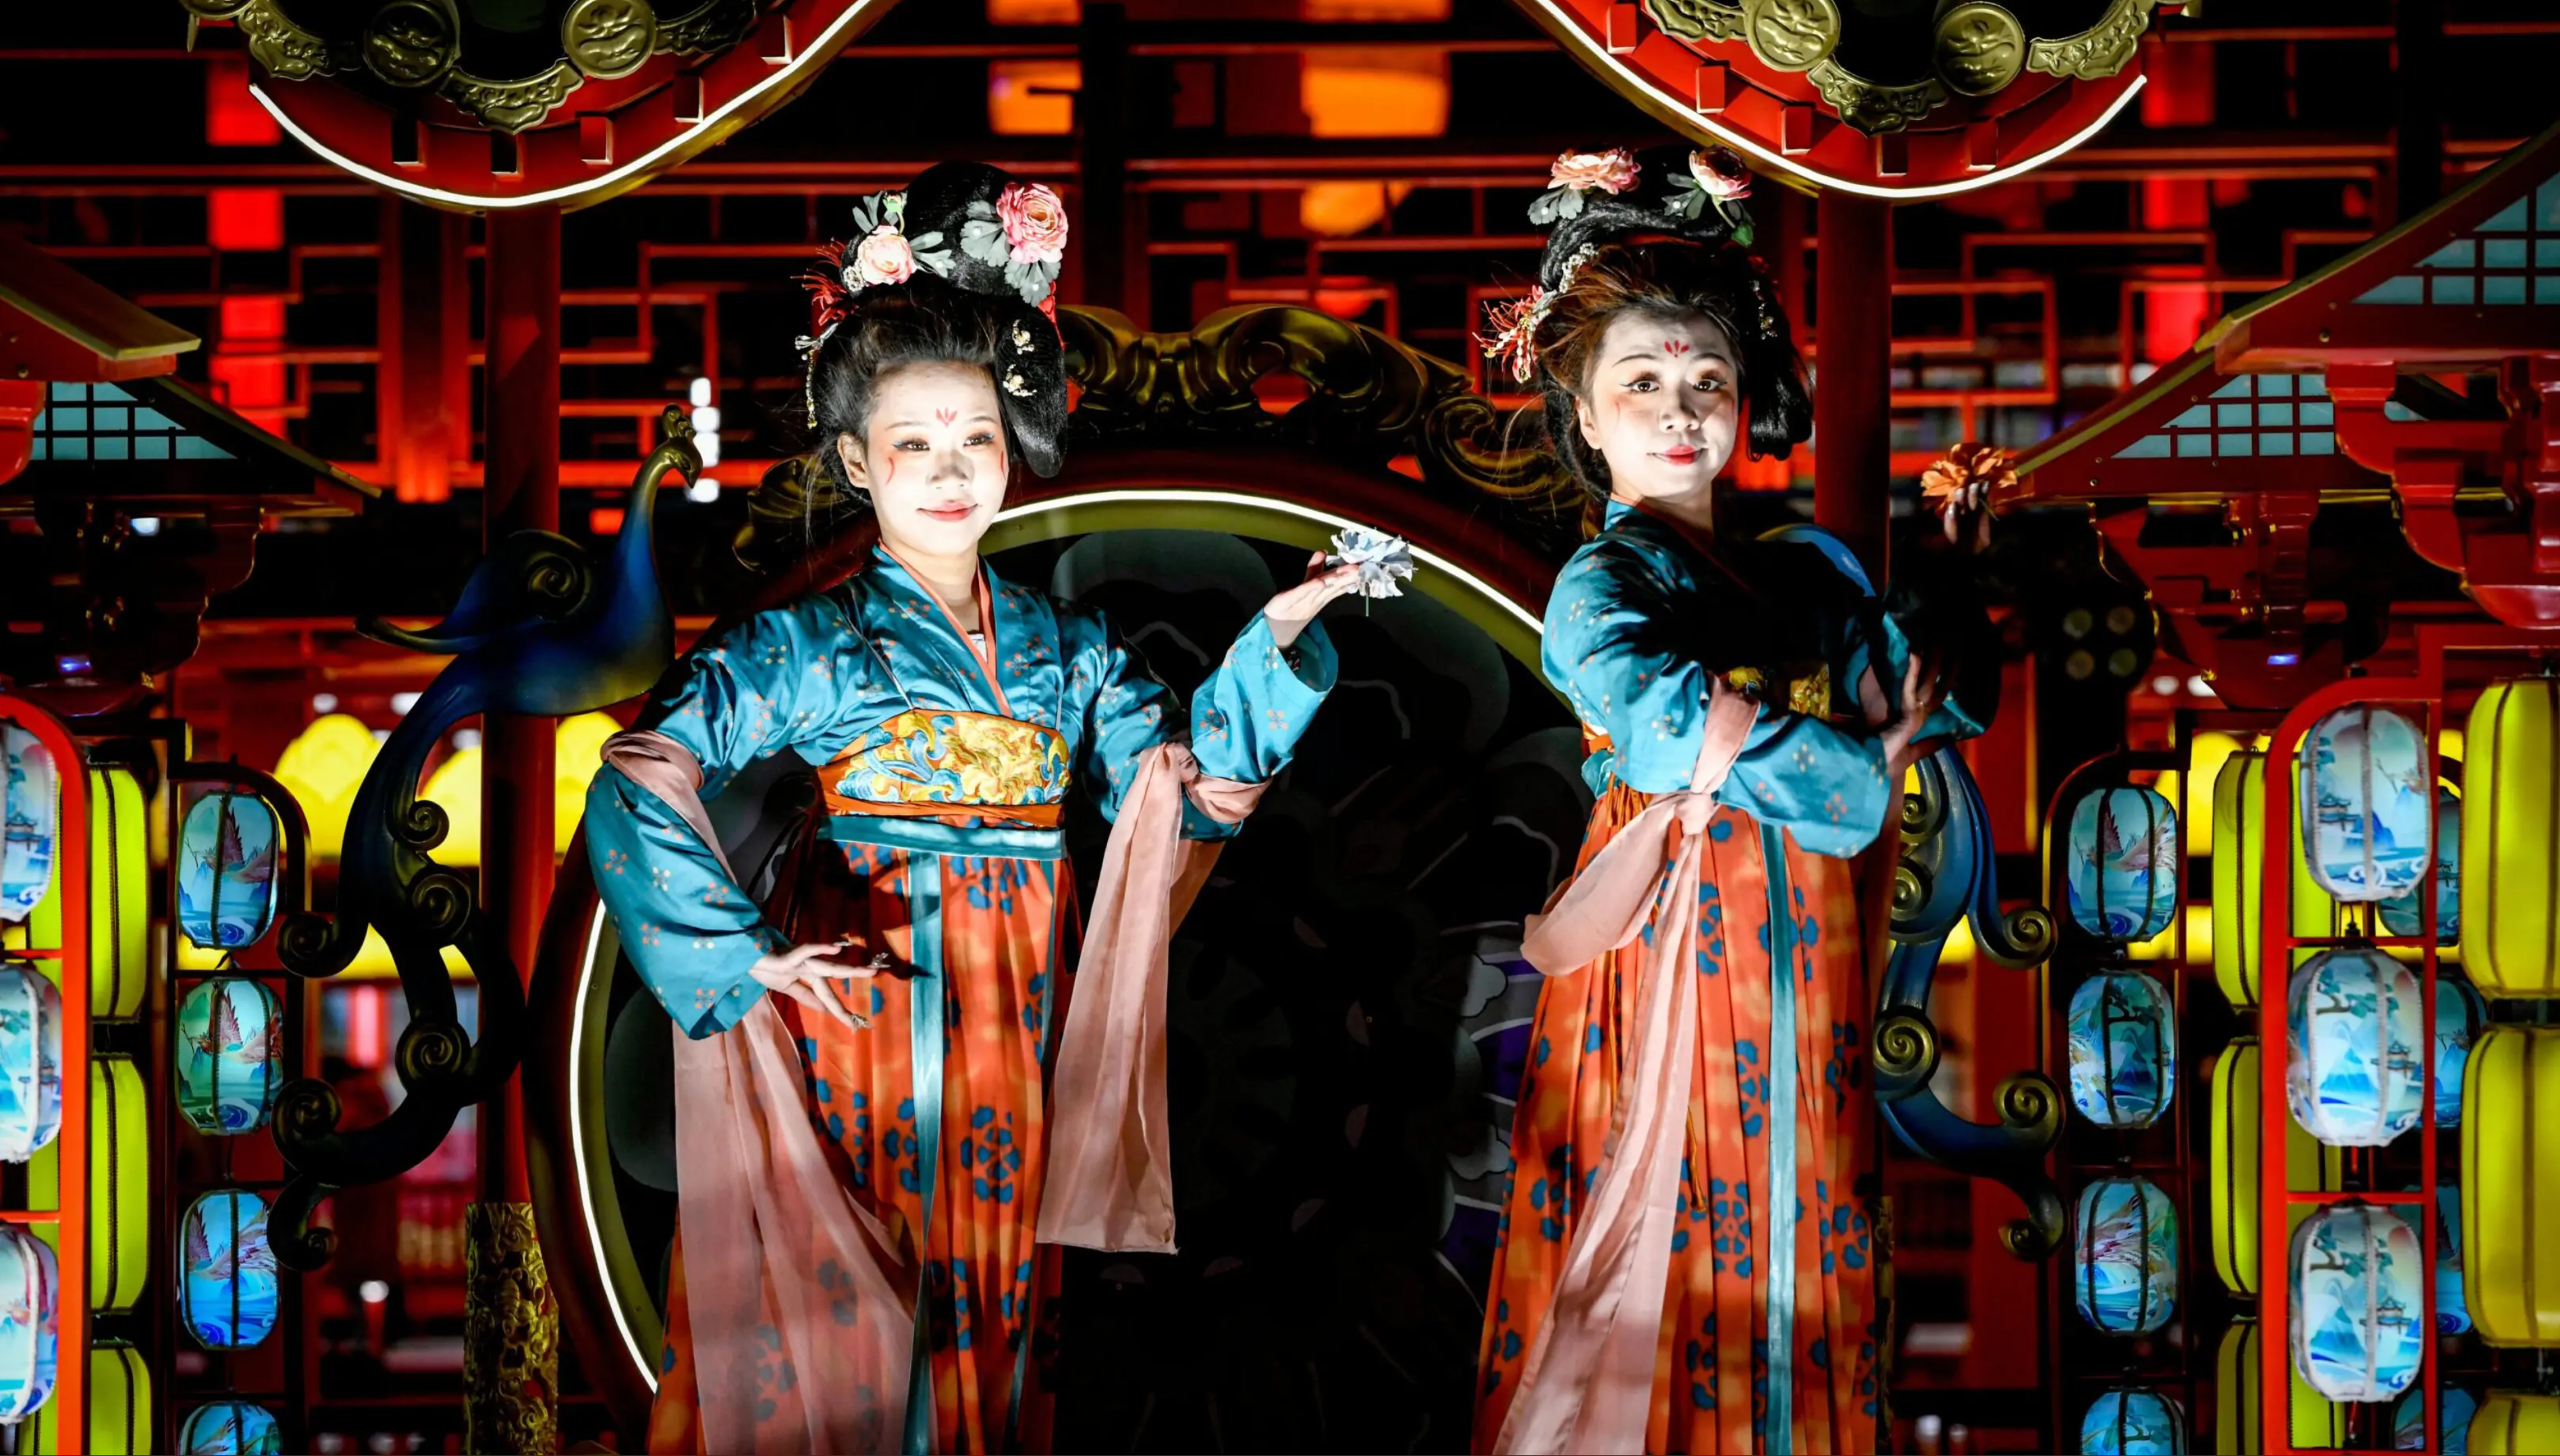
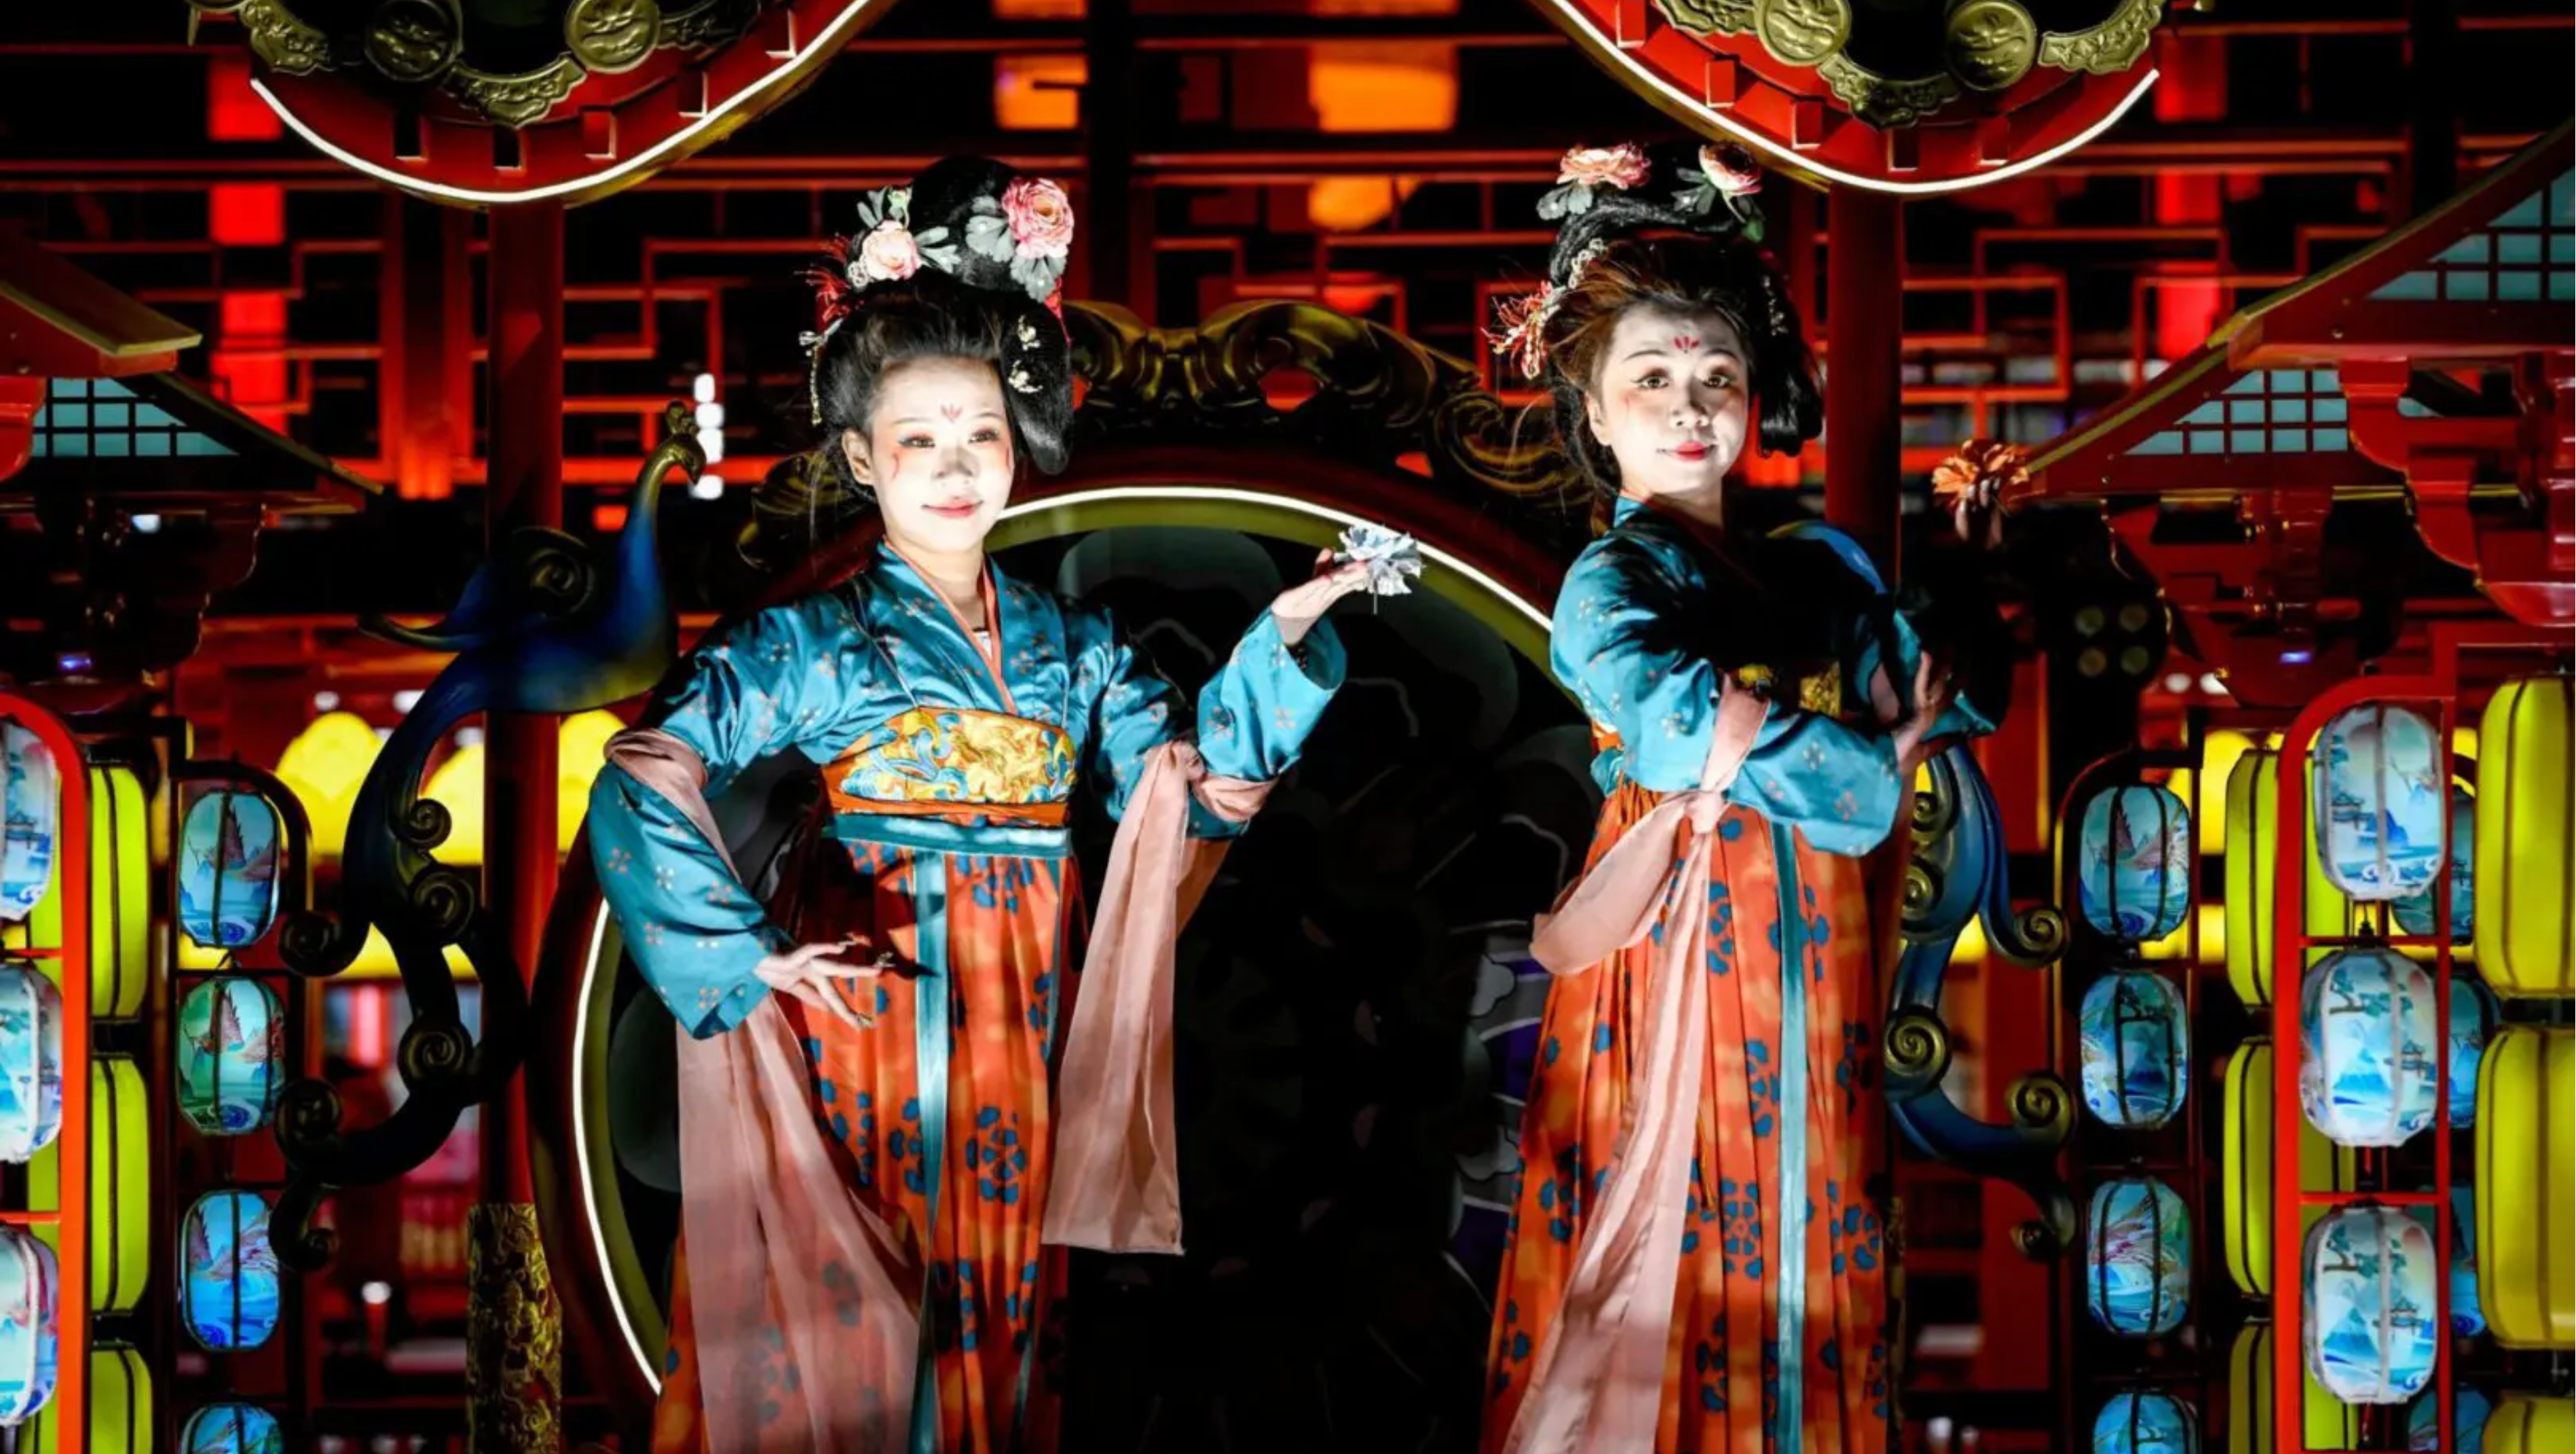

Detailed Image Example
In this example you can see that the top image has much more detail and doesn't appear blurry. The top image was saved at full size and imported with the updated Smush settings (3840px X 2160px), while the bottom image was imported with the old Smush settings (1920px X 1080px) and saved at the same size.

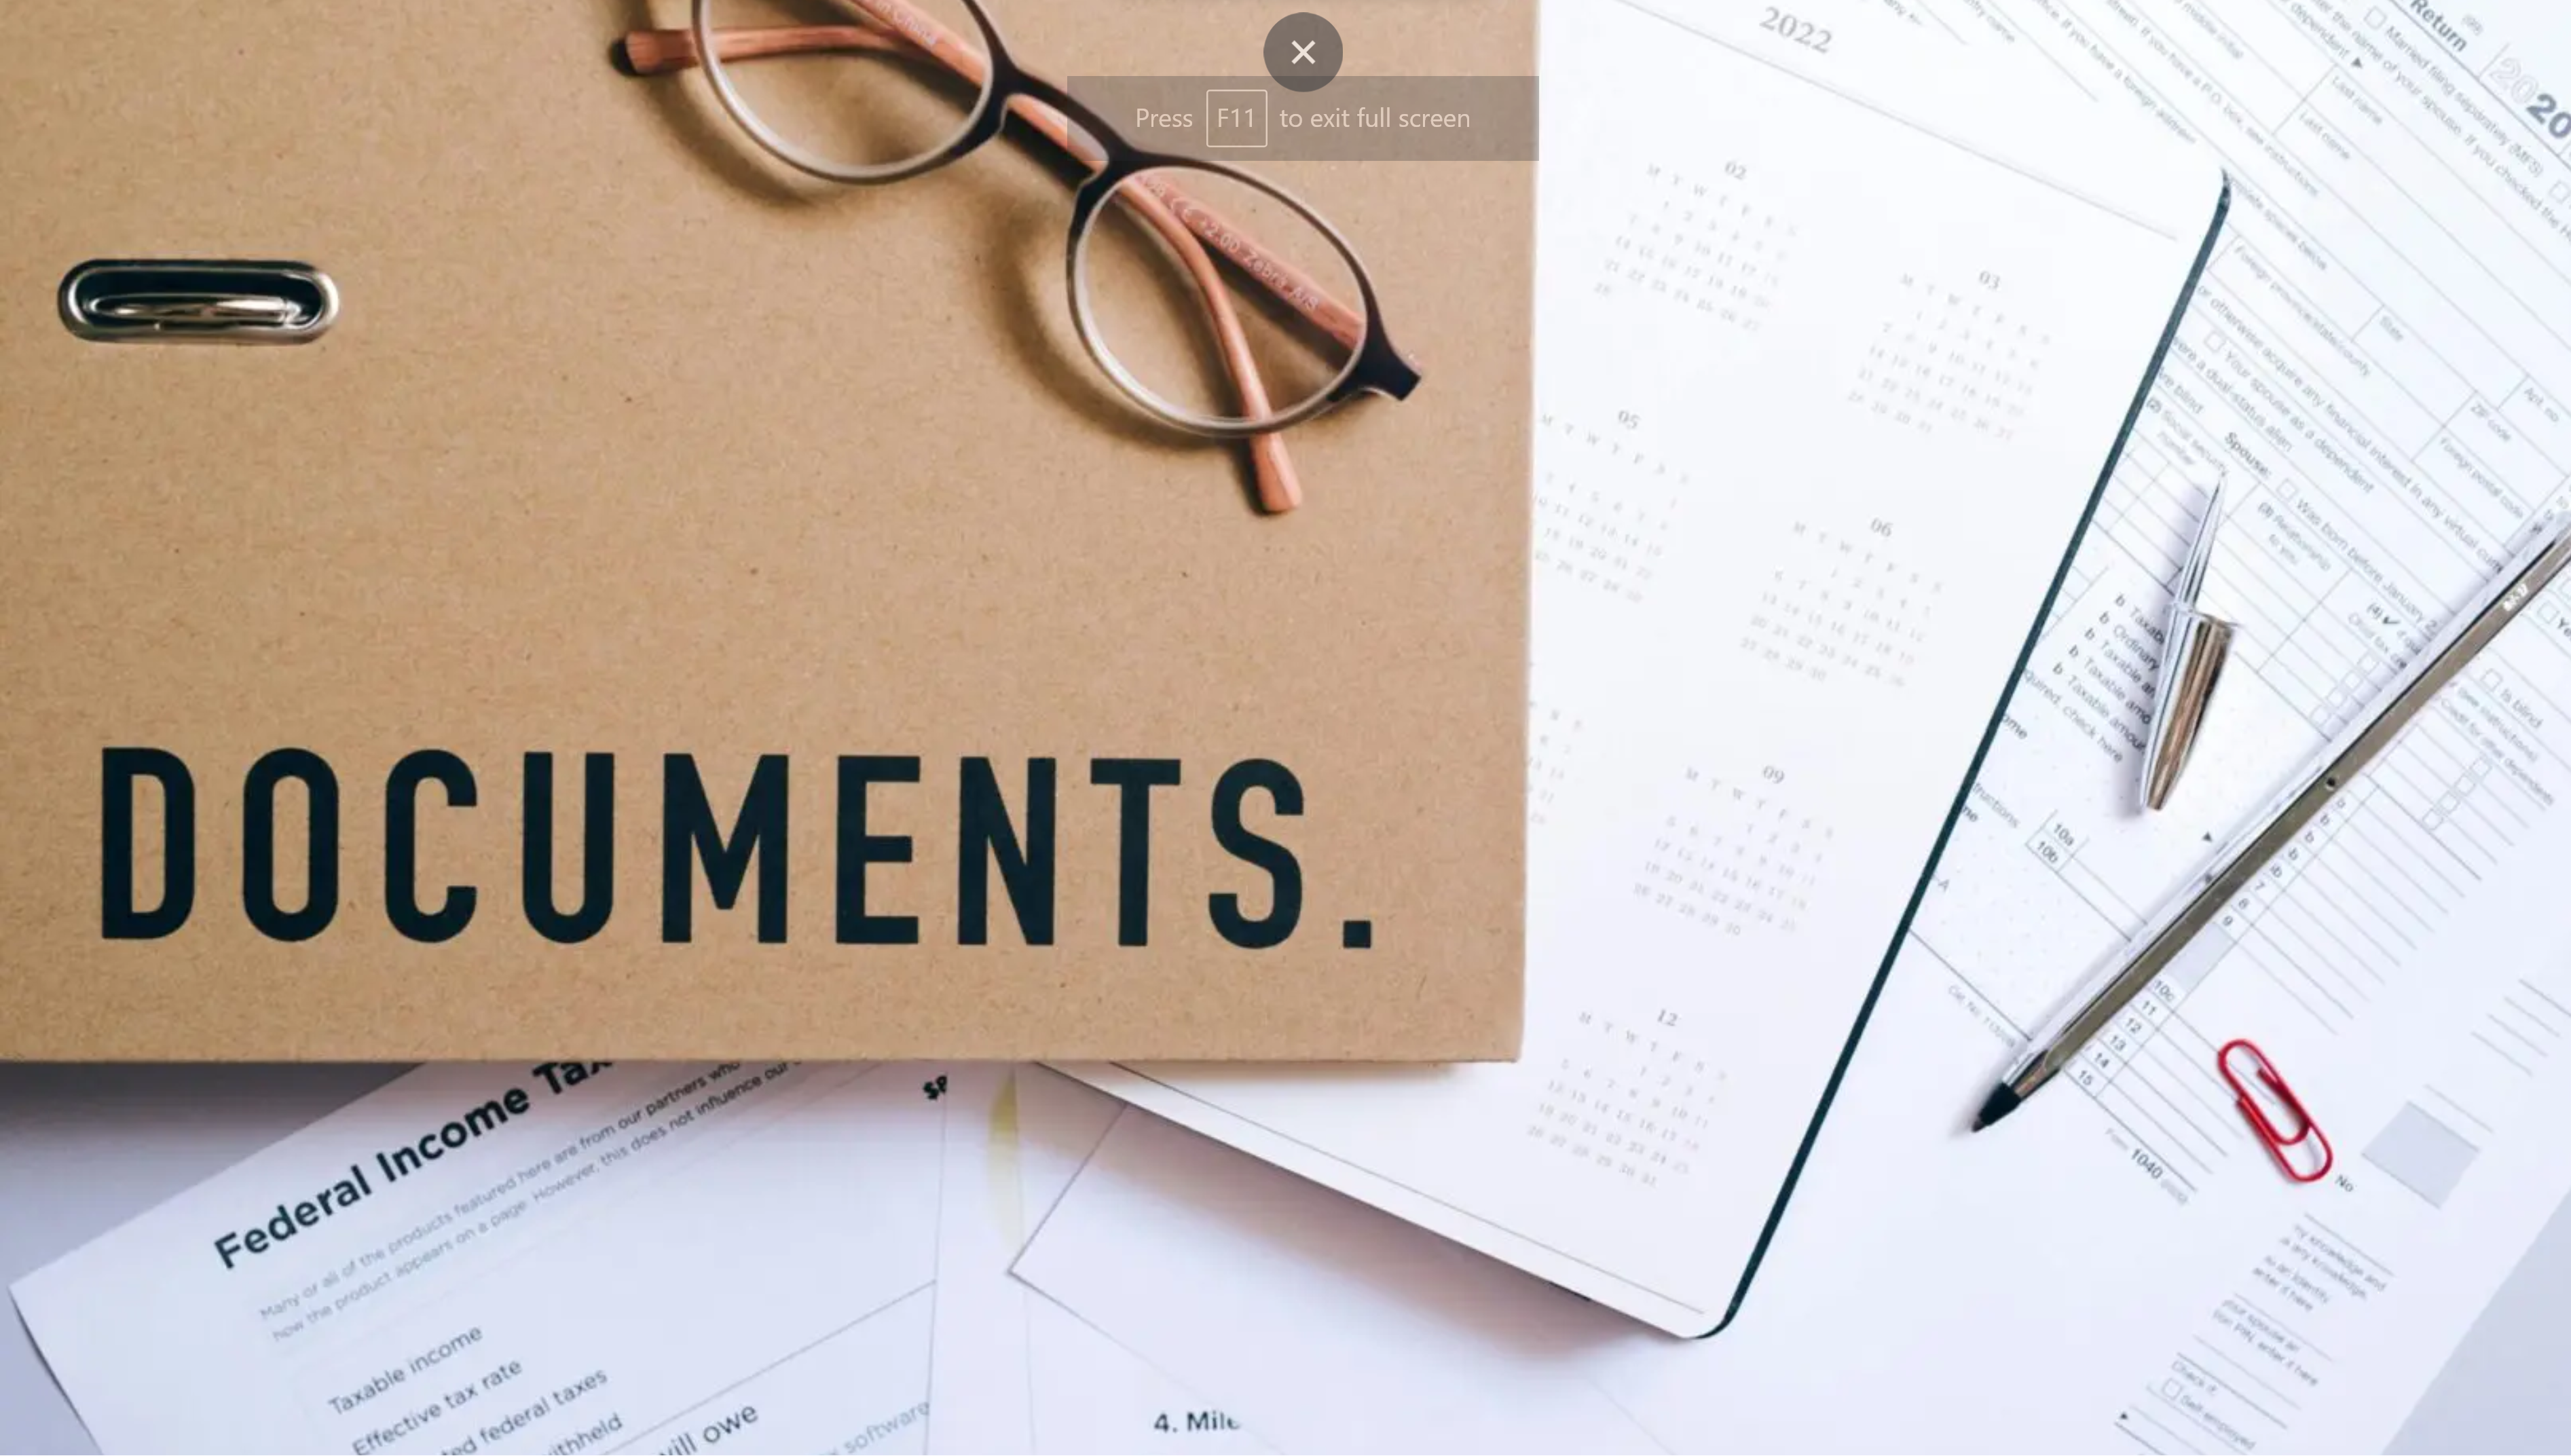

Text Heavy Image Example
In this example you can see that the top image has much more detail and the text doesn't appear pixelated/blurry. The top image was saved at full size and imported with the updated Smush settings (3840px X 2160px), while the bottom image was imported with the old Smush settings (1920px X 1080px) and saved at the same size.
Table of Contents
Image Optimization Highlights
- Save all images at 2x the size they will be displayed on the site.
- Saving images at 2x the size is especially important for Essentials sites as there is no other way to ensure proper image quality.
- Configure Smush Pro with the correct settings.
- Run Smush Pro with the new settings.
- If the images still do not appear correctly, they will need to be re-added to the site.
Optimizing Smush Pro
Importing images at 2x size is the first step to make sure all images look great on each site. And properly configuring Smush Pro will make sure all images can be imported at the highest resolution while also maintaining high GLH scores.
WordPress has a maximum image upload size of 2560px X 2560px, which would still be below the minimum of 3840px X 2160px for Retina/4k displays. Additionally, the base configuration of Smush Pro further decreases this to 1920px X 1080px. The standard Smush Pro settings are what is causing issue we are currently seeing with blurry/pixelated images and needs to be updated to allow for Retina/4k resolutions. The sections below contain all of the proper Smush Pro settings and easy copy/paste values are listed also.
Click the image below to review the correct
Smush Pro - Bulk Smush settings
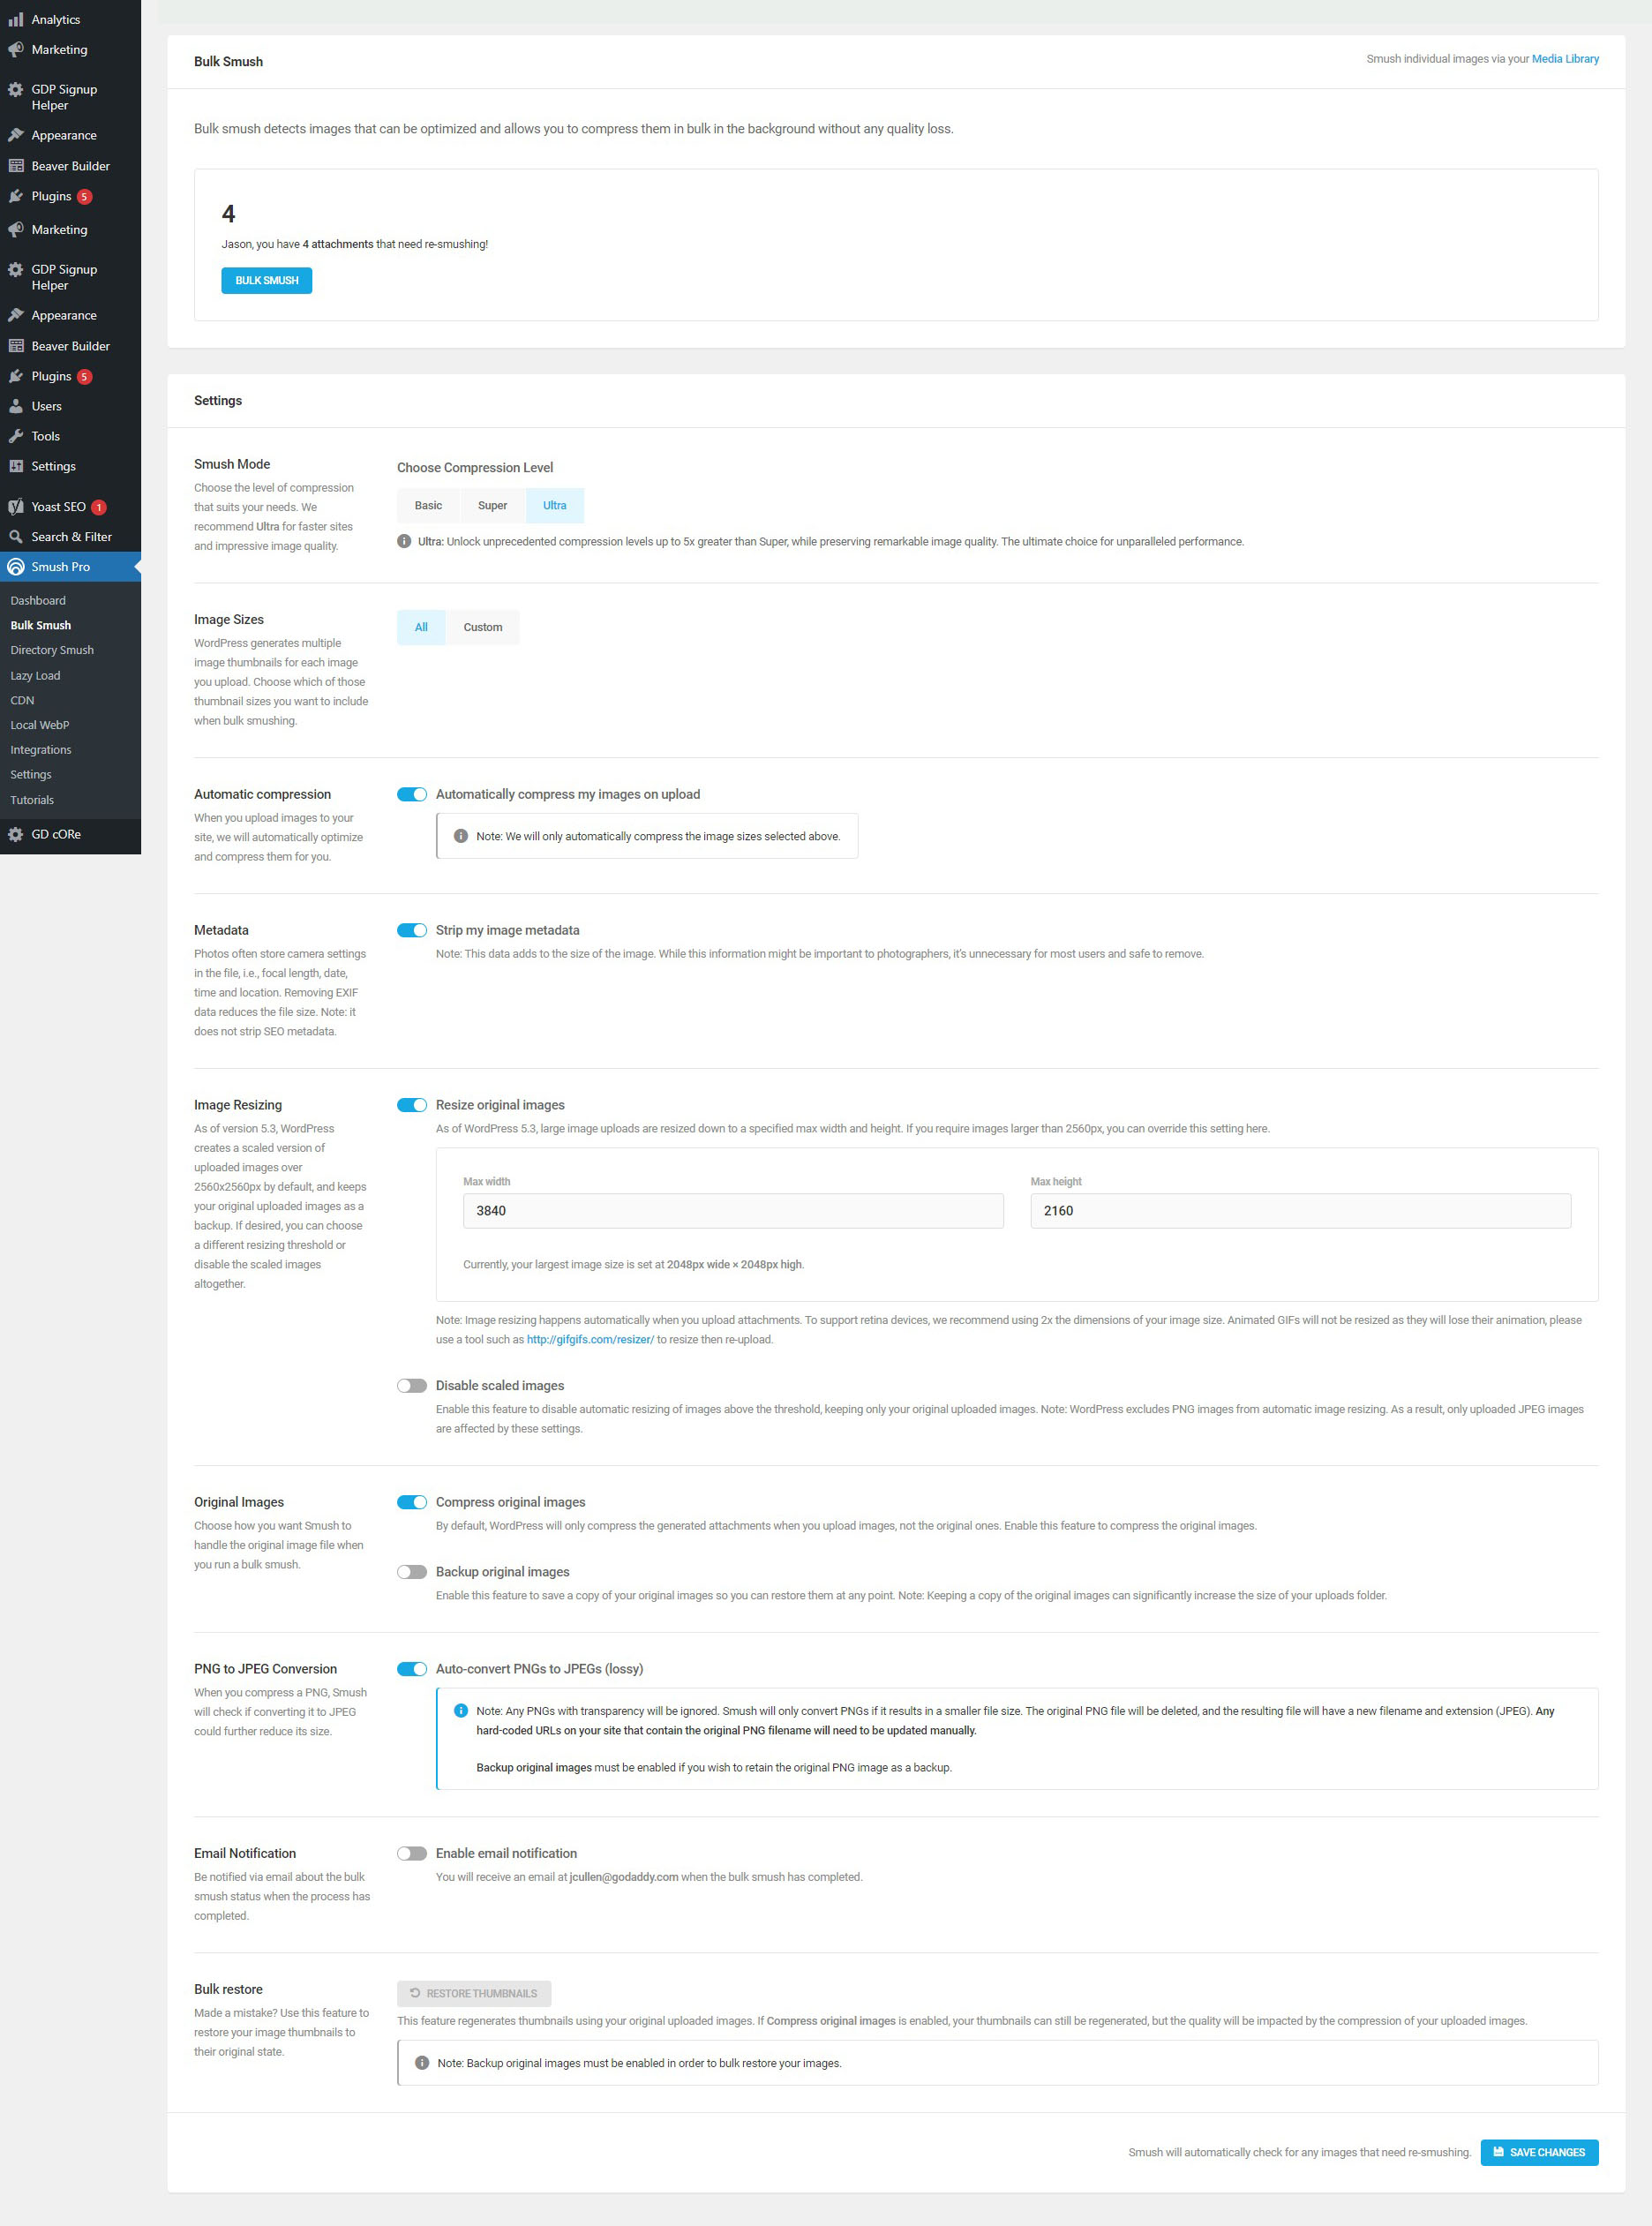
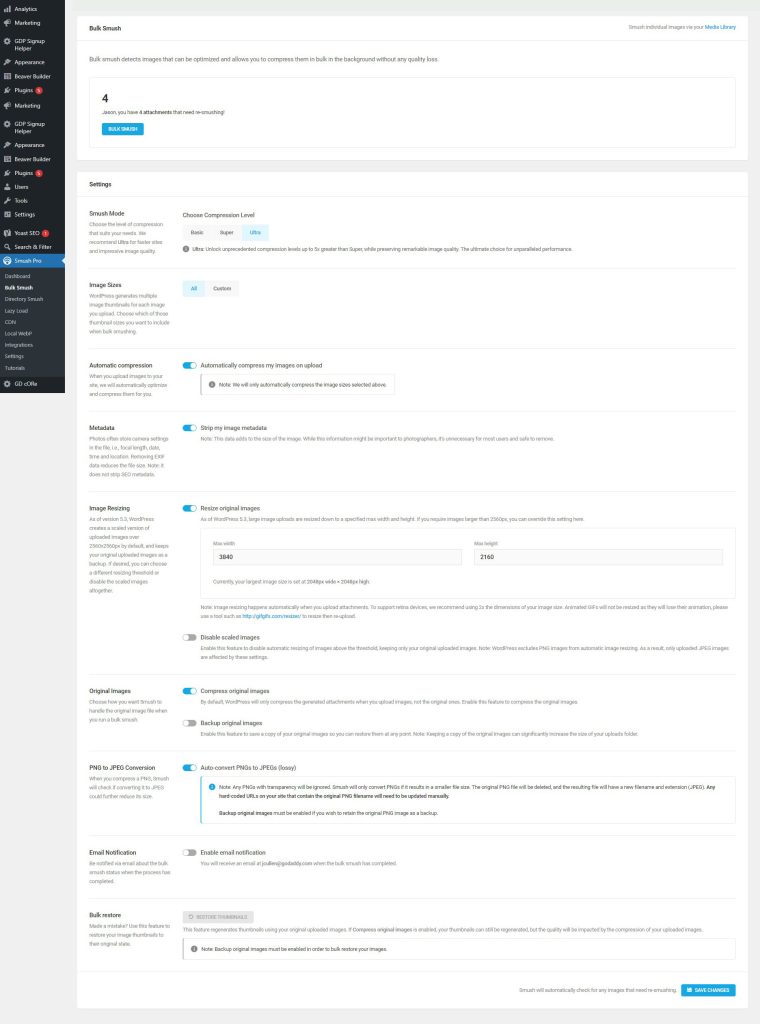
- Smush Pro Settings - Bulk Smush
- Choose Compression Level: Ultra
- Image Sizes: All
- Automatically compress my images on upload: On
- Stirp my image metadata: On
- Resize original images values: 3840 x 2160
- Disable scaled images: Off
- Compress original images: On
- Backup original images: Off
- Auto-convert PNGs to JPEGs (lossy): On
- Make sure all of the above settings match then Save Changes and run Bulk Smush.
- Review the site to make sure all images are no longer blurry or poor quality.
- If the images still do not appear correctly, they will need to be re-added to the site.