
Woo Search & Cart [ 3 ]
Ajax Search for Woo & WP Menu Cart Pro best practices and how to configure/modify default settings for preferred results.
Follow the step-by-step installation instructions from the "WP/WOO Setup" tab.
Install Plugins
Check GD Core
- Installation
when you install Core after selecting a Premium Store plan type and check the plugins tab, you'll see all the plugins that are included with Woo - make sure "AJAX Search for WooCommerce" and "WP Menu Cart Pro" have been installed and activated here - What happens if they aren't installed?
if you forget to check whether the plugins are installed or active, and proceed to "page setup" and select a woo header layout, you'll notice that the HTML modules in the header will have text shortcodes in place of the cart and search bar - if you go install/activate them and then refresh the header, they should appear - What next?
once you publish the header you may notice that the cart/search bar don't look exactly like they do on the demo site, or that cart fly-outs appear where you don't want them to - follow the instructions in the sections below to configure each plugin's settings correctly
Reference: These plugins should be included in Core with Woo - For use on a legacy platform, the PRO version of WP Menu Cart can be found in vendor package builder
Ajax Search for Woo [ 3a ]
Header Template
Preface
each header layout has the search bar in a certain spot in the header - in previous versions of the plugin (during demo & layout creation) there wasn't a spot in the settings to declare a maximum width or to adjust the padding within the search bar for placement in thin header top bars
Custom CSS
in order to make sure the search bar filled a maximum width 100% of the column in which it was placed, and to adjust the padding of the bar, there are small custom CSS snippets placed in the template's "Layout CSS / JavaScript" section which can be edited as needed - Search height, icon & min-width are controlled here as well in templates that required it

Back-end Settings
Display the form
There are two easy ways to display the search form:
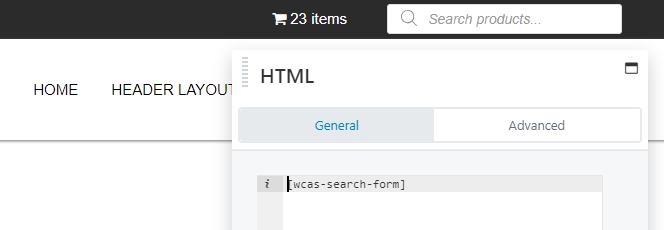
- Use a shortcode
[wcas-search-form] - OR Go to the Widgets Screen and choose "Woo AJAX Search" - you'll find in the header templates that we use the shortcode placed inside of an HTML module
Configure search settings
- dashboard > WooCommerce > Ajax Search Form - In the new updated version of the plugin, they included an option for "Max form width" which can be left blank
Search input placeholder
- the default Search input placeholder is "Search for products..." - this can be unnecessarily long on smaller screens – change to "Search products..." or just "Search..." as needed
Form tab settings
- Form Tab > Suggestions output
by default, "Also show matching categories" is checked on - turn that off if you only want products to display, otherwise leave as is - by default "Show product image" & "Show price" are also enabled - turn them off to avoid clutter if you have longer product names, or if you would rather use the details box, because the details box already shows a full preview of the product.


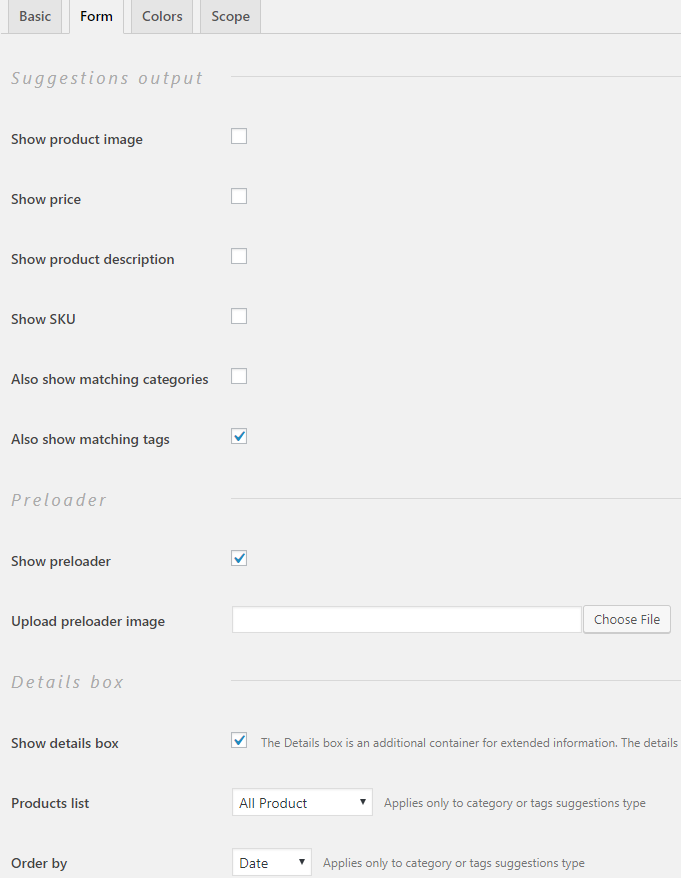
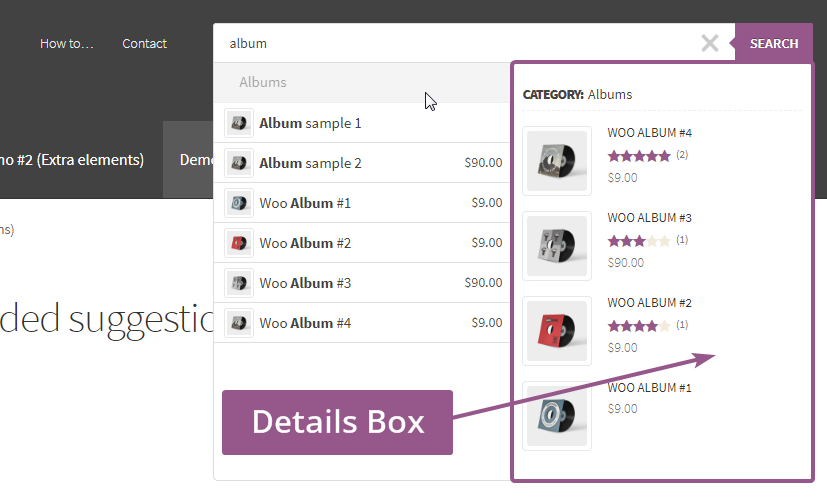
- Form Tab > Details box
Enable or disable the "show details box" as needed (this is a really cool feature but it won't display on small screens) - Form Tab > Colors
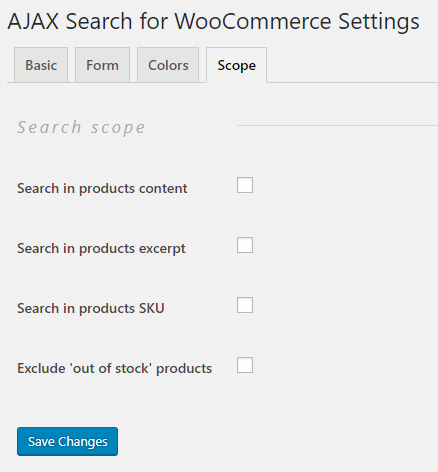
actual colors of the search bar form can be controlled under the colors tab - usually adjusting this is unnecessary or can be handled with CSS as well - Form Tab > Scope
the scope tab allows options to pull products based on items from products content, excerpt, SKU, or items from "out of stock" products - you can leave these disabled unless specifically requested in ticket


WP Menu Cart Pro [ 3b ]
Header Template
Preface
each header layout has the cart in a certain spot in the header - in previous versions of the plugin (during demo & layout creation) there wasn't a spot in the settings to declare cart alignment or a place to set the icon color
Icon color
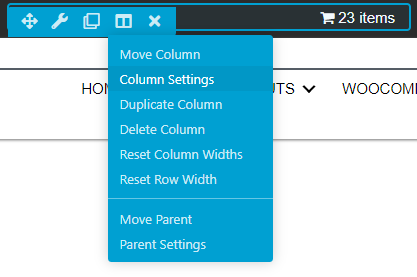
the color of the cart icon and items/price is controlled by the column settings in which the cart is placed depending on the header layout template
Custom CSS
in order to float the cart left or right, there are small custom CSS snippets placed in the template's "Layout CSS / JavaScript" section which can be edited as needed


Back-end Settings
Display the cart
There are two easy ways to display the cart:
- Use a shortcode
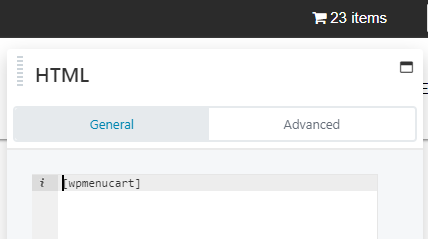
[wpmenucart] - OR Attach the cart to a menu from the dashboard plugin settings page - you'll find in the header templates that we use the shortcode placed inside of an HTML module
Configure cart settings
- dashboard > WooCommerce > Menu Cart Pro - In the new updated version of the plugin, they included an option for menu alignment
Cart tab settings
- Cart Tab > Main
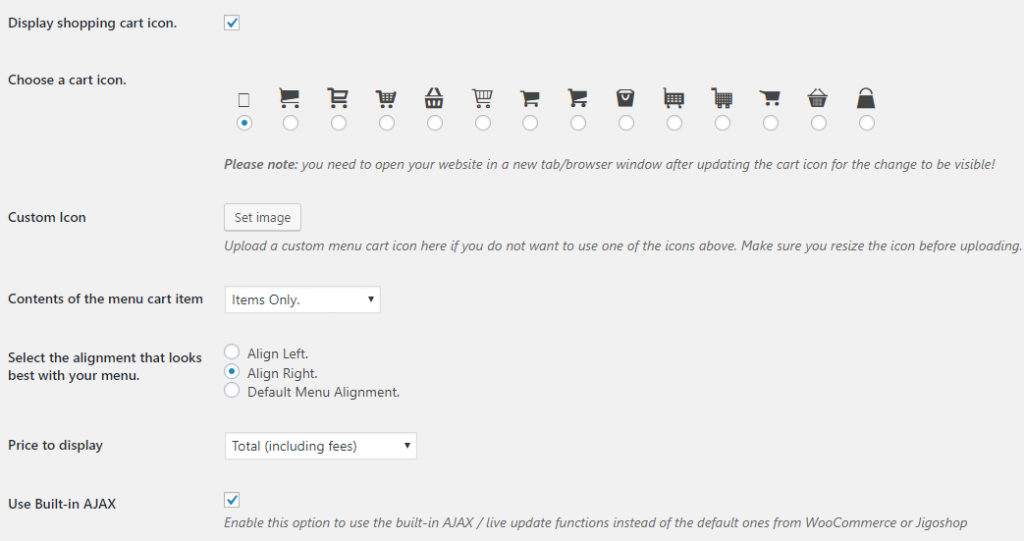
check the box "always display cart", uncheck the box "use fly-out", check the box to display cart icon, from drop-down "Contents of the menu cart item" select "items only" unless something else is requested

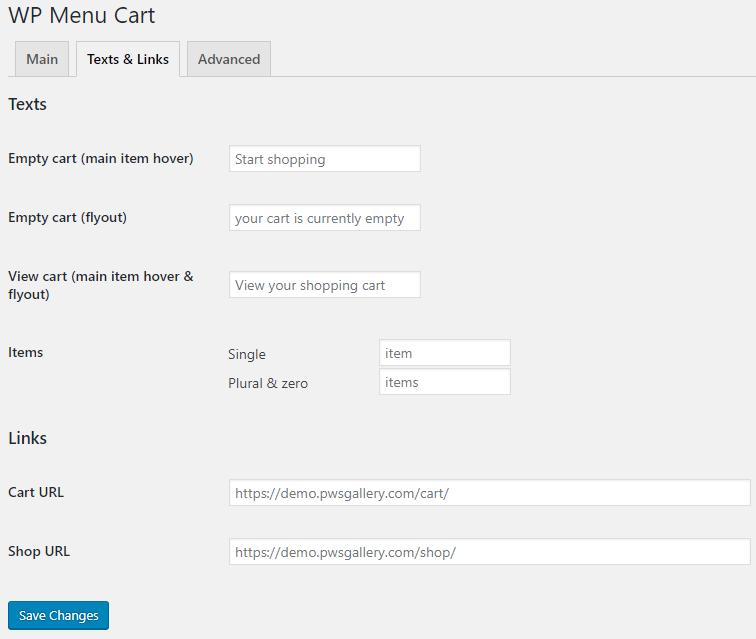

- Cart Tab > Text & Links
this tab allows you to set custom texts for the cart module - you don't have to touch this tab unless specifically requested - Cart Tab > Advanced
this tab allows you to assign custom CSS classes to the different components of the cart module - you don't have to touch this tab either unless some styling is specifically requested and a custom class would be necessary
Table of Contents
Add a header to begin generating the table of contents
Next Steps
After enabling search and cart, its time to create the themer layouts.