
How to add Promotional Popups to a WordPress Site (V3 & V2)
August 25, 2020 | Customer Campaign Run Books, Tips & Tricks, WooCommerce, WordPress
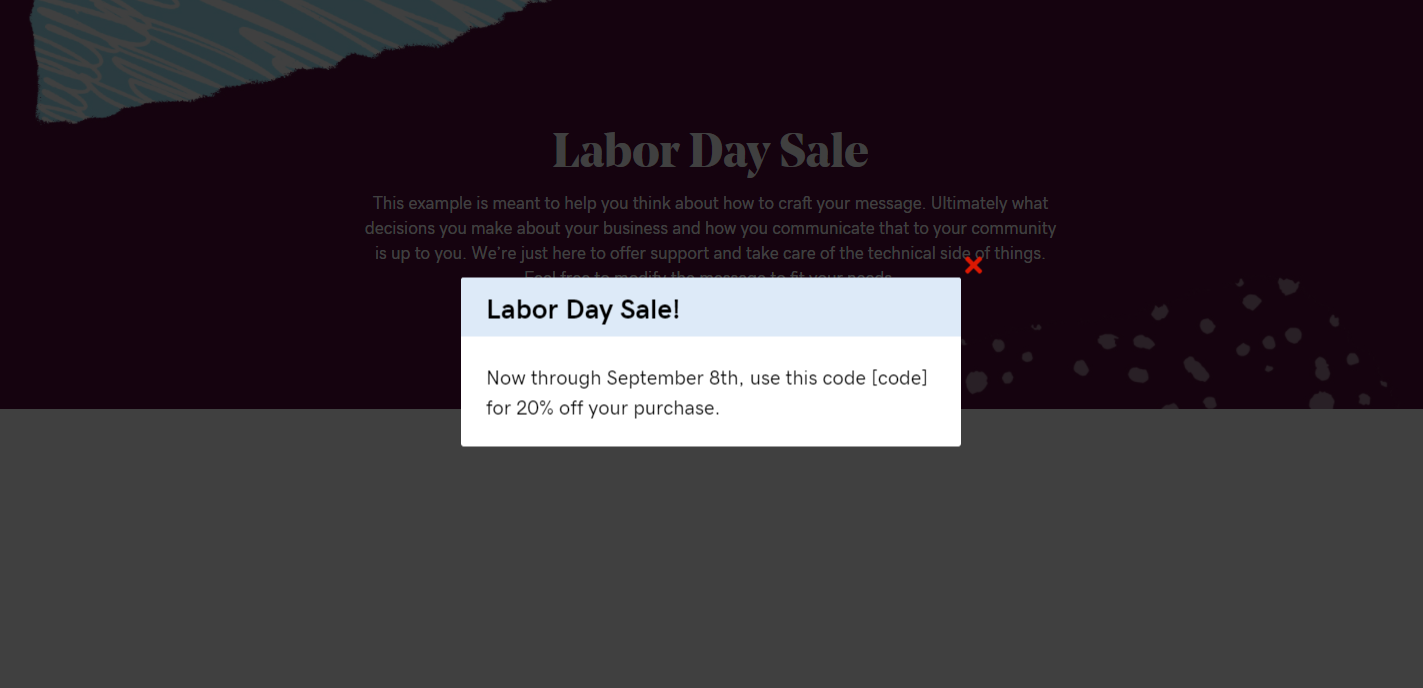
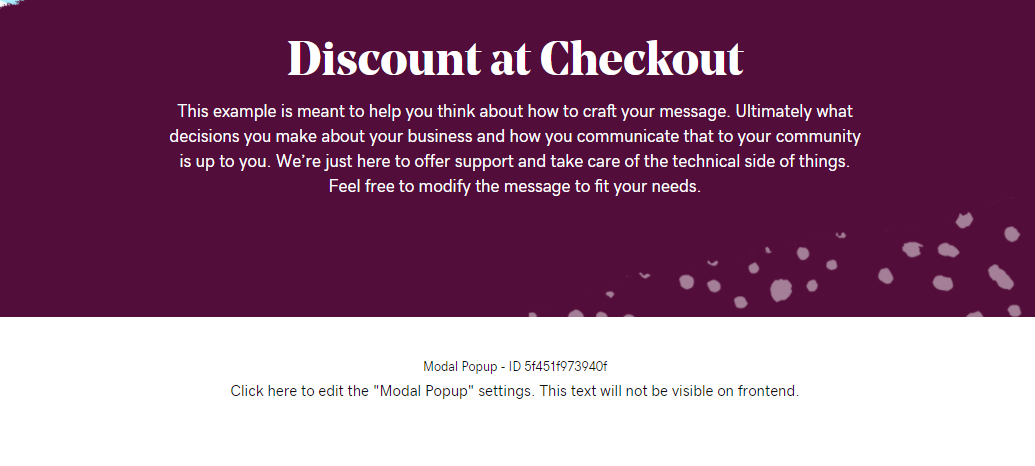
In the current day, a lot of people have businesses that need to have some way of communicating promotions or holiday plans to site visitors. This post covers how to add, edit or remove a promotional coupon or announcement popup in WordPress. Click here to see a demo of the module with text content.
This article covers the following:
- WooCommerce Coupon Setup and Management
- How to add a promotional popup to a WordPress site
- Styling Standards for the Modal Popup Module
- How to edit/remove a popup from a site
WooCommerce Coupon Setup
In the case that the site is a WooCommerce store, and the customer picked a layout that includes coupons, follow these steps to make sure the coupon is actually set up before you create the popup and publish it. Reference the woo coupon management documentation – the important parts are listed below.
WooCommerce Settings
Enable Coupons
Before you can add coupons, make sure the option to add them is enabled. To get started, go to WooCommerce > Settings. In general, enable coupons on your store.
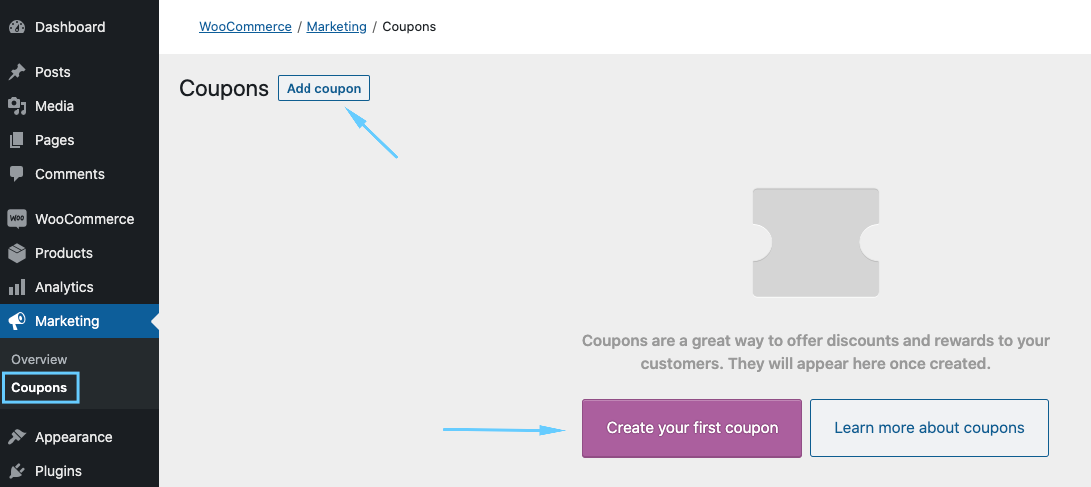
Coupon Management
To add a coupon:
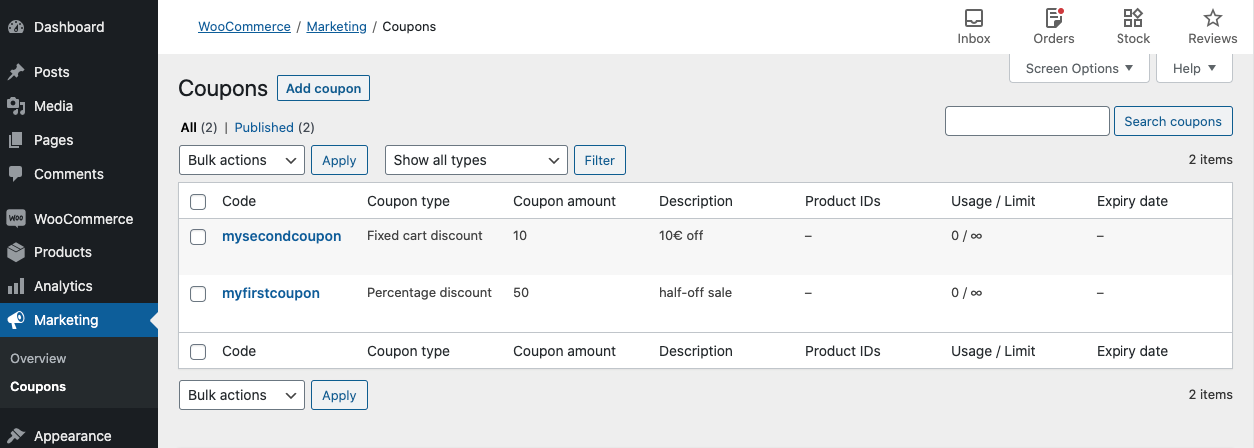
- Go to: Marketing > Coupons
- Create a new coupon by selecting Add Coupon. Or hover over an existing one to Edit.
- Enter or generate a Coupon Code. The code is used by the customer to apply the coupon and associated discount. Must be unique as it’s used as an identifier.
- Your code – Enter any alphanumeric code you wish.
- Any code – Select the Generate Coupon Code button if you want WooCommerce to auto-create and enter a coupon code via algorithm.
- Enter a Description (optional) — Info about the coupon for internal use. For example: Name of promotion/event, dates in effect, compensation, ticket number, customer name.
Under Coupon Data, there are three sections you can use to add restrictions and limits for the coupon: General, Usage Restriction, and Usage Limits.
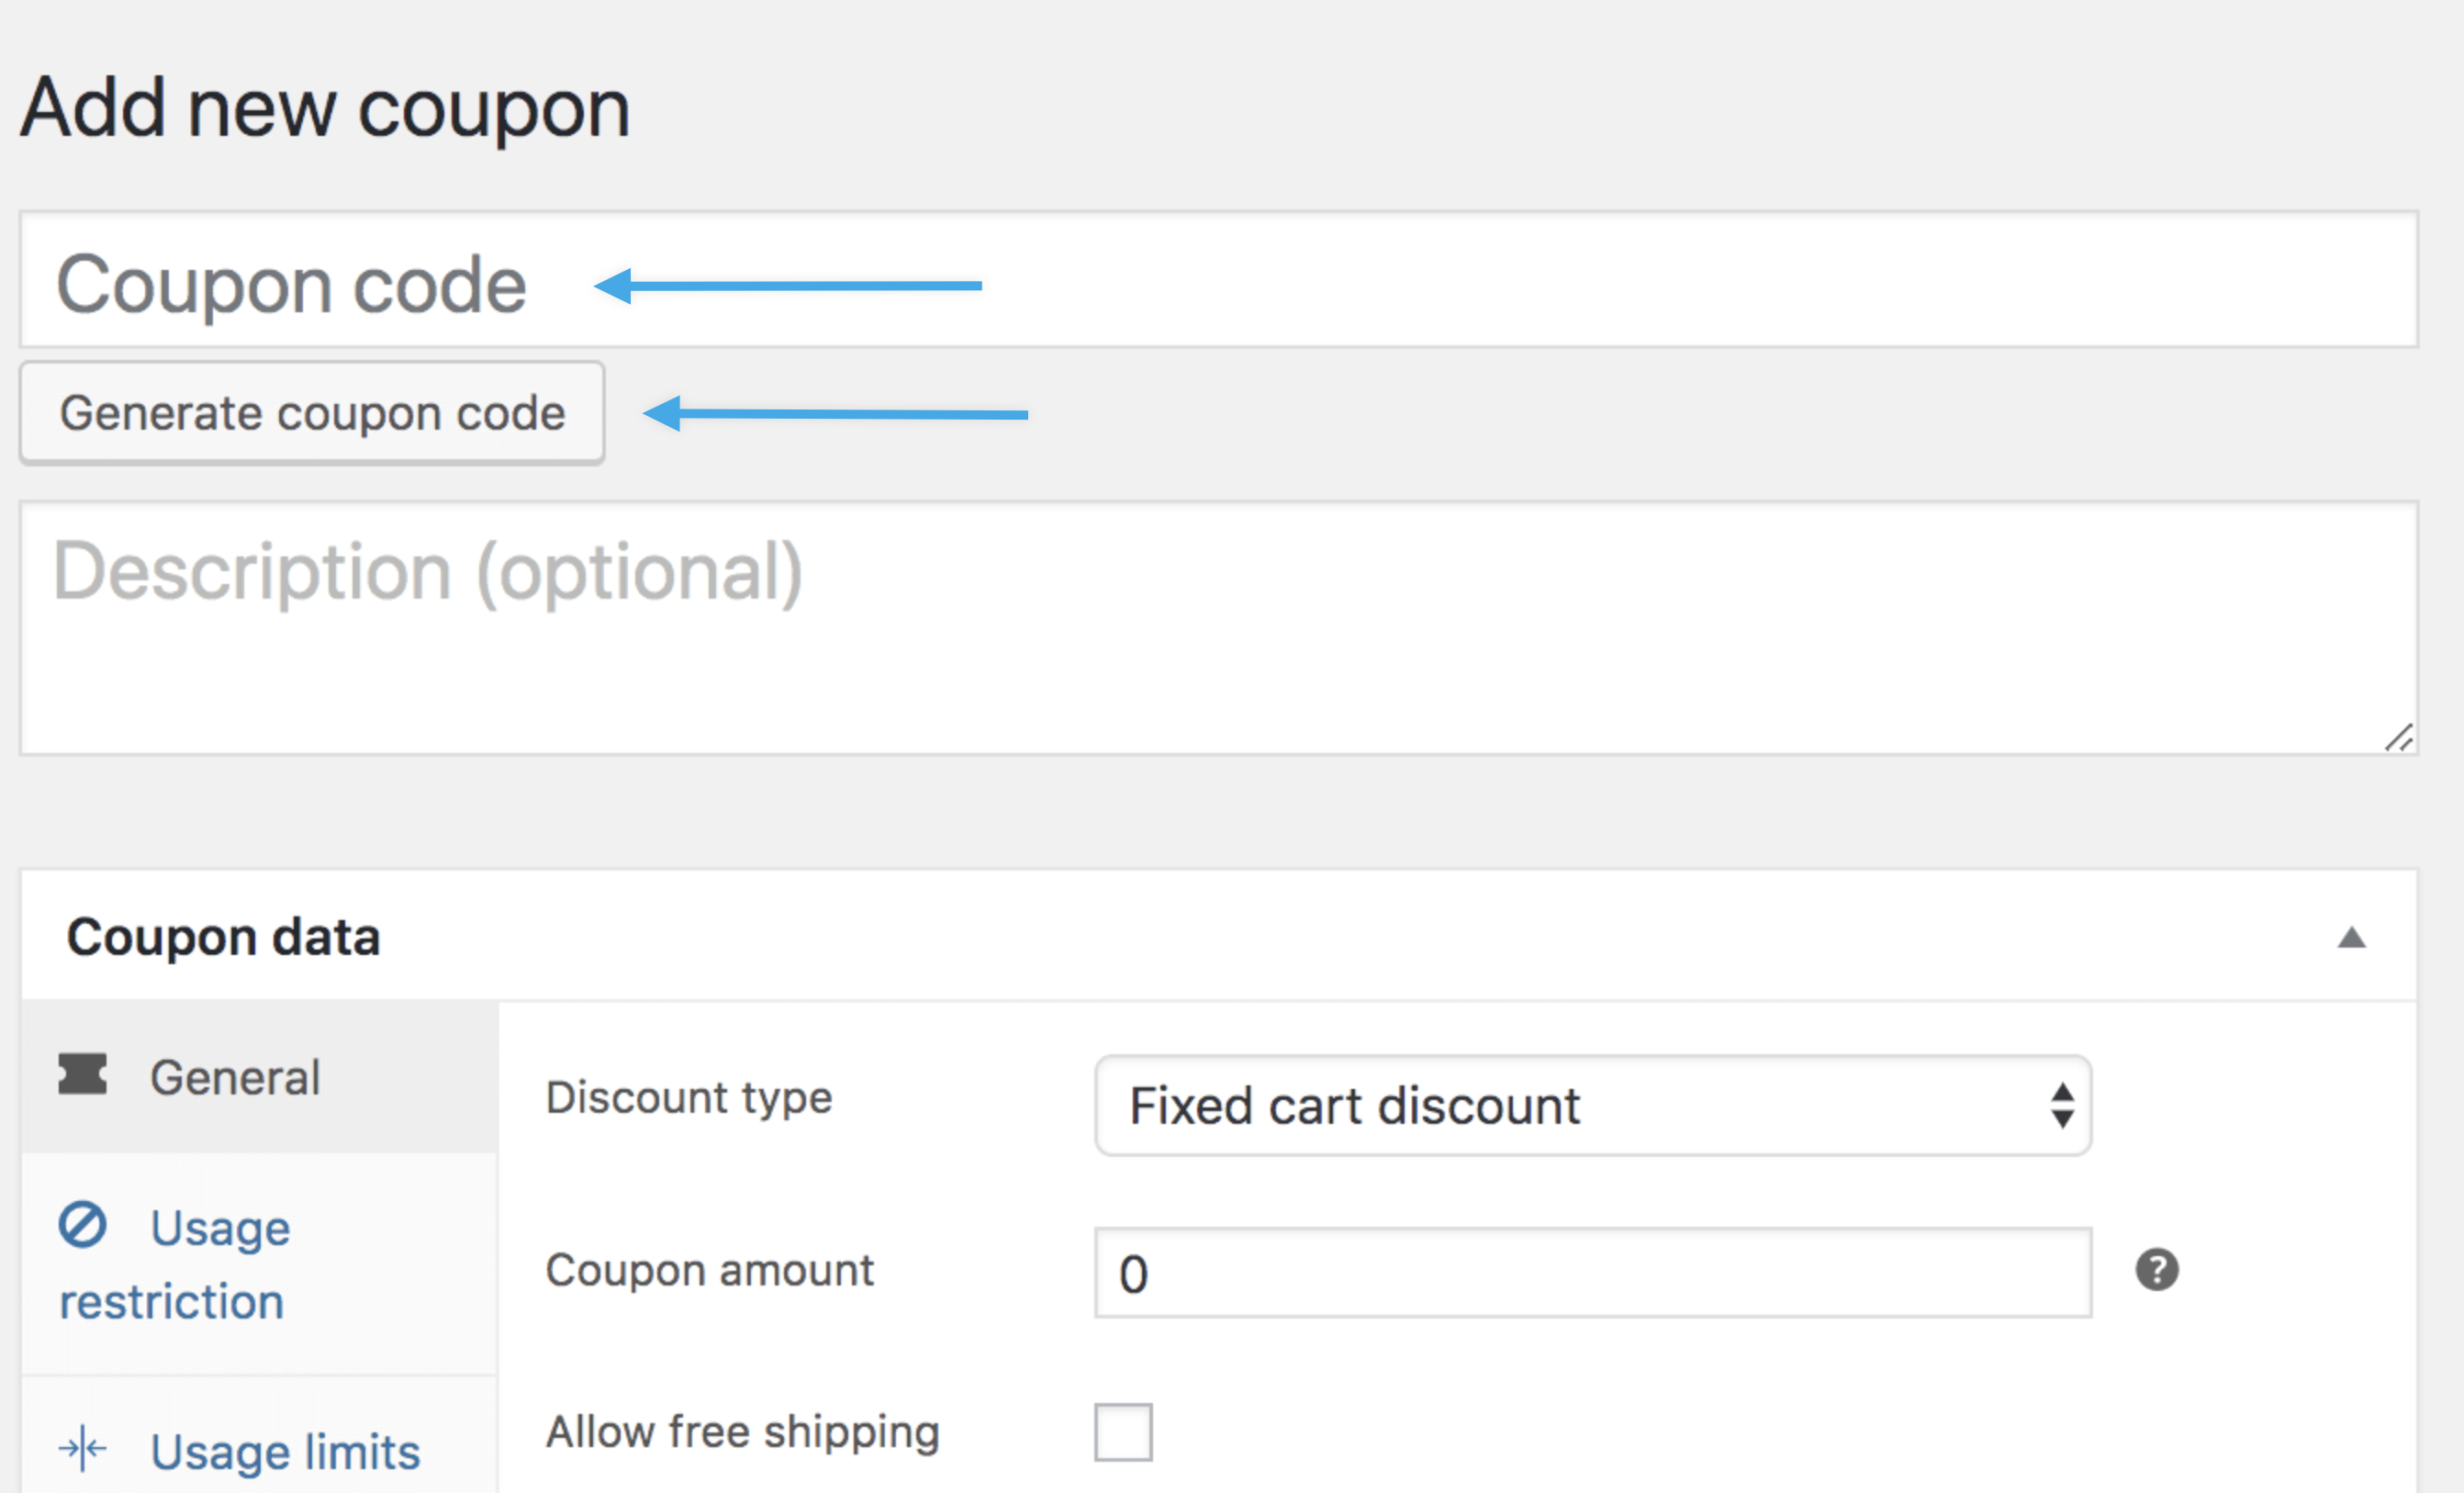
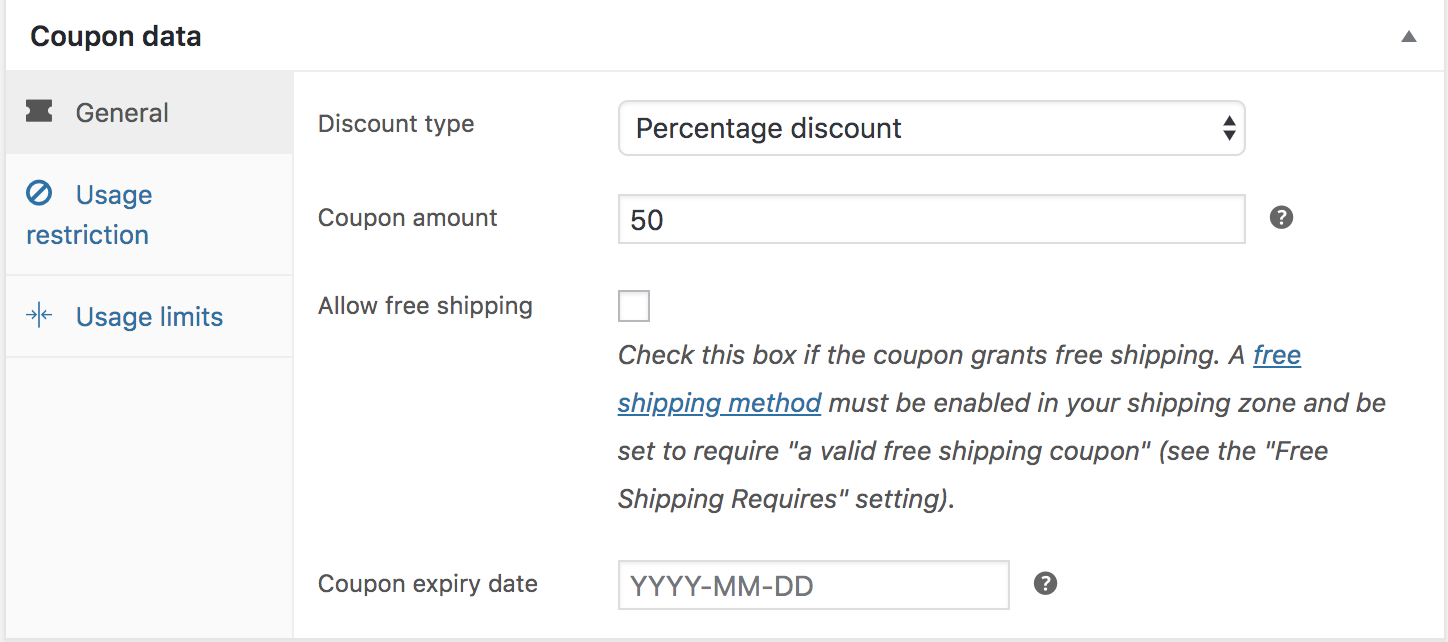
- Discount type :
- Percentage discount – A percentage discount for selected products only. For example, if the cart contains three (3) t-shirts @ $20 each = $60, a coupon for 10% off applies a discount of $6.
- Fixed cart discount – A fixed total discount for the entire cart. For example, if the cart contains three (3) t-shirts @ $20 each = $60, a coupon for $10 off gives a discount of $10.
- Fixed product discount – A fixed total discount for selected products only. Customer receives a set amount of discount per item. For example, three (3) t-shirts @ $20 each with a coupon for $10 off applies a discount of $30.
- Coupon amount – Fixed value or percentage, depending on discount type you choose. Entered without a currency unit or a percent sign, which are added automatically, e.g., Enter ’10’ for £10 or 10%.
- Allow free shipping – Removes shipping cost when coupon is used. Requires Free Shipping to be enabled.
- Coupon expiry date – Date the coupon should expire and can no longer be used. Expiry happens at 12:00 am or 00:00 on the date chosen. If you want a coupon to be valid through Christmas Day but invalid the moment Christmas is over, set the expiration date to YYYY-12-26 as it will expire on YYYY-12-26 00:00. It uses your site’s time zone setting at Settings > General > Timezone in WordPress (change this to the date of the holiday or the day after, depending on how long the customer wants their promotion to last)
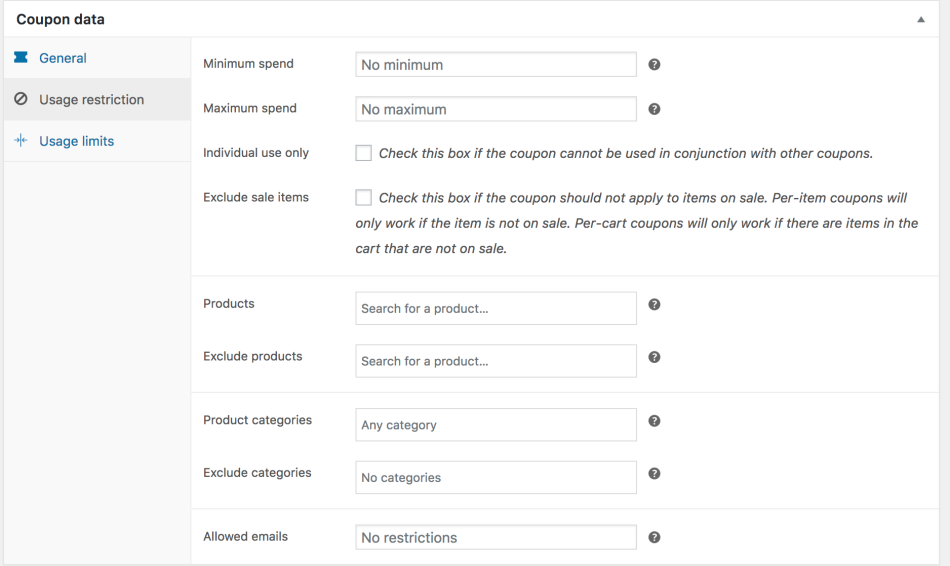
Usage Restriction
- Minimum spend – Allows you to set the minimum subtotal needed to use the coupon. Note: The sum of the cart subtotal + tax is used to determine the minimum amount.
- Maximum spend – Allows you to set the maximum subtotal allowed when using the coupon.
- Individual use only – Tick the box if you don’t want this coupon to be used in combination with other coupons.
- Exclude sale items – Tick the box if you don’t want this coupon to apply to products on sale. Per-cart coupons do not work if a sale item is added afterward.
- Products – Products that the coupon will be applied to, or that need to be in the cart in order for the fixed or percentage discount to be applied.
- Exclude products – Products that the coupon will not be applied to, or that cannot be in the cart in order for the “Fixed cart discount” to be applied.
- Product categories – Product categories that the coupon will be applied to, or that need to be in the cart in order for the fixed or percentage discount to be applied.
- Exclude categories – Product categories that the coupon will not be applied to, or that cannot be in the cart in order for the “Fixed cart discount” to be applied.
- Allowed Emails/Email restrictions – Email address or addresses that can use a coupon. Verified against customer’s billing email. WooCommerce 3.4+ also allows you to include a wildcard character (*) to match multiple email addresses, for example, `*@gmail.com` would make any gmail address.
Leaving “Products” and “Exclude Products” blank allows the coupon to be applied to the entire store.
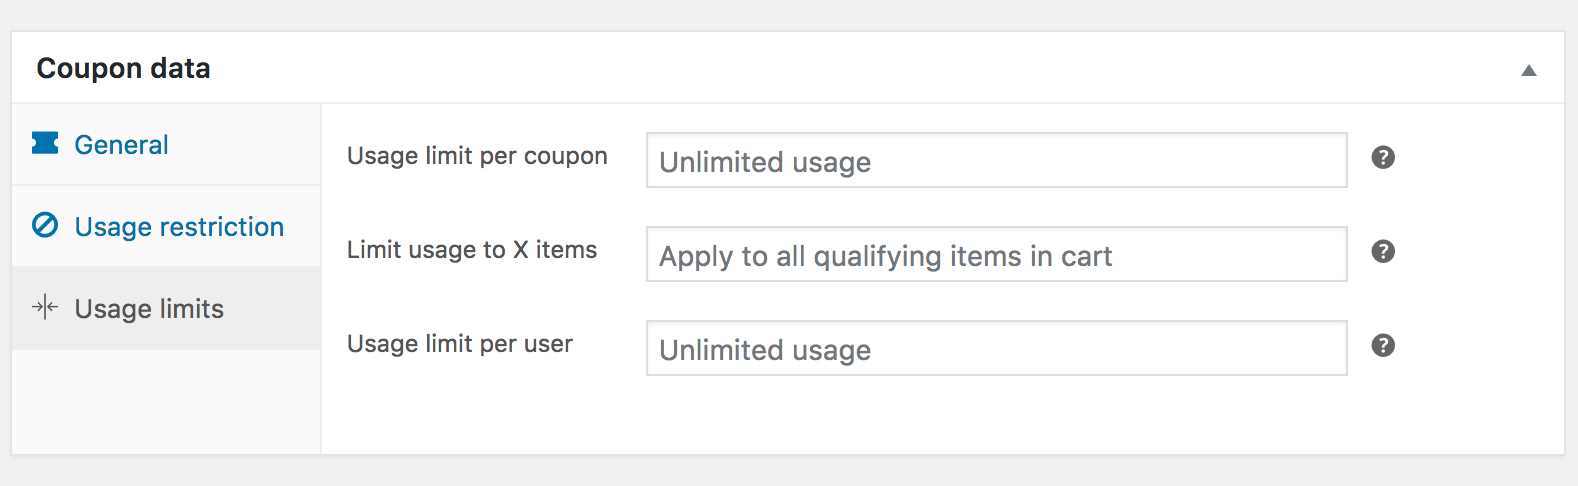
Usage Limits
- Usage limit per coupon – How many times a coupon can be used by all customers before being invalid.
- Limit usage to X items – How many items the coupon can be applied to before being invalid. This field is only displayed if there is one or more products that the coupon can be used with, and is configured under the Usage Restrictions.
- Usage limit per user – How many times a coupon can be used by each customer before being invalid for that customer.
Once you’ve configured all settings, select Publish and your coupon is ready to use.
Applying coupons to each of the promo options
Coupon Option 1 – Code on select items only – e.g. Labor Day Coupon
- General > discount type > select Percentage discount OR Fixed cart discount depending on if the customer wants to give a fixed dollar amount off the entire purchase OR if they want a percentage amount off the entire cart instead
- Usage Restriction > select the products they want the discount to apply to
- Usage Limits > apply settings provided by customer – if none were provided, limit usage per coupon to 1
Coupon Option 2 – Code on entire purchase – e.g. Labor Day Sale
- General > discount type > select Percentage discount OR Fixed cart discount depending on if the customer wants to give a fixed dollar amount off the entire purchase OR if they want a percentage amount off the entire cart instead
- Usage Restriction > leave “Products” and “Exclude Products” blank
- Usage Limits > apply settings provided by customer – if none were provided, limit usage per coupon to 1
Automatic discount applied on entire purchase – e.g. Discount at Checkout
For this option, we’ll be using the WooCommerce Dynamic Pricing Extension instead of the built in coupons. Reference the woo dynamic pricing documentation to develop a better understanding of how order totals pricing works (or read the styleguide documentation on it) – the important parts on how to set it up are listed below.
- Install: Go to GD Core > Plugins > Install and activate Dynamic Pricing
- Configure: Set up an advanced pricing rule based on the total amount spent in the order.
Go to: WooCommerce > Dynamic Pricing > Order totals.
Select Add Pricing Group. You can create more than one group, allowing you to apply one set of criteria to a specific role, and another set of criteria to everyone else. Then, configure the conditions for the rule.
- Admin Title: Give the group a title for the store manager. Customers will not see this.
- Quantities based on: Select either “Cart Total” for the whole cart.
- Applies To: Apply this to Everyone, unless its been requested that specific roles like members can only get the discount.
- Dates: Define a date range for when the prices should be applied. Set the date from the day you publish the coupon to the holiday date.
Finally, the table rates with the pricing rules need to be defined.
- Minimum Order Total: This is the minimum purchase amount in the cart to apply this rule.
- Max Order Total: Maximum amount to apply this rule. You can use an * to create an unlimited upper bound.
- Type: The only option here is ‘Percentage Discount’.
- Amount: The amount to discount. Enter a number, like ’25’.
The ‘+’ symbol at the end of each line in the table rate can be used to add more rules.
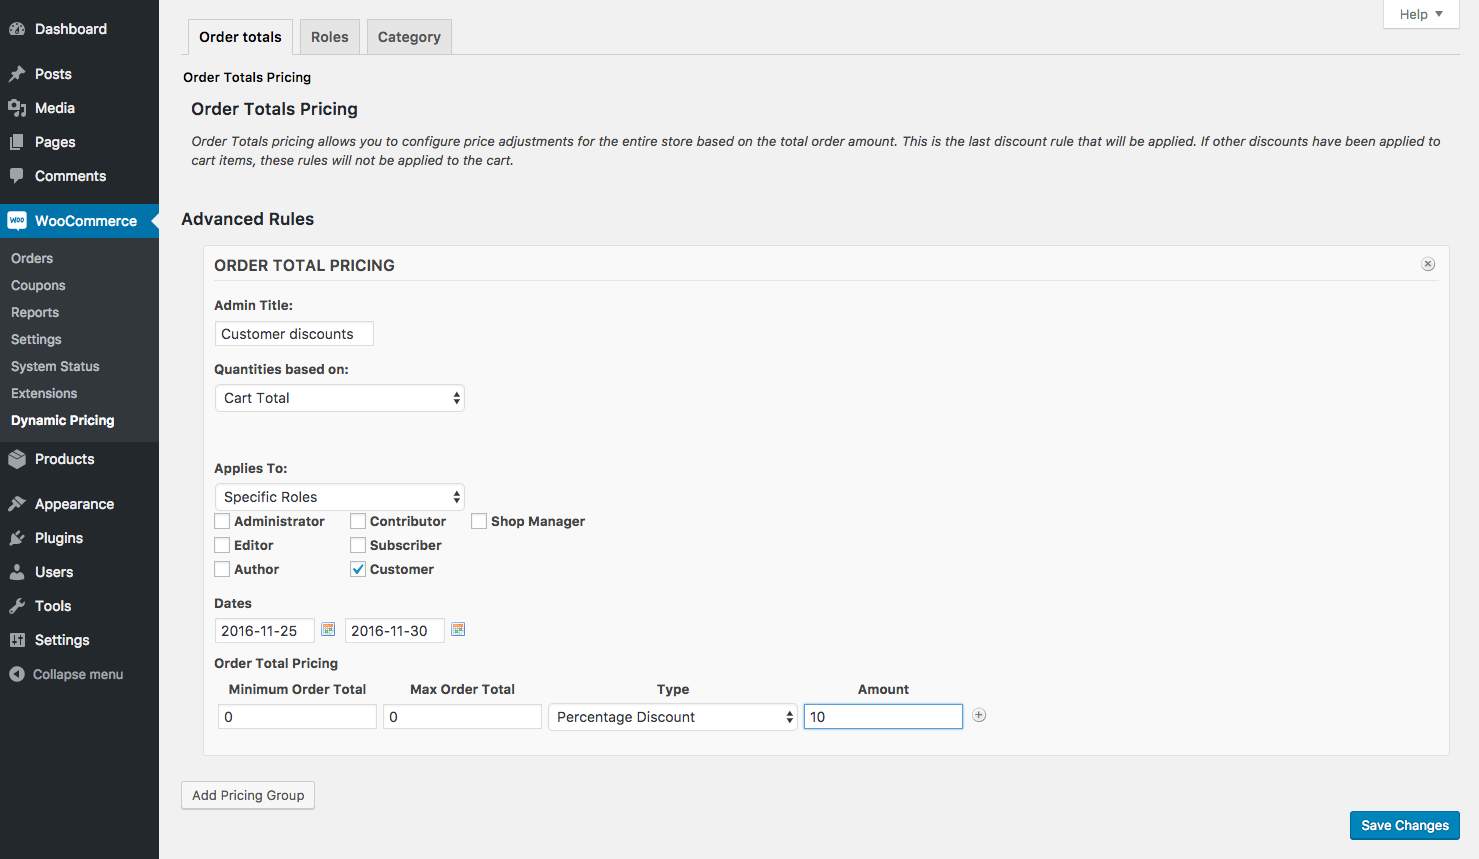
Select Save Changes to enable the rule.
How to add a promotional popup to a WordPress Site
- For a Woo, once your coupon code or order total pricing discount is set up, its time to create the coupon popup.
- Open your homepage in beaver builder
- Click on the plus sign to add a module, search for “popup”
- Drag the UABB “modal popup” module to any existing row or column in the footer (it will only be there for you to edit, and it will look completely different when you preview or publish)
Styling Standards for the Popup Module
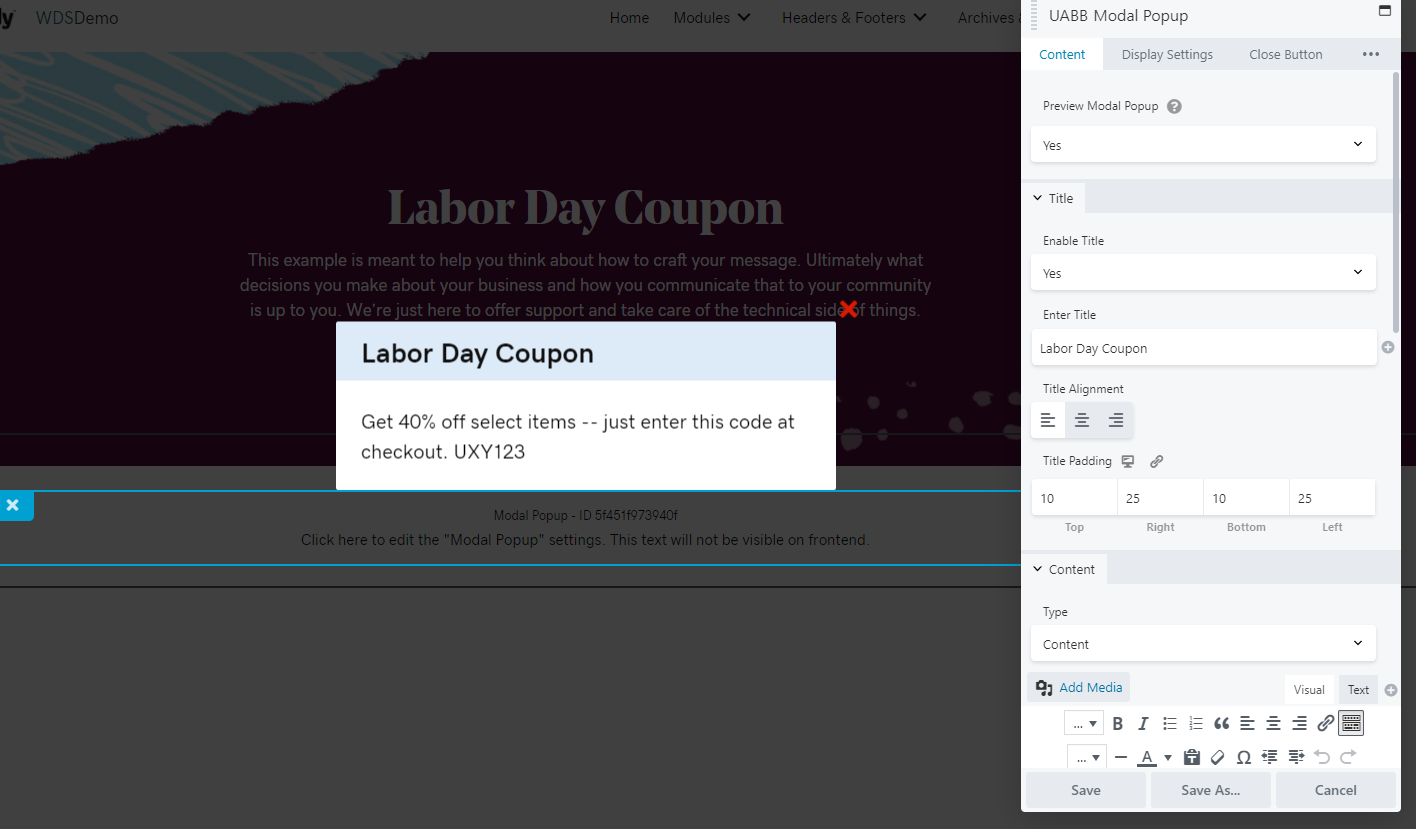
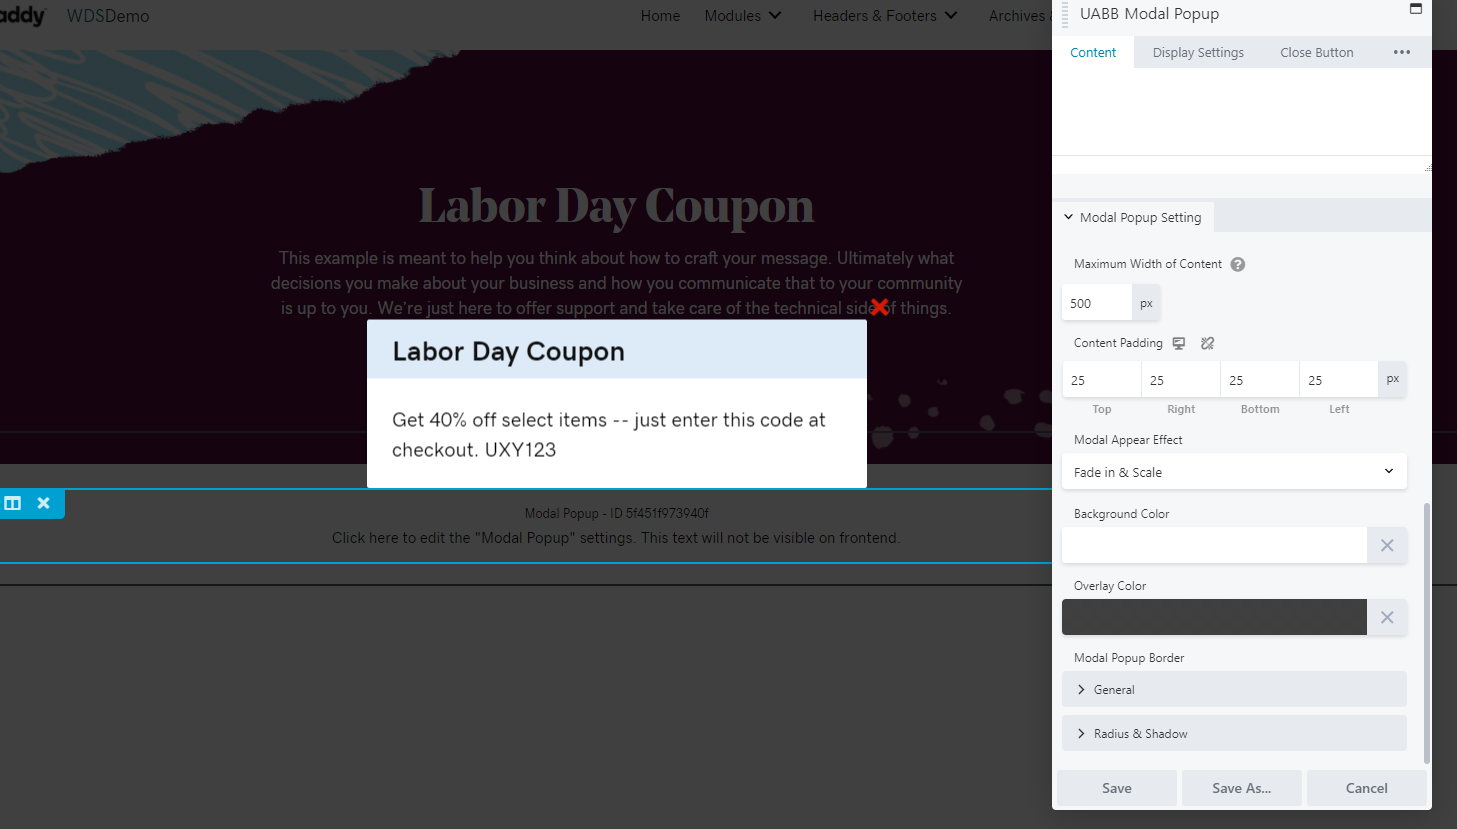
Content Tab
- Enable Title: set to Yes
- Enter Title: paste the title of the promotion or announcement here
- Title Padding: set to top 10, right 25, bottom 10, left 25
- Content Type: content
- Content: add desired text from customer submission
- Content Padding: set to 25px on all sides
- Background Color: set to white
#ffffff
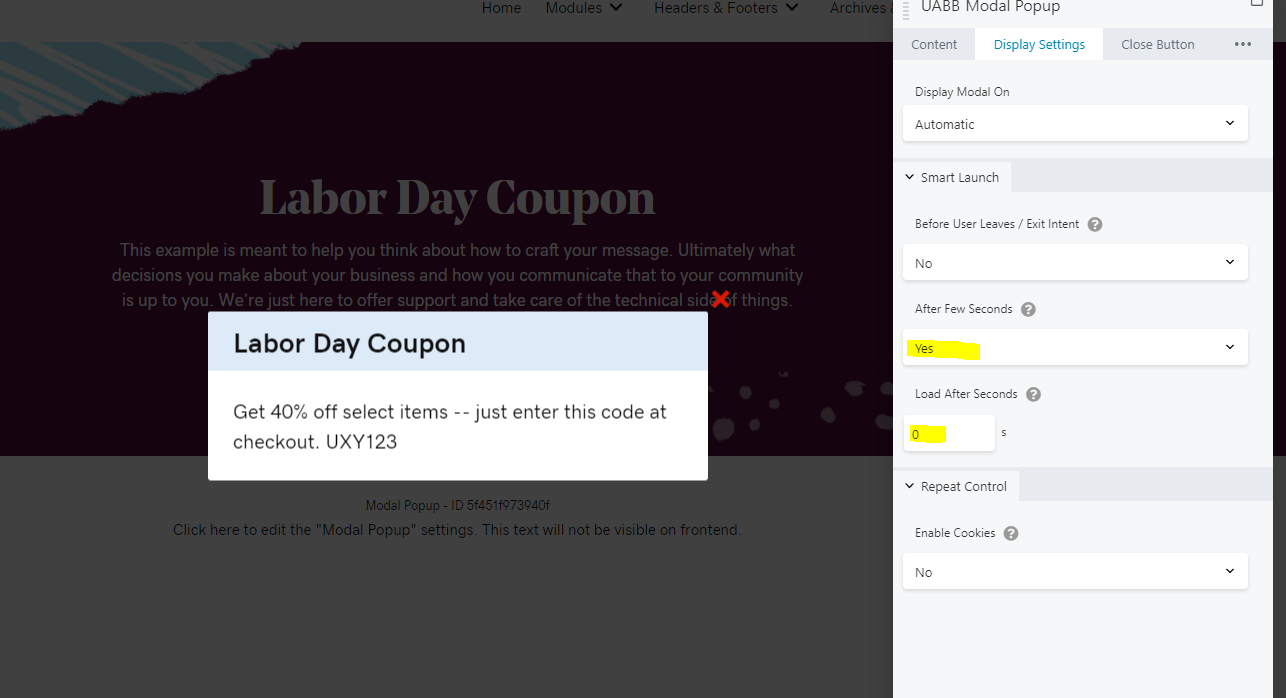
Display Settings Tab
- Display Modal On: set to Automatic
- Before user leaves: set to No
- After a few seconds: set to Yes – then change “load after seconds” to 0s
- Enable Cookies: set to No (since we are placing this on the homepage only, we can leave cookies off so that any number of times someone goes to the page that day they will see the popup)
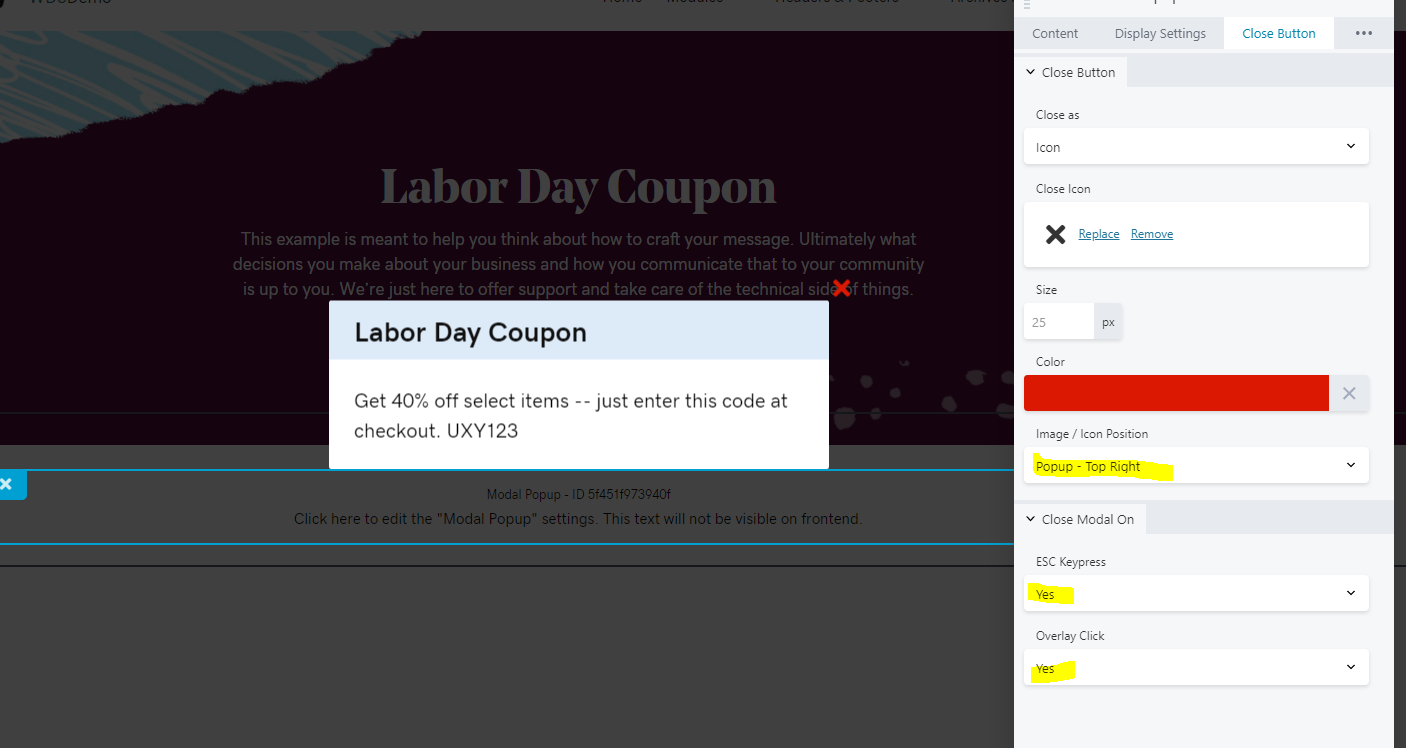
Close Button Tab
- Close as: icon
- Color: change to red
#db1802or other relevant color depending on site color scheme - Image / Icon Position: Popup – Top Right
- Close modal on ESC Keypress: Yes
- Close modal on Overlay Click: Yes
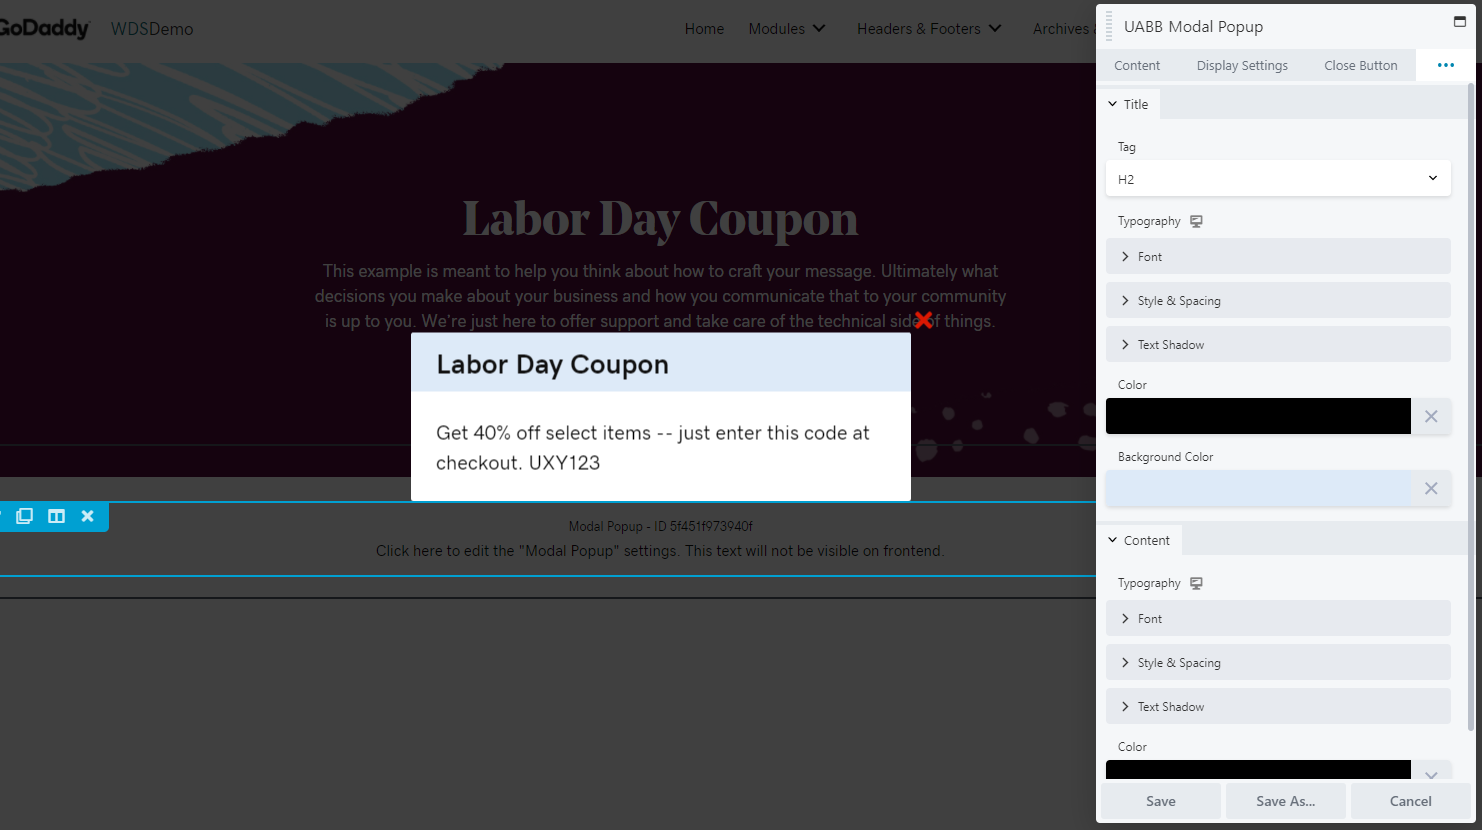
Typography Tab
- Title Tag: set to H2
- Color: set to black
#000000or other relevant color depending on site color scheme - Title Background Color: set to light blue
#ddeaf8or other relevant color depending on site color scheme - Content: set to black
#000000
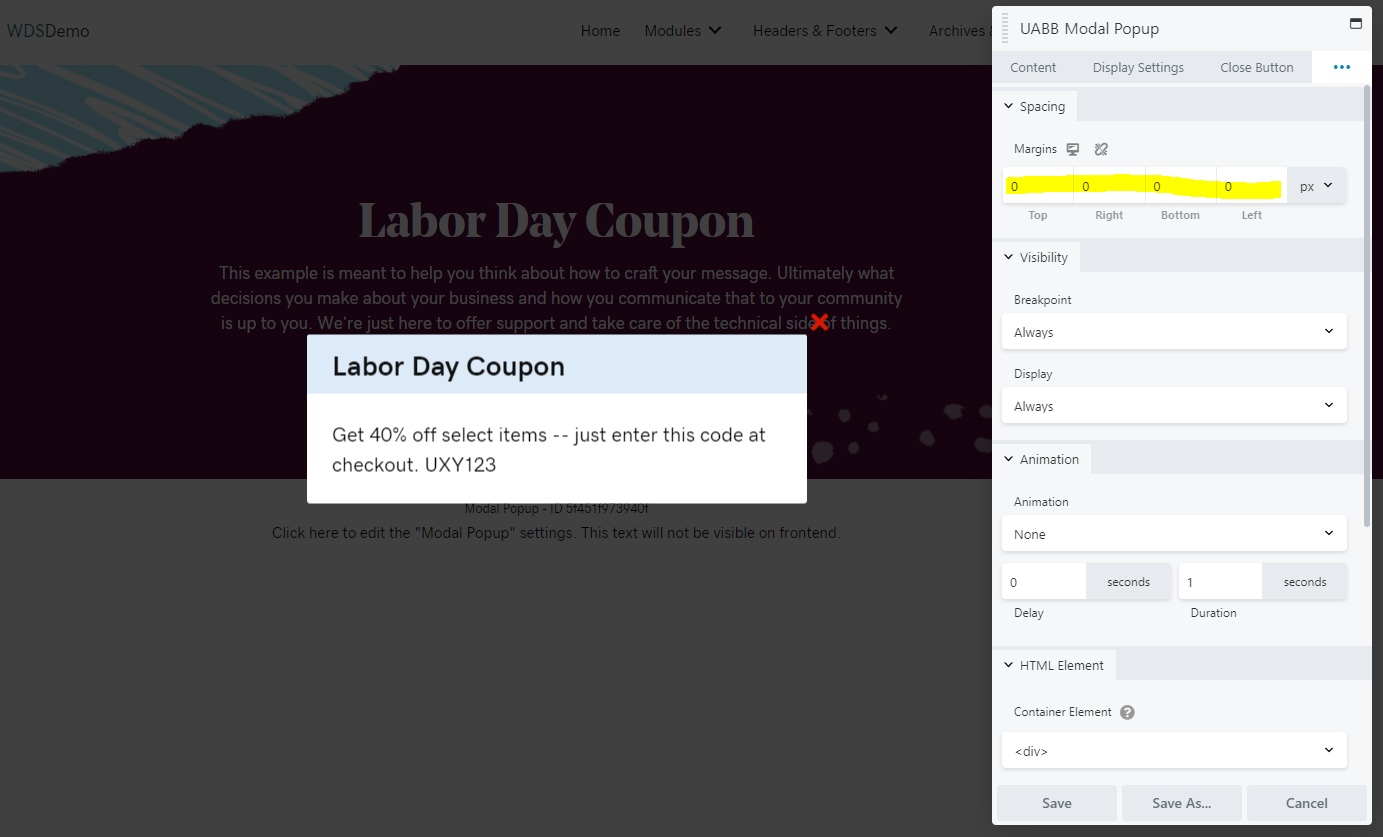
Advanced Tab
- Margins: set top and bottom margins to 0 – even though the banner will not show in this area when the site is published, there will be a 40px height of empty space in its place if you don’t change the default margins of 20px to 0
Note: please don’t target this module with CSS or try to hide it with CSS, it will automatically disappear from the footer when you publish
Preview the popup and publish it live
- Hit the letter “P” on your keyboard OR click “Preview” from the tools menu dropdown – You’ll notice that the module is no longer in the place you put it, rather it pops up in the center of the site
- When you’re happy with how it looks, click “continue editing” and then click “done” followed by “publish”
How to edit or remove a modal popup from your site
Step 1: Where is the popup?
- First you will need to find where your popup is located – is it appearing on only one page, or is it appearing on every page of your site?
- If its appearing on one page, go to that page and click on Beaver Builder, then proceed to step 2
- If its appearing on all of your pages, its either in the header or the footer – go to any page, then hover over beaver builder and click to edit the sitewide header or footer, make sure its in one of these layouts, and then proceed to step 2
Step 2: Modify the module
- To edit, hover over the modal popup module and click the wrench icon to edit the module settings adjust the content, layout, colors, and then click “done” followed by “publish”
- To remove, hover over the modal popup moduleand click the “x” icon to remove – agree to the dialog box and then click “done” followed by “publish”

