
Deactivating Plugins Through the Database
January 5, 2021 | Tips & Tricks, Troubleshooting, WordPress
When debugging a WordPress site, we will often have to deactivate all plugins as a part of our troubleshooting measures. The best method to accomplish this is to deactivate the plugins in the database via phpMyAdmin. This is preferable because the database entry for the plugins only lists the active plugins. The alternative is generally to disable the plugins by renaming the /wp-content/plugins directory. The downside to that option is you have no way of knowing which plugins were activated and which were installed but deactivated when you renamed the directory.
Our customers regularly have plugins they have installed that are not currently active, due to this we need to deactivate plugins via the database as a precaution when this troubleshooting step is necessary.
1) Log into the customer’s GoDaddy account and launch into their hosting plan.
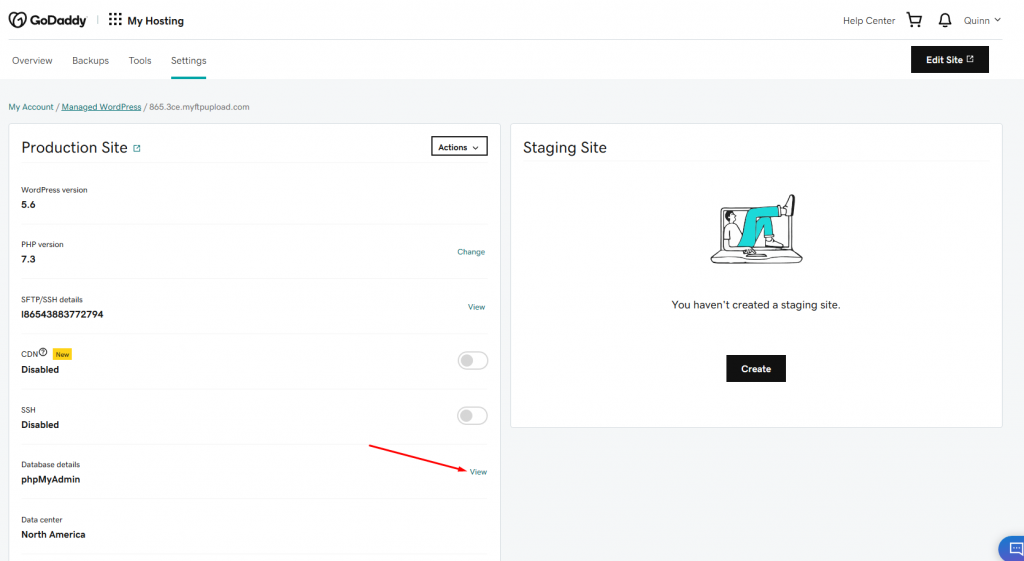
2) Click on the Settings tab.
3) Click on the View link across from phpMyAdmin
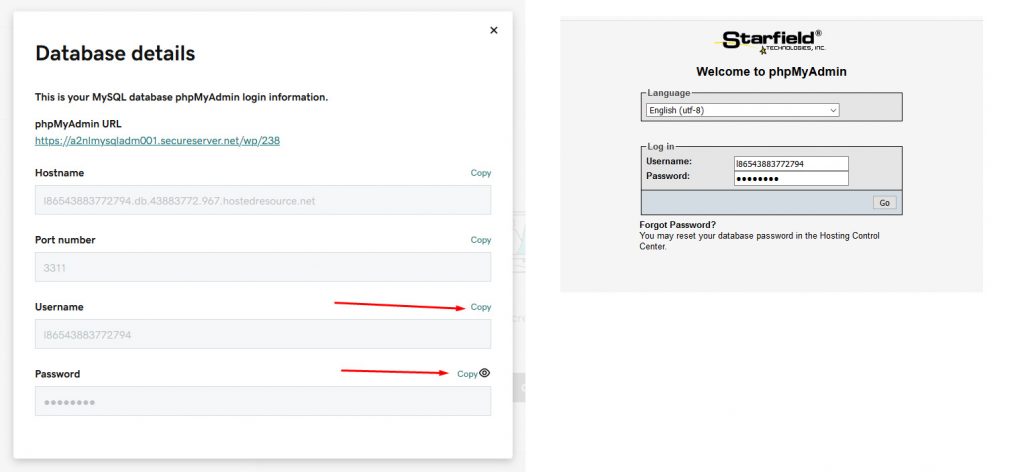
4) Click the phpMyAdmin URL link. I recommend opening this in a new tab

5) Copy the Username and Password from this pop-up to enter on the phpMyAdmin login screen.
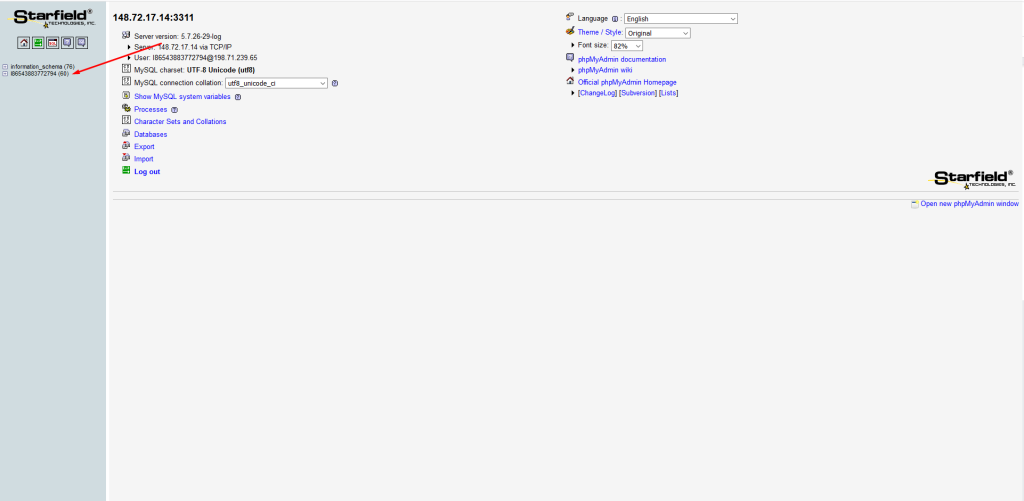
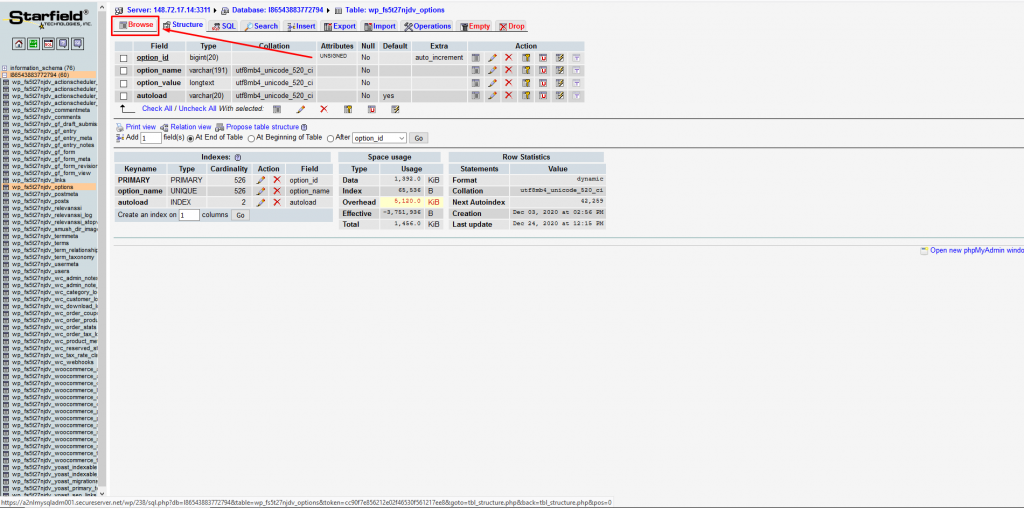
6) You’re now logged into phpMyAdmin. This is the live database for the site, so be very careful not to edit anything other than what you’re instructed to edit. A small error in the database could lead to catastrophic failure on the site. In the left sidebar, there will be links to at least two tables. One is called information_schema and you will ignore this one. You’ll want to click on the other table name, which should match the phpMyAdmin username from the previous step.
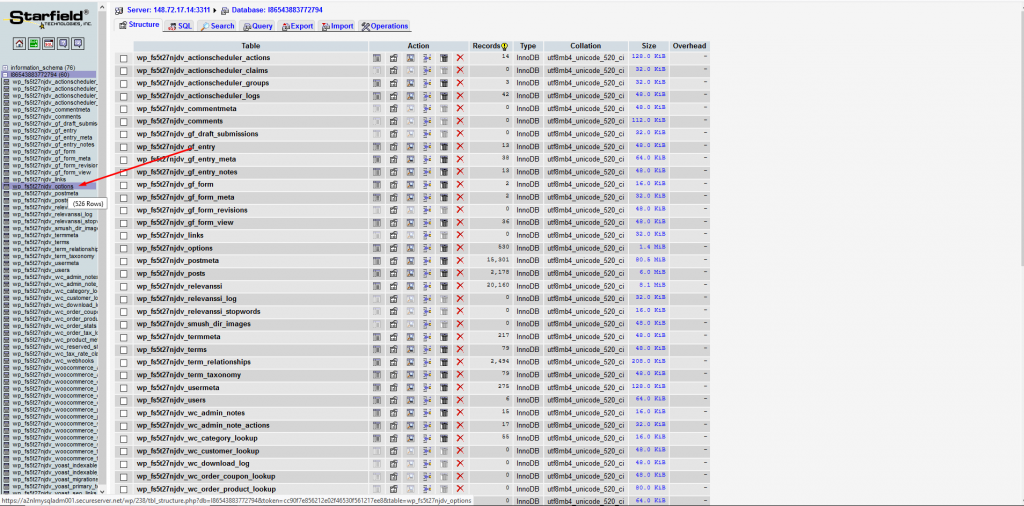
7) Now click on the link that ends in “_options”
8) Now click the Browse tab near the top of the screen
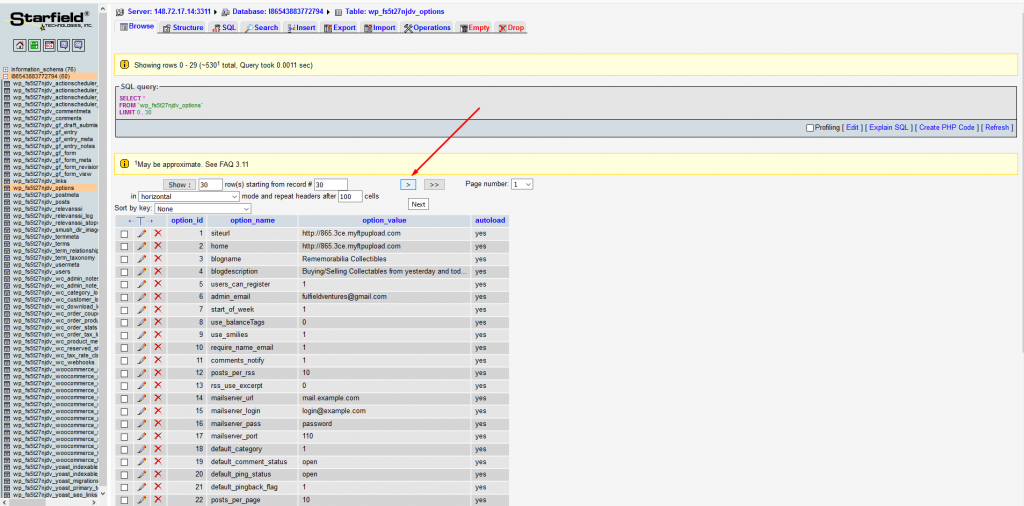
9) Click the Next button to go to the next page
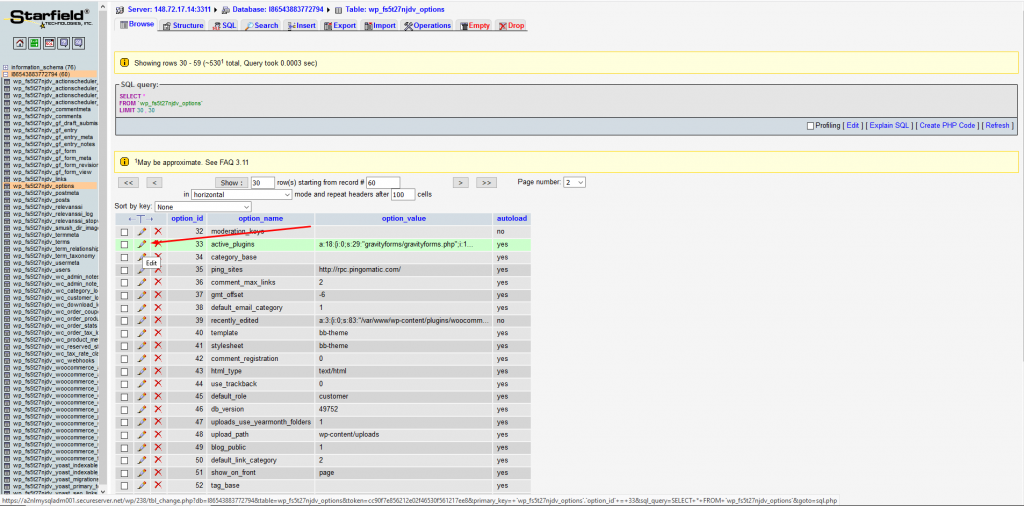
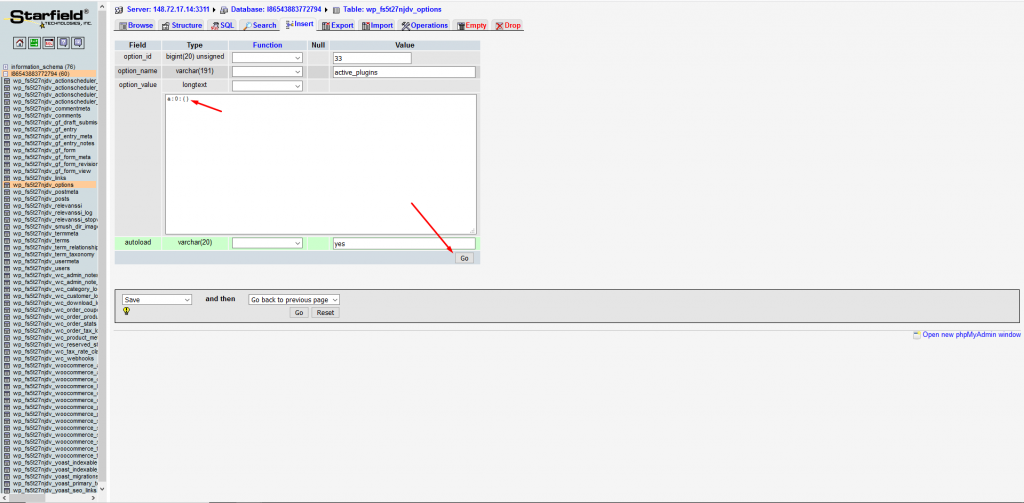
10) Locate the entry that has active_plugins in the option_name column and click on the edit icon
11) You will now have a list of all active plugins on the site. Copy this entire entry and save it somewhere as a reference. This is a list of only the active plugins on the site
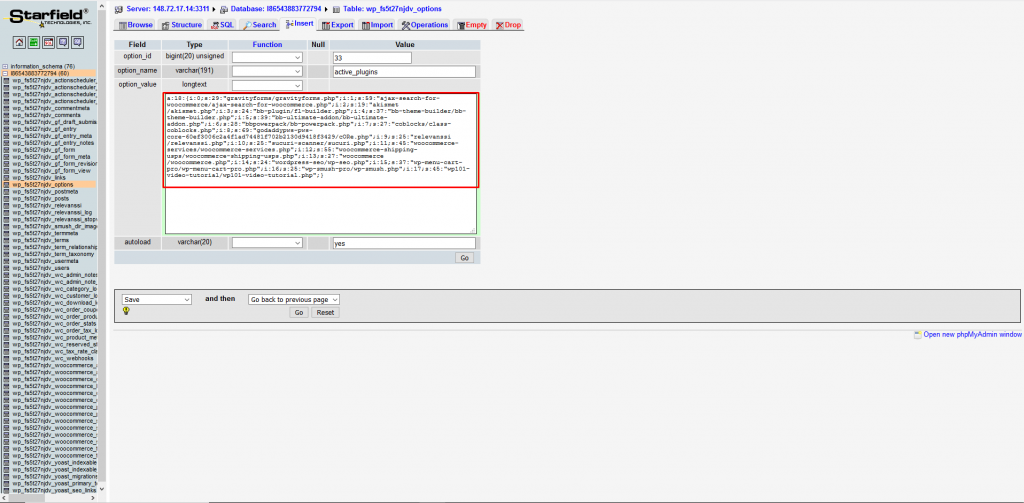
12) Replace the original entry with a:0:{} and then click the Go button
13) The site will now have zero active plugins. Each of the installed plugins will remain installed, they’ll just all be deactivated. When your troubleshooting is done you can either manually activate the plugins by using the list of active plugins you copied in step 11 as a reference or you can paste that back into it’s original location and click the Go button again.