
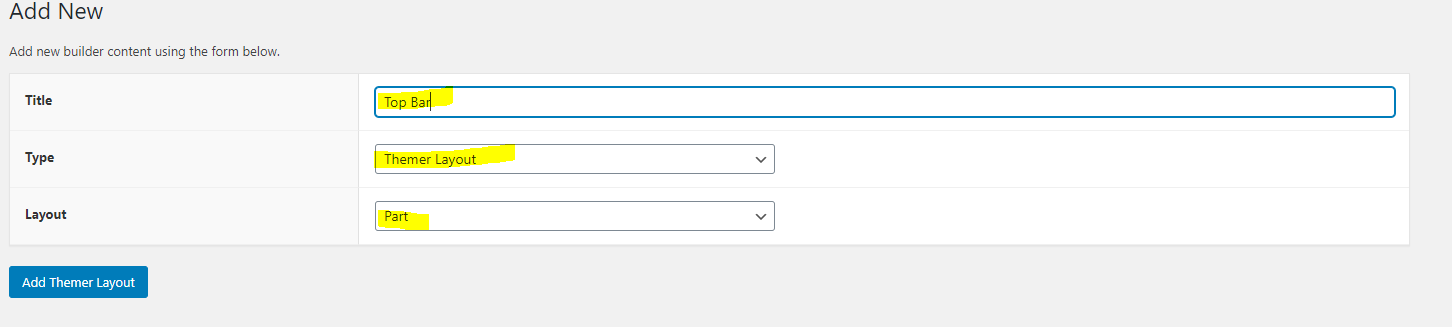
Site Topbar – phone, icons, search [ 2 ]
Category: Site Top Bar | Components: Phone Number, Site Search, Social Icons
Template Details
Header – Topbar – phone, icons, search
Use cases
- Use this top bar with any simple header to add optional header elements upon request e.g. site search, phone, email icon, social icons, etc.
- Don’t use this top bar on a header that already includes search functionality
Component breakdown
- Phone & Icons – template uses a custom HTML module with the phone tel link in it along with a bunch of common icons like email, facebook, twitter, etc. The reason these items are in an HTML module rather than in an icon module with text and an icon group module is because the HTML is way more lightweight and responsive.
- Site Search – template uses a PowerPack search module set to its classic style, taking up the space provided by the column its in. Feel free to swap this search module with an HTML module containing a shortcode for the Search and Filter plugin if specific parameters are needed or if only a specific post type should be included in the search results.
Custom code
This header layout uses custom HTML and CSS. If you click the HTML module, you’ll find the following code:
Note: This section contains HTML. Importing the template can cause the custom code to break – after importing the template, you will want to replace the HTML in the module with the fresh HTML below.
<div class="headone">

    <a class="socicon" href="tel:1234567890">
        <i class="fas fa-phone-alt"></i> (123) 456-7890
    </a>

</div>

<div class="headtwo">

    <a class="socicon" href="mailto:email@site.com">
        <i class="fas fa-envelope"></i>
    </a>

    <a class="socicon" href="#" target="_blank">
        <i class="fab fa-facebook-f"></i>
    </a>

    <a class="socicon" href="#" target="_blank">
        <i class="fab fa-twitter"></i>
    </a>

    <a class="socicon" href="#" target="_blank">
        <i class="fab fa-linkedin-in"></i>
    </a>

<!--
    <a class="socicon" href="#" target="_blank">
        <i class="fas fa-map-marker-alt"></i>
    </a>

    <a class="socicon" href="sms:0000000000">
        <i class="fas fa-mobile-alt"></i>
    </a>

    <a class="socicon" href="#" target="_blank">
        <i class="fas fa-user"></i>
    </a>

    <a class="socicon" href="#" target="_blank">
        <i class="fas fa-heart"></i>
    </a>

    <a class="socicon" href="#" target="_blank">
        <i class="fab fa-instagram"></i>
    </a>

    <a class="socicon" href="#" target="_blank">
        <i class="fab fa-pinterest-p"></i>
    </a>

    <a class="socicon" href="#" target="_blank">
        <i class="fab fa-youtube"></i>
    </a>

    <a class="socicon" href="#" target="_blank">
        <i class="fab fa-snapchat-ghost"></i>
    </a>

    <a class="socicon" href="#" target="_blank">
        <i class="fab fa-twitch"></i>
    </a>

    <a class="socicon" href="#" target="_blank">
        <i class="fab fa-tiktok"></i>
    </a>

    <a class="socicon" href="#" target="_blank">
        //replace this string with any icon from
        fontawesome.com/icons
    </a>
-->

</div>- You can use any of the preloaded icons in the commented out section to display icons as needed.
- All items loaded in the div with the class “headone” will appear before the gray divider line with the phone number, and all items loaded in the div with the class “headtwo” will appear after the gray divider line.
- While in the builder, click the tools dropdown at the top left of the screen > then click Layout CSS / JavaScript – the CSS for the CSS styling applied to the custom HTML
.head-custom-icons .fl-html {
    display: flex;
    align-items: center;
    font-size: 16px;
    /*------uncomment for right align------*/
    justify-content: flex-start;
    /*------uncomment for left align------*/
    /*justify-content: flex-end; */
    /*------uncomment for center align------*/
    /*justify-content: center; */
}
.head-custom-icons .fl-html a {
    /*change colors as needed ---
    --- remove color style to keep site's default link color*/
    color: #111111;
}
.head-custom-icons .fl-html a:hover {
    /*change colors as needed ---
    --- remove color style to keep site's default link hover color*/
    color: #444444;
}

/*------uncomment for icons on the left of phone------*/
/* .headtwo {
    padding-right: 8px;
    margin-right: 8px;
    border-right: 1px solid #d6d6d6;
} */
/*------uncomment for icons on the right of phone------*/
.headtwo {
    padding-left: 8px;
    margin-left: 8px;
    border-left: 1px solid #d6d6d6;
}
.headone a, .headtwo a {
    margin: auto;
    padding: 0 4px;
}
How to Use
Download & Import Templates
- Choose one of the available template packages to download from the sidebar to the right
- Click the button to download the .xml for the desired template package
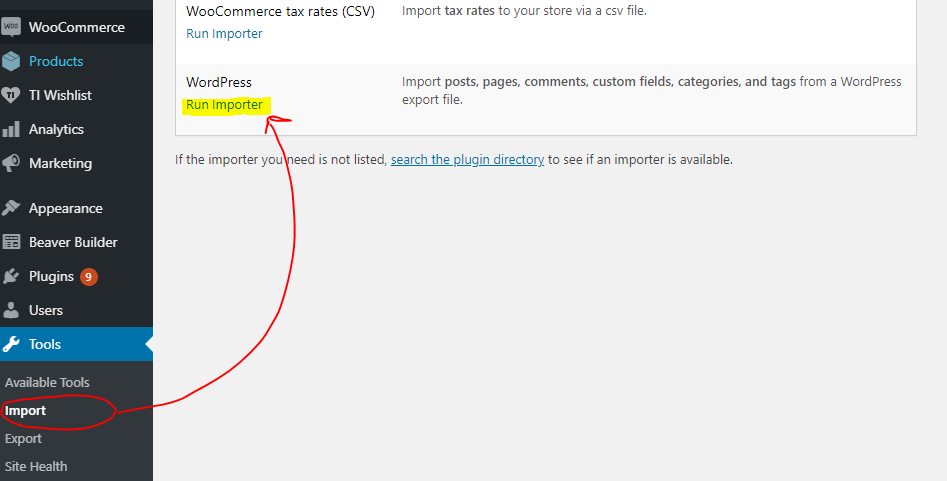
- Go to the site you want to import the template on, once you've installed GD Core and set up all the required plugins
- Go to the dashboard > tools > import - then at the bottom, under WordPress click "install now" > then click "run importer"
- Select your downloaded template package .xml from the "choose file" button > then click "upload file and import"
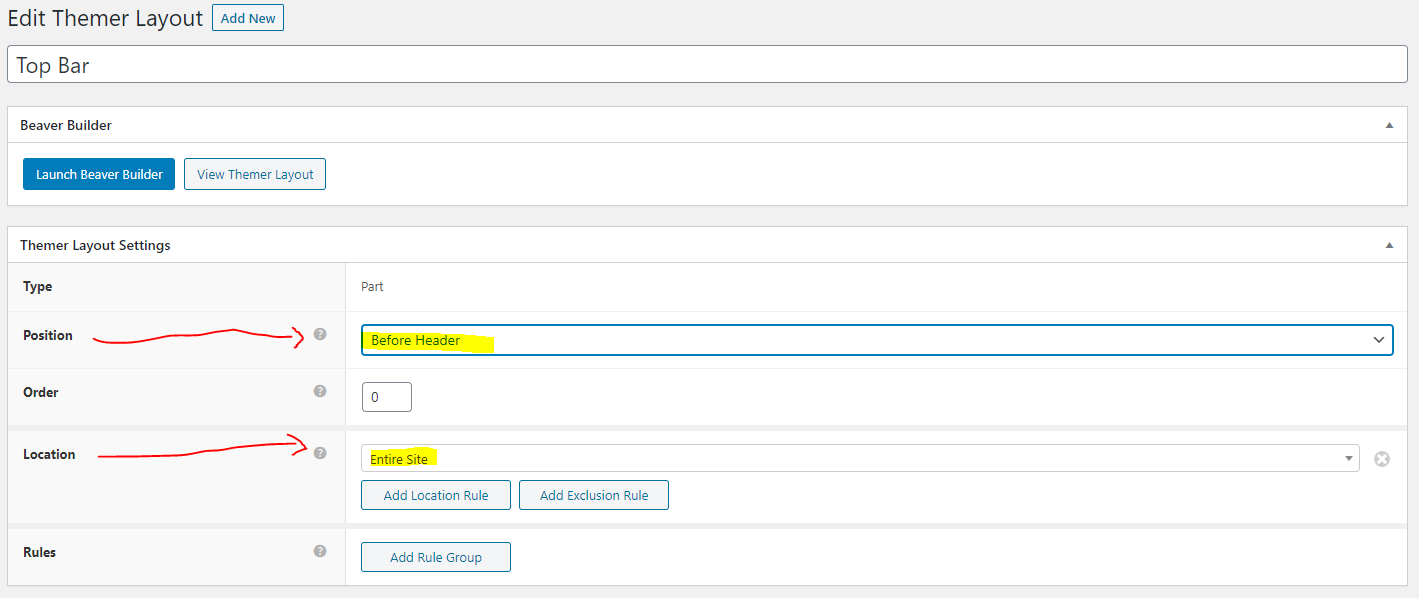
Step 1

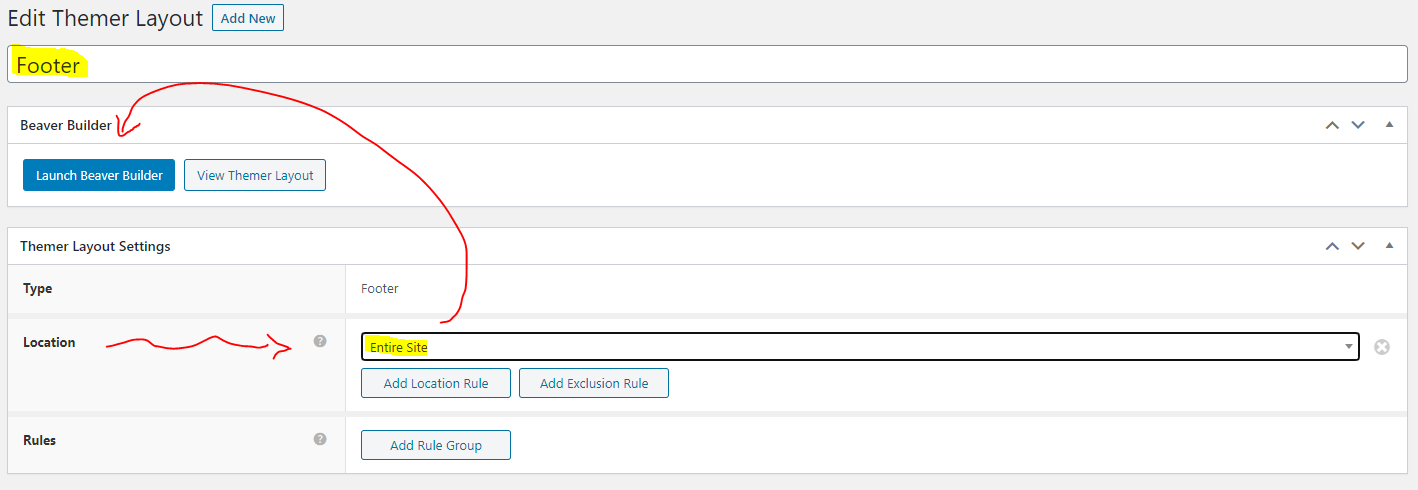
Step 2
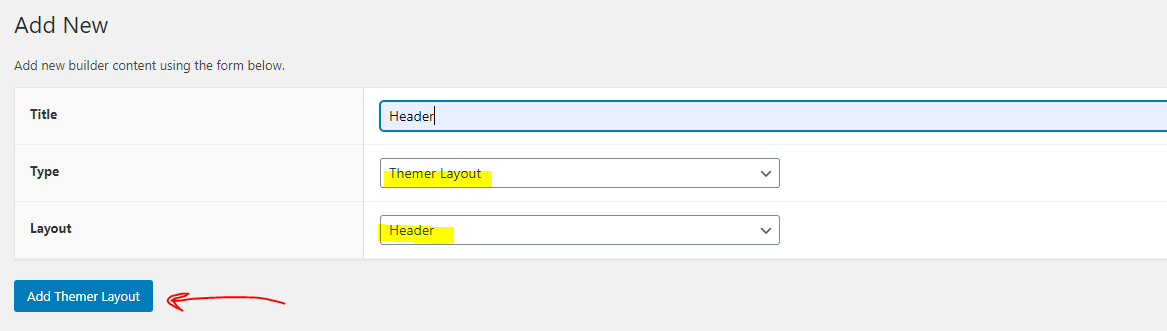
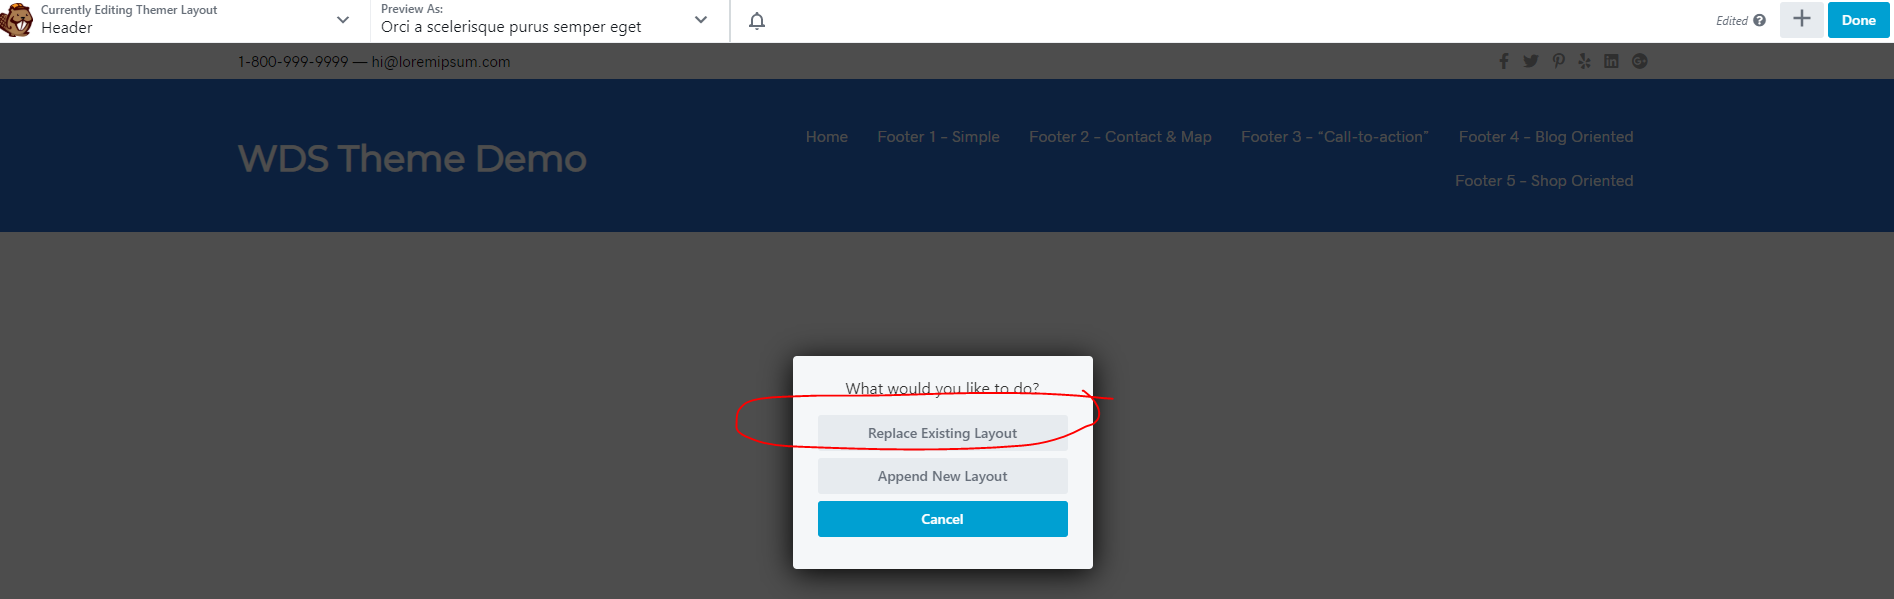
Apply Templates to Layouts

Note:
Feel free to adjust the widths of the columns to work with whatever changes you make to the template's components.
Make sure to check these adjustments on tablet and mobile responsive views as well to make sure the layouts appear correct on all screen sizes.
Table of Contents
Add a header to begin generating the table of contents