
Header Middle – logo, hamburger, cta, search, icons [ 6 ]
Category: Site Header | Components: Call-to-Action, Hamburger Menu, Logo, Site Search, Social Icons
Template Details
Header Middle – logo, hamburger, cta, search, icons
Use cases
- Sites with lots of menu items or menu links with long character lengths
- Sites that want a Call-to-action button in the header on every page separate from the menu
Component breakdown
- Logo – template uses a standard photo module with the link set to site URL via field connection which can be swapped with an info box for a text business name, an icon with text, or an image with text – make sure that if you swap the photo module for an infobox the link is set to complete box and site URL via field connection
- Hamburger Menu – template uses a PowerPack advanced menu module with responsive toggle hamburger set to be always visible. The responsive display is set to off-canvas from left and the hamburger/menu text alignment is also set to left.
- The menu module will appear empty unless you have a menu created and ready to select from the dropdown in the module – so make sure you create a menu first
- Feel free to change the menu alignment to the right or swap settings as needed.
- If you change the hamburger menu alignment to the right instead, make sure you update the off-canvas to appear from the right as well.
- CTA – template uses a standard button module set to full width, taking up the space provided by the column its in. Feel free to swap this button with another module if needed.
- Site Search – template uses a PowerPack search module set to its minimalist style, taking up the space provided by the column its in. Feel free to swap this search module with an HTML module containing a shortcode for the Search and Filter plugin if specific parameters are needed or if only a specific post type should be included in the search results.
- Icons – template uses the standard icon group module – the icons can be added to/removed or swapped out for any other icons from the included icon libraries.
Custom code
This header layout doesn’t use any custom HTML or CSS.
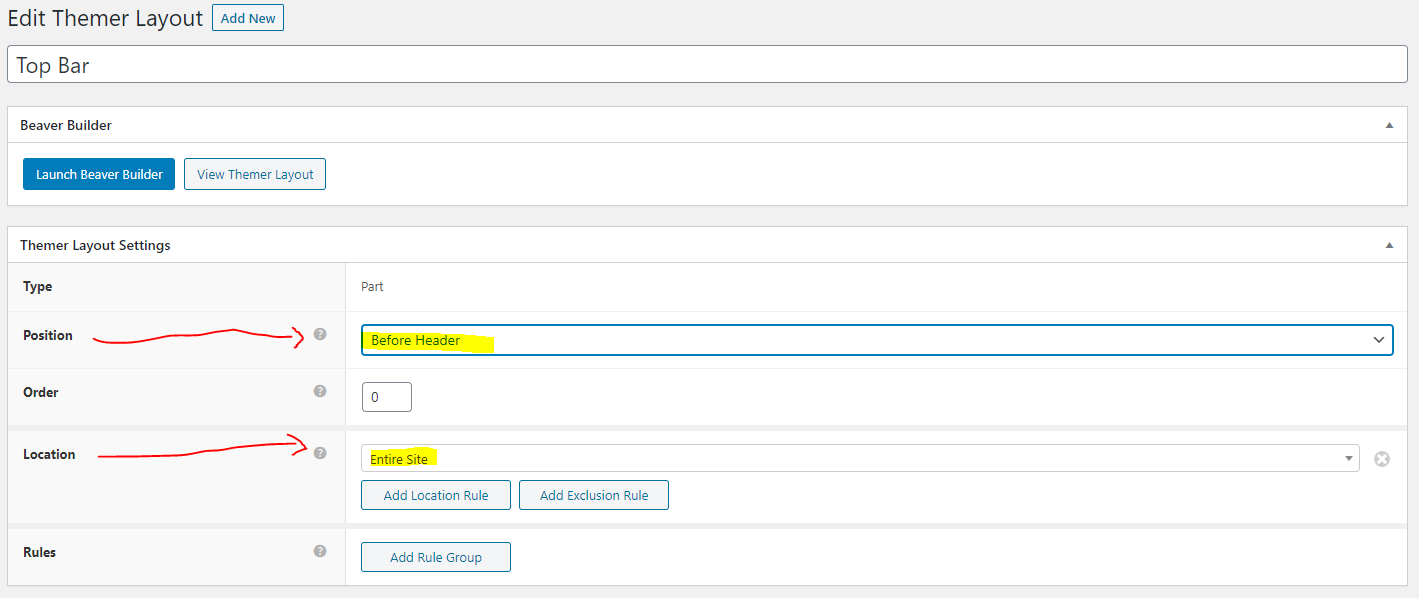
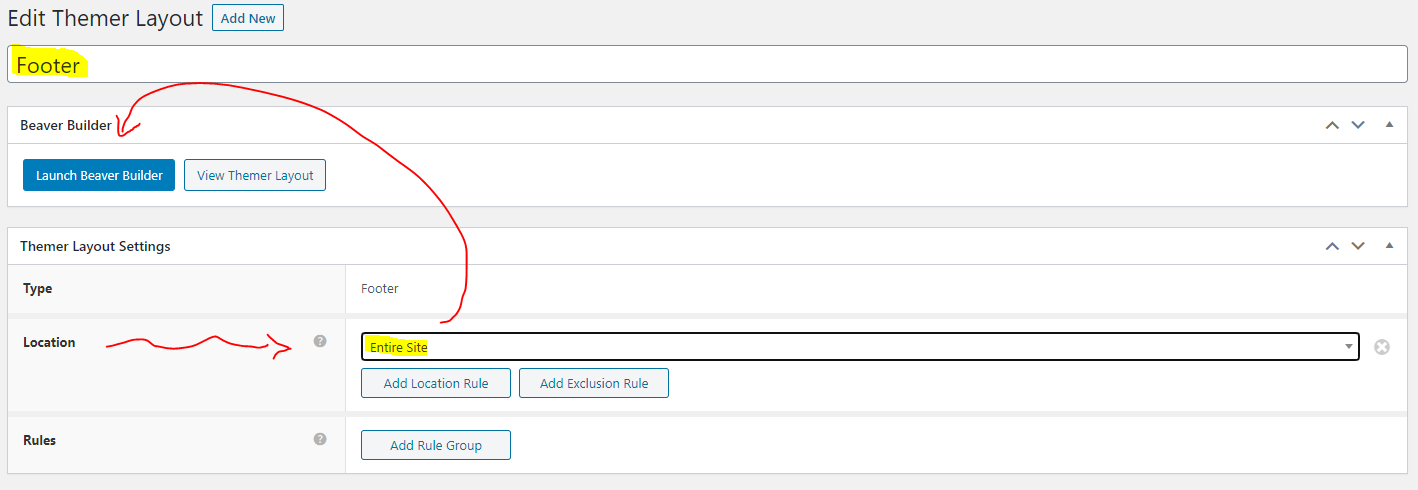
How to Use
Download & Import Templates
- Choose one of the available template packages to download from the sidebar to the right
- Click the button to download the .xml for the desired template package
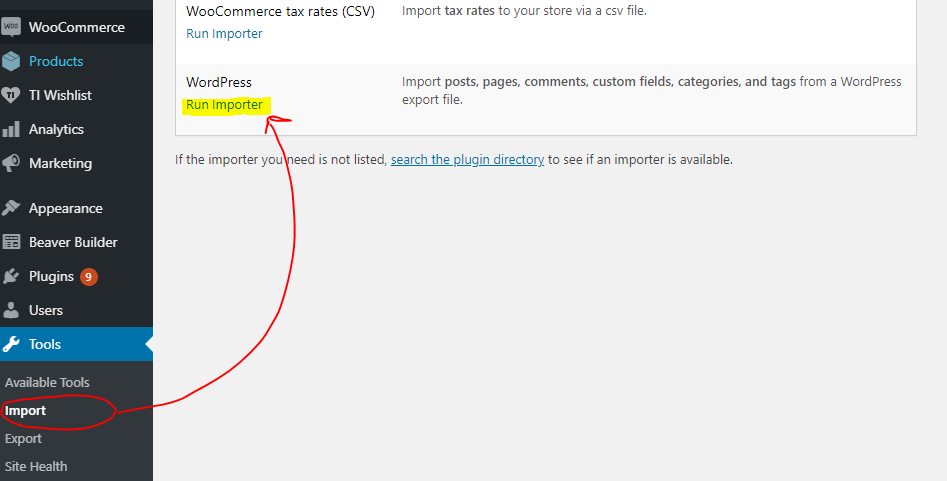
- Go to the site you want to import the template on, once you've installed GD Core and set up all the required plugins
- Go to the dashboard > tools > import - then at the bottom, under WordPress click "install now" > then click "run importer"
- Select your downloaded template package .xml from the "choose file" button > then click "upload file and import"
Step 1

Step 2
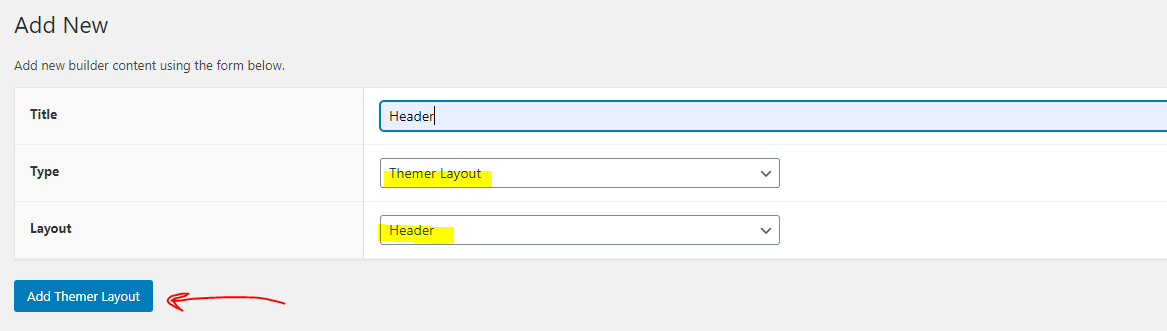
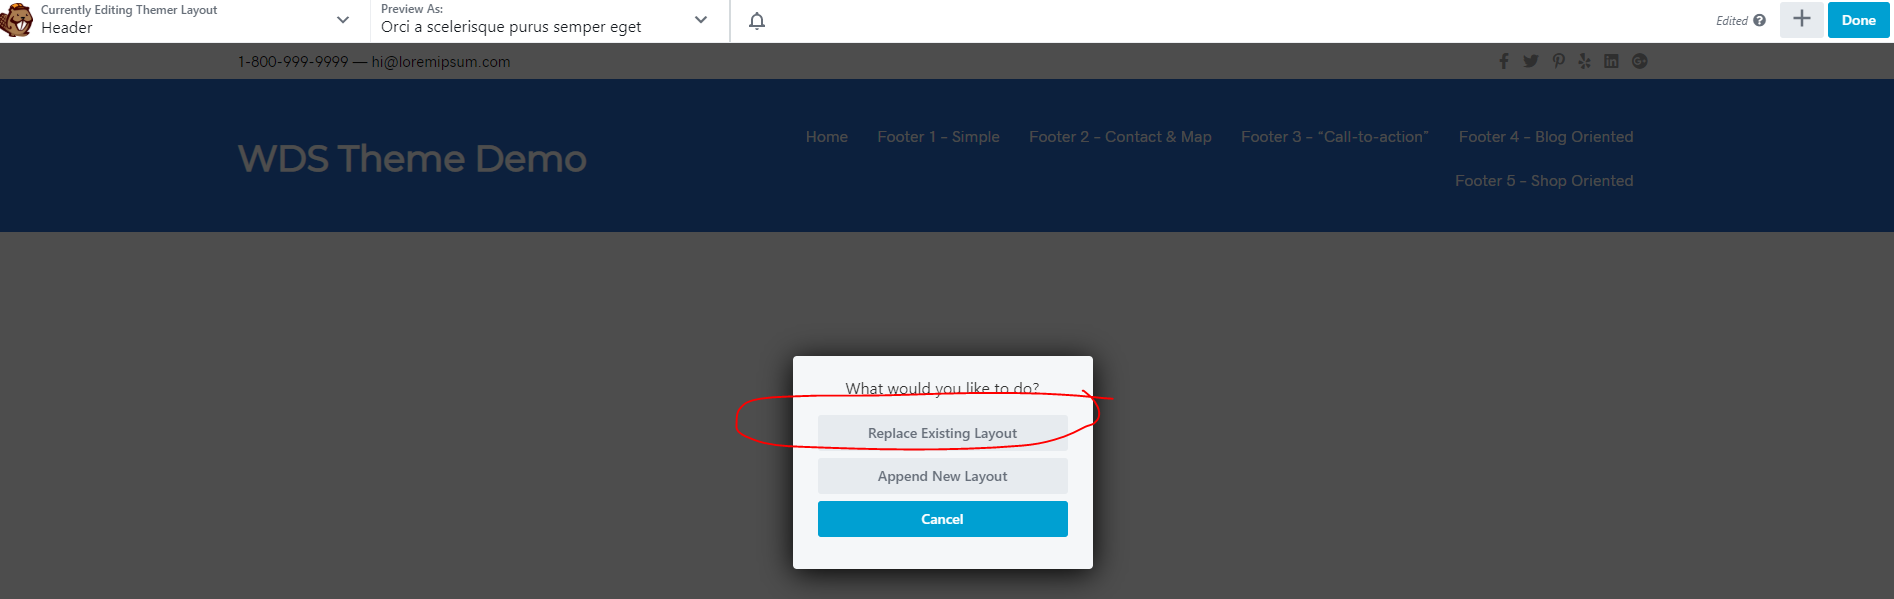
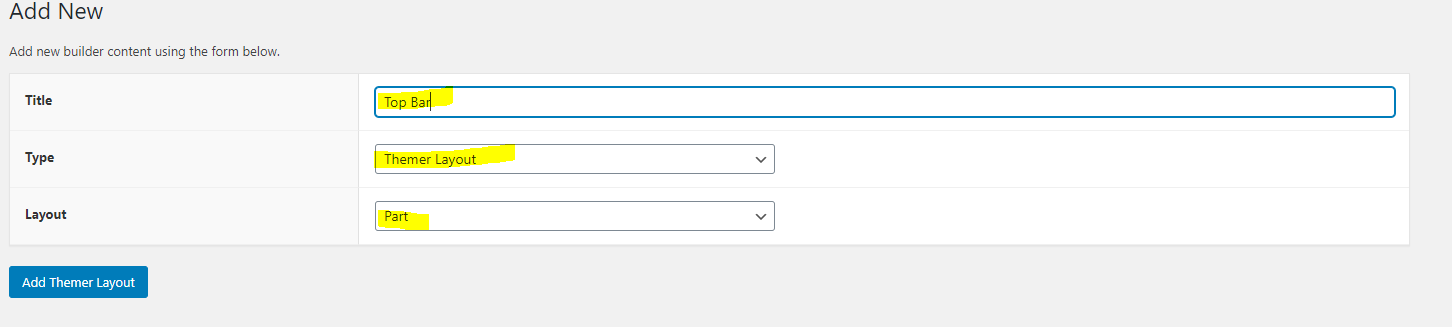
Apply Templates to Layouts

Note:
Feel free to adjust the widths of the columns to work with whatever changes you make to the template's components.
Make sure to check these adjustments on tablet and mobile responsive views as well to make sure the layouts appear correct on all screen sizes.
Table of Contents
Add a header to begin generating the table of contents