To allow for increasing memory limit without needing to submit a technical clarification, we are providing a way for each builder to complete the PHP Memory limit increase on their own.
We will be providing a .user.ini to be uploaded to the server. Without FTP credentials, you’ll need to install a new plugin called File Manager (wp-file-manager). This plugin will allow you to drag and drop the file directly into the File Manager plugin.
Listed below are the steps for this process:
1. Login to the WP Admin
2. Visit Plugins –> Add New –> Search for “File Manager”

3. Click “Install Now” and then “Activate” once it’s done installing.
4. Click WP File Manager in the sidebar on the left side of the dashboard.

5. This will bring you to the main File Manager screen.
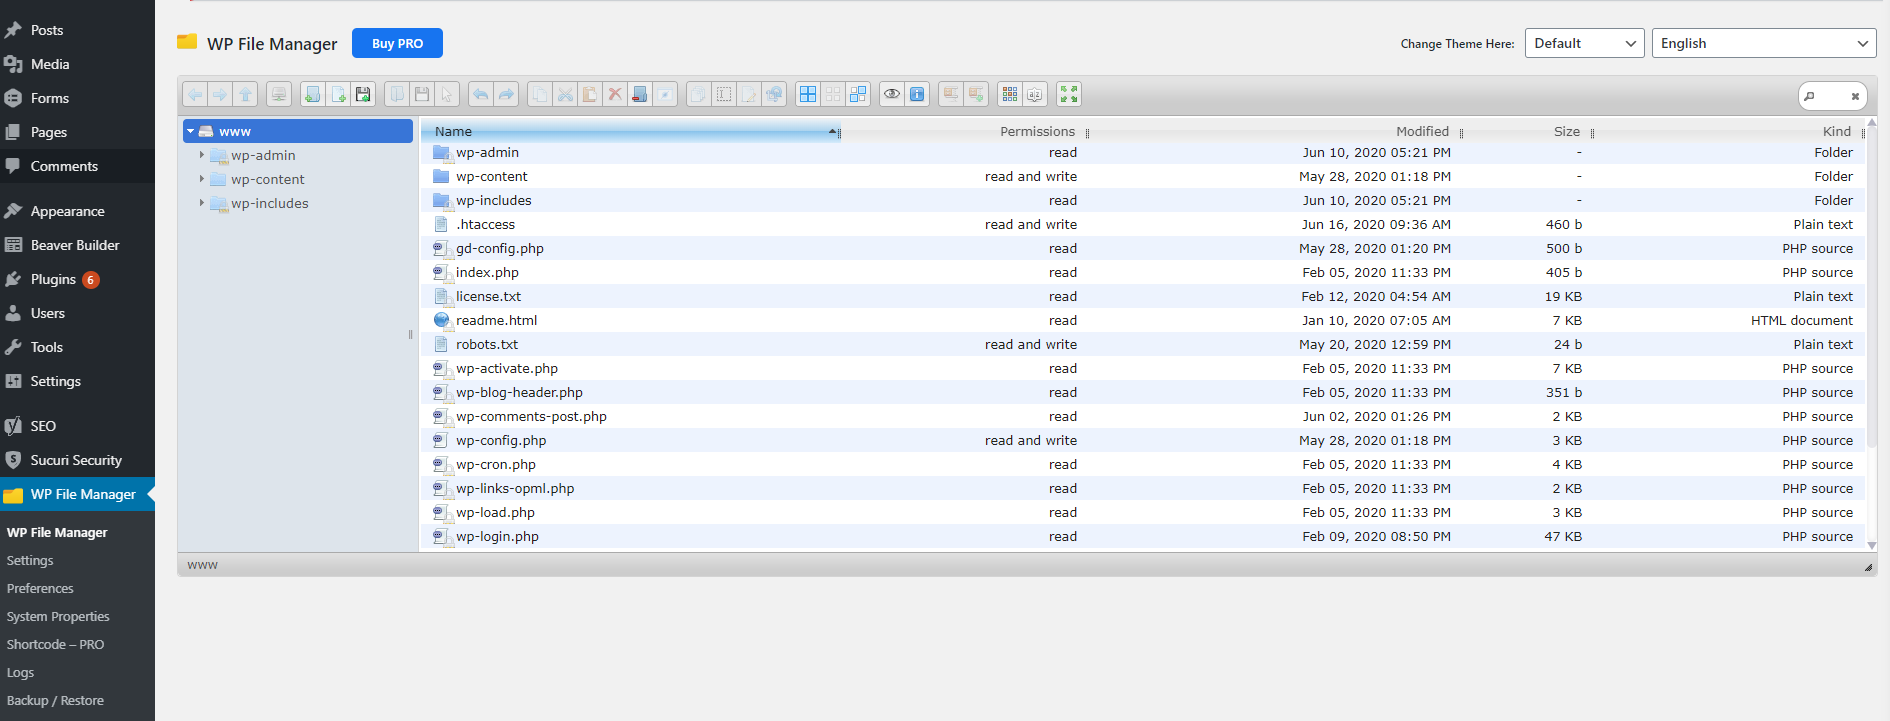
Download the .user.ini file that we provided using the button at the bottom of this post and follow the important steps below it before proceeding with step 6.
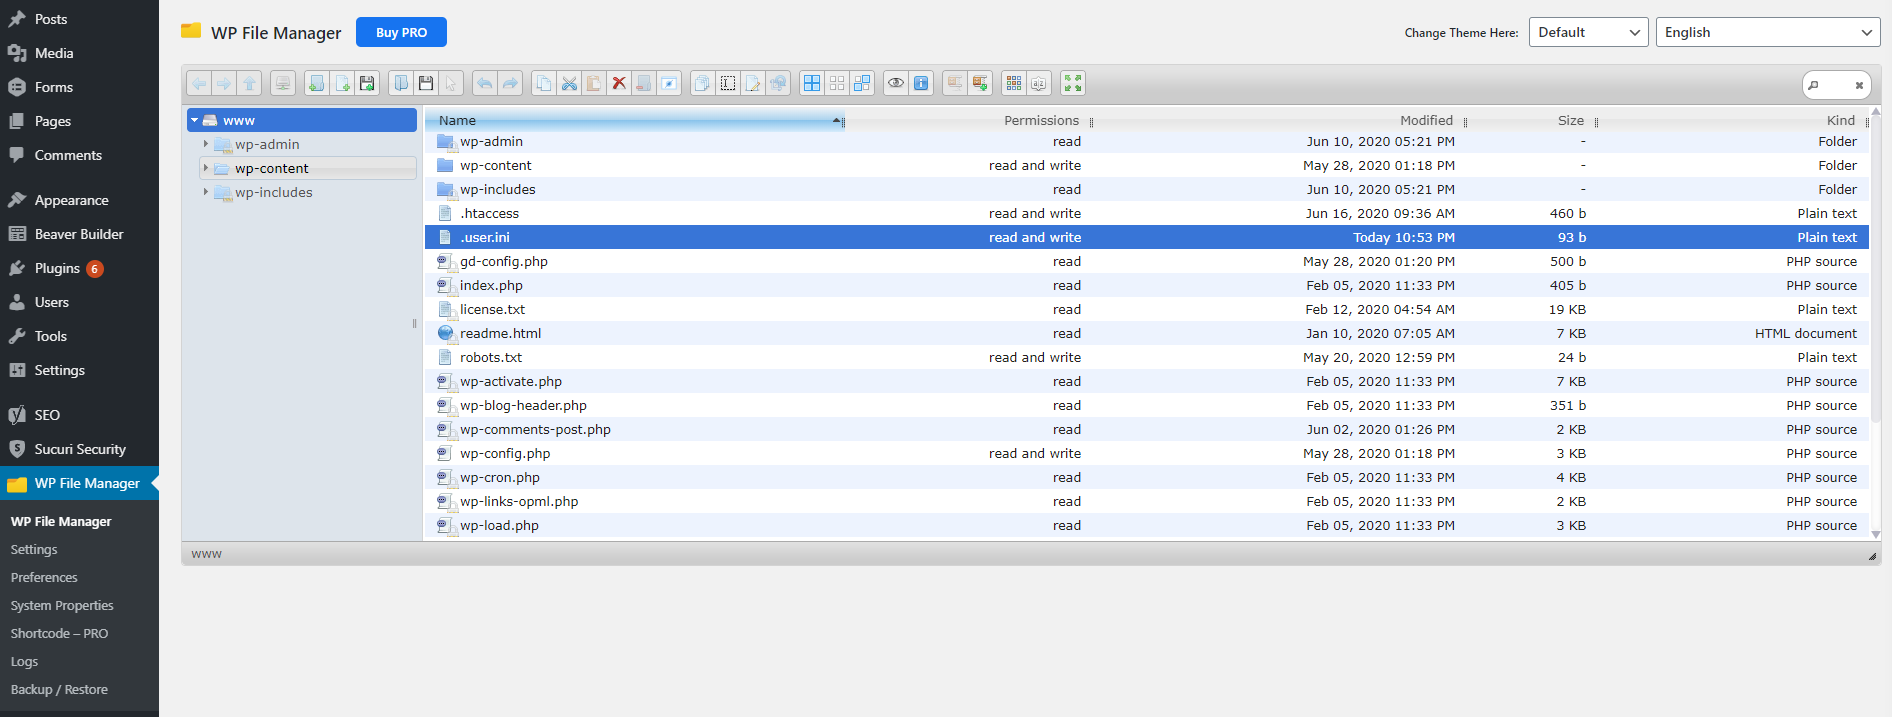
6. Once you are on this screen, you’ll then drag and drop the .user.ini file that we’ve provided.
7. After you upload it, you’ll see the .user.ini automatically be highlighted.
8. Now that you have that complete, click on “Plugins.”
9. Deactivate and Delete the File Manager Plugin.
A few guidelines for using this plugin:
- You are only to use it for uploading the GoDaddy Builder provided
.user.ini, and not editing or uploading any other files. - Do not edit the
.user.inifile that we have provided you. - Remember once you have uploaded the
.user.iniyou need to delete the File Manager plugin. - If you need to send a technical clarification, you will need to tell us if you have uploaded a
.user.inior not.
Before step 6, do the following:
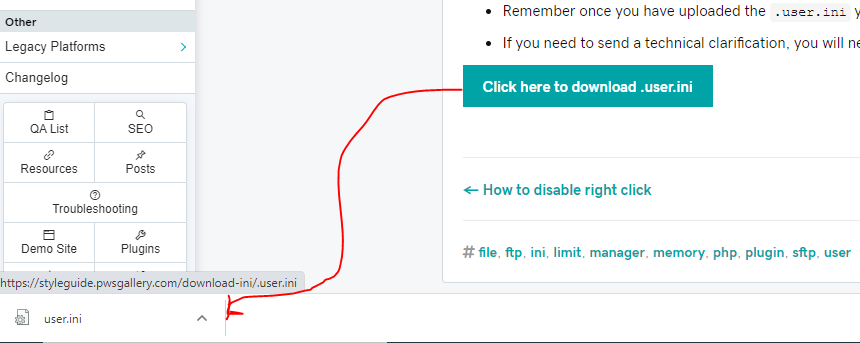
Important!
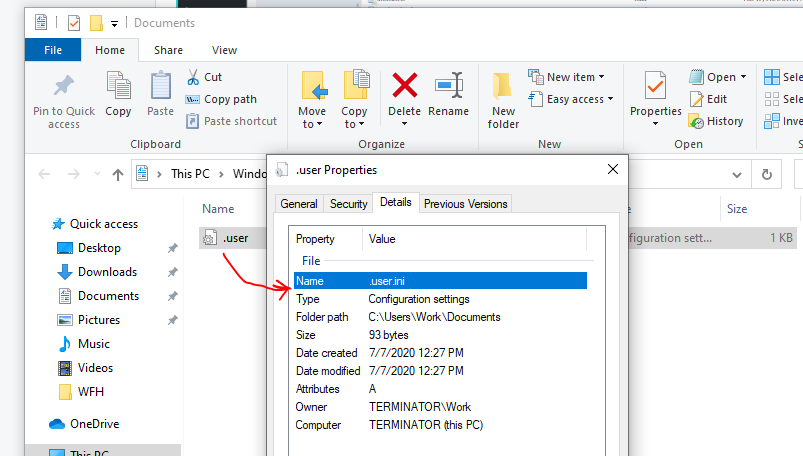
When you click the button and download the .user.ini file, you will notice that it downloads as “user.ini” missing the first “.” – you will have to rename it to “.user.ini” before you upload it to the site’s file manager.
To rename the file before you upload it, follow these steps:
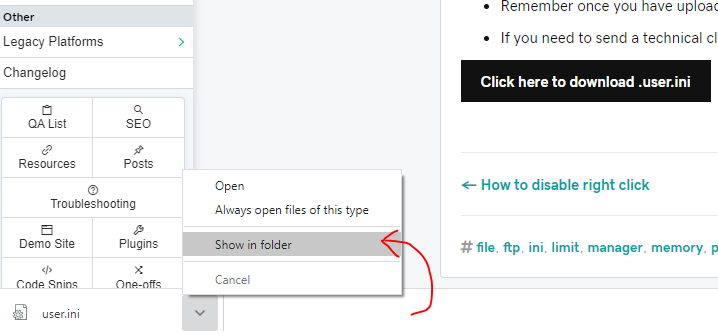
- Download the
.user.inifile by clicking the button - Click “show in folder” to open file location
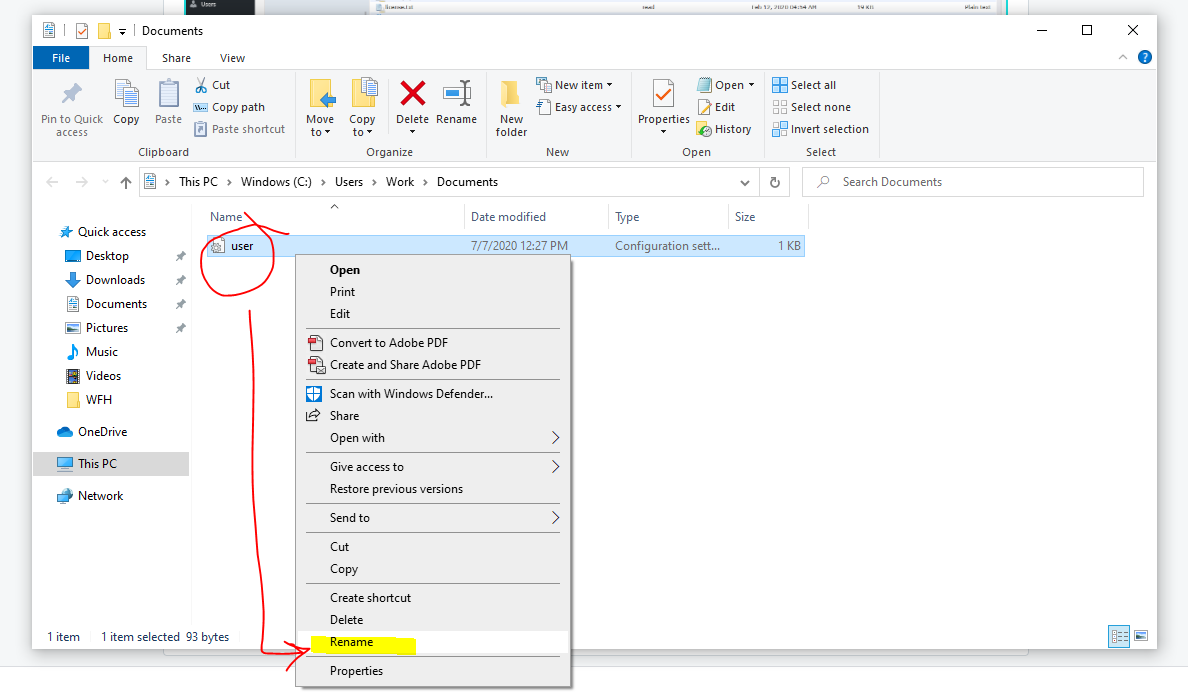
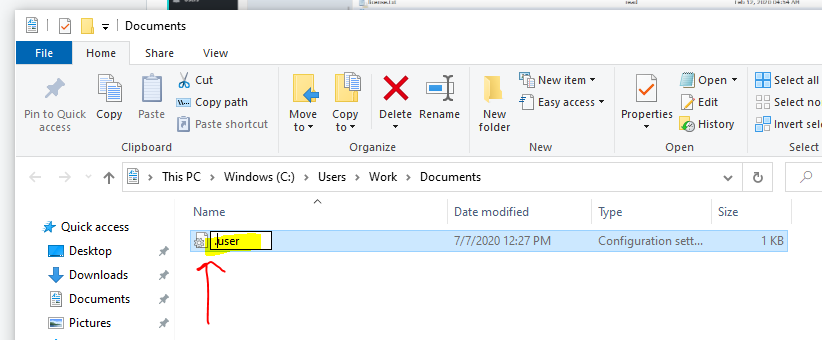
- Rename the file and just add a “
.” before the word “user” without any spaces - You can check if you did it right by viewing the file properties and making sure the name value is “
.user.ini“ - Continue with step 6 and upload the file to the site