
Shop Archive Grid – Sidebar, SF, Sort [Filterable]
Category: Product Archive | Components: Posts Module, Search Filter
Template Details
Use cases
Multi-column grid format – most common eCommerce shop layout. Use this layout on stores with regular products that specifically request for searchable and filterable functionality.

Component breakdown
- Products Grid – the template is using standard WooCommerce products module, default layout with the product image stacked above the product information. (The default WooCommerce products module is actually the standard posts module with additional settings and WooCommerce classes enabled)
- The number of products that show on a page before pagination occurs is controlled by the WordPress reading settings – to change this, go to dashboard > settings > reading > and then change the blog feed value and save, this will automatically adjust on the products archive page
- This layout template is made with the products (posts) module’s content source set to main query since it is made for themer layouts. If for any reason, this template is to be used on a static page, change the content source from main to custom query. If you are using it on an archive themer layout, make sure to keep the content source as main query only.
- WooCommerce Breadcrumb – template uses the default WooCommerce breadcrumb module aligned to the left
- Filterable Sidebar – this template’s sidebar requires that the Search & Filter (free version) plugin be installed, and consists of a custom HTML module with the following shortcode to filter by product categories, product tags and the attribute for color:
Note: This section contains HTML. Importing the template can cause the custom code to break – after importing the template, you will want to replace the HTML in the module with the fresh HTML below.
[searchandfilter fields="search,product_cat,pa_color,product_tag" headings=",Product Categories,Product Colors,Product Tags" types=",checkbox,checkbox,select" hierarchical=",1,1,0" operators="OR,AND,OR,OR" post_types="product" search_placeholder="Search Products..." submit_label="Search"]Switch out or remove attributes as needed – in order to be able to filter by attribute, however, you must create the product attribute globally and then select to enable an archive for it.
To learn how to properly set up, configure and use the search and filter plugin, click here.
Open Customizer > Content Tab > WooCommerce Tab
Some modules, even if you set the columns in the module to a certain number, get overridden sometimes by the settings in this tab. The only item in this tab to keep an eye on is “number of columns”. The default setting is usually 4. Make sure this number matches the column settings in your product grid module. For example, if you change it to 3 in the module, change it to 3 in the customizer as well.
If you’re experiencing weird column layout issues on a product archive page that has a product grid module set to a different number of columns than 4, it would be a good idea to check this area in the customizer and to change the number of columns to match the number being set in the product grid module. Once that is done, flush the cache, refresh the page, and the layout should correct itself.
Custom code
This layout uses custom CSS. While in the builder, click the tools dropdown at the top left of the screen > then click Layout CSS / JavaScript to access the CSS styling applied to the Search Filter shortcode in the custom HTML module and make adjustments as needed. This is what it looks like:
/* Search & Filter Styles */
.searchandfilter p {
	margin: 0;
	display:inline-block;
}
.searchandfilter ul {
	display: block;
	width: 100%;
	padding: 0;
	margin: auto;
}
.searchandfilter li {
	list-style: none;
	display: block;
	padding-right: 0;
	margin: auto;
}
/* If in a widget area make a single column by adding display block  */
.widget-area .searchandfilter li, .widget-area .searchandfilter p {
	display:block;
}
.searchandfilter label {
	display: flex;
	margin: auto;
	align-items: center;
	width: 100%;
	font-size: 15px;
	font-weight: 500;
}
.searchandfilter h4 {
	margin: 10px 0 5px;
	font-size: 18px;
	font-weight: 700;
}
.searchandfilter ul > li > ul:not(.children) {
	margin: 0 auto 10px;
}
.searchandfilter ul > li > ul:not(.children) li {
    margin: auto;
    padding-right: 5px;
}
.searchandfilter label input[type=checkbox], .searchandfilter label input[type=radio] {
    margin: 0 4px 0 0;
}
.searchandfilter select, .searchandfilter input[type=text] {
    width: 100%;
    height: 36px;
    /* padding: 0 4px; */
    border-radius: 0;
    /* border: 1px solid #111111; */
    margin-bottom: 15px;
    /* font-size: 15px; */
}
.searchandfilter select option, .searchandfilter select {
    padding: 0 5px;
}
How to Use
Download & Import Templates
- Choose one of the available template packages to download from the sidebar to the right
- Click the button to download the .xml for the desired template package
- Go to the site you want to import the template on, once you've installed GD Core and set up all the required plugins
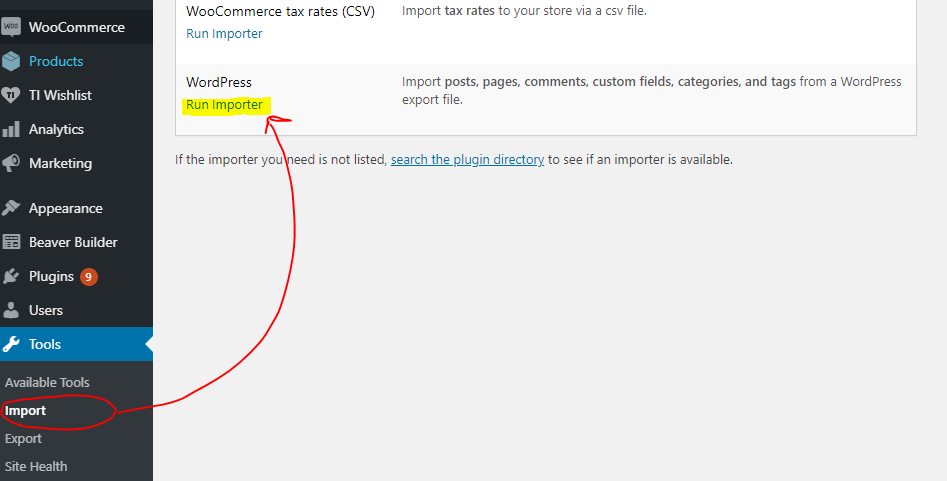
- Go to the dashboard > tools > import - then at the bottom, under WordPress click "install now" > then click "run importer"
- Select your downloaded template package .xml from the "choose file" button > then click "upload file and import"
Step 1

Step 2
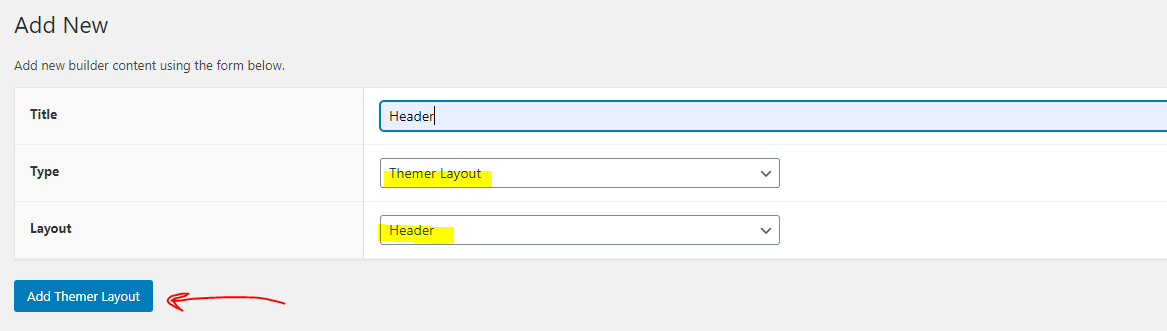
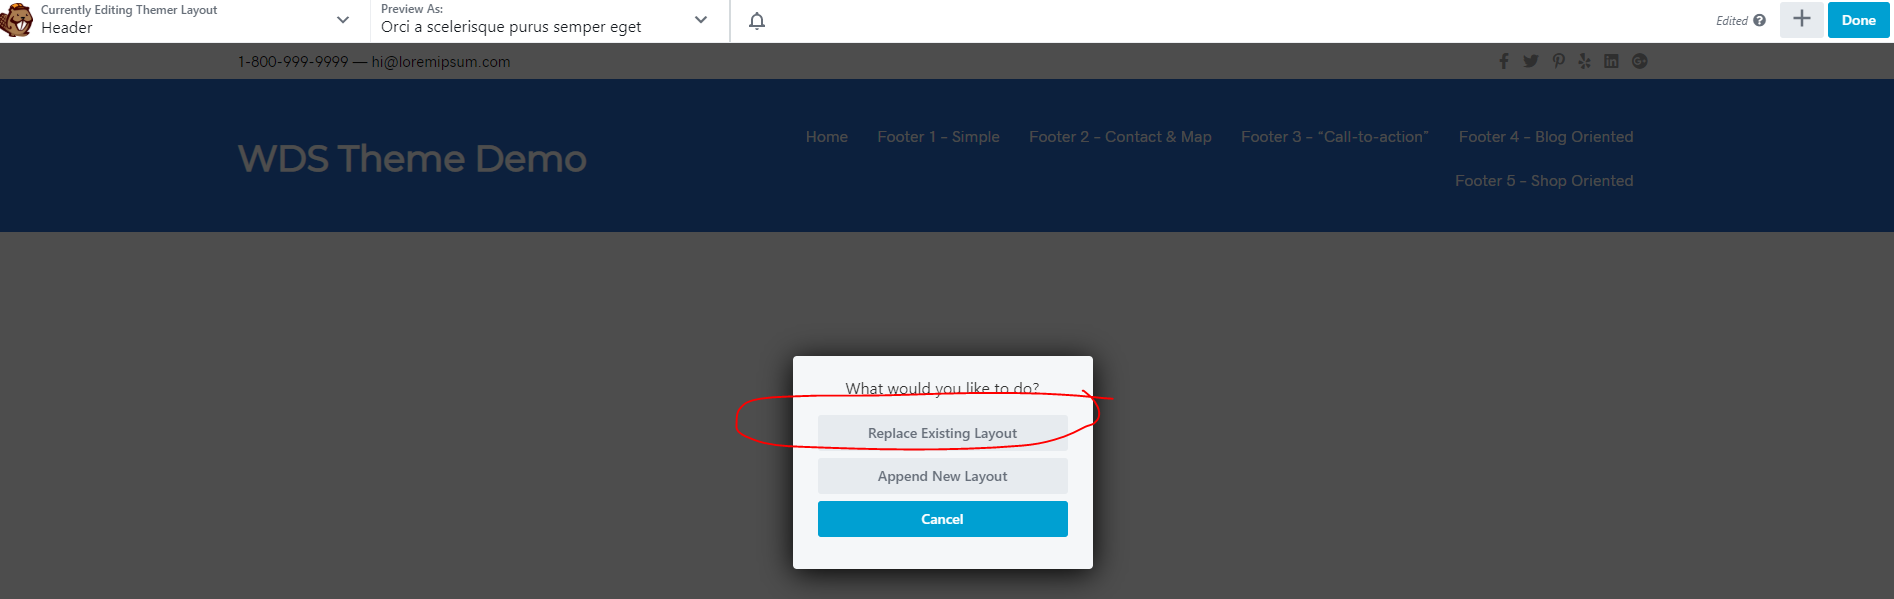
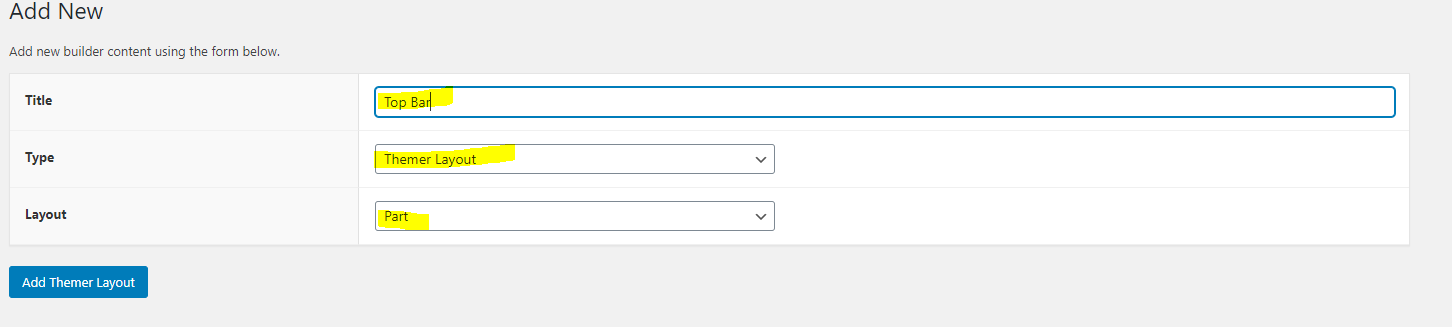
Apply Templates to Layouts

Note:
Feel free to adjust the widths of the columns to work with whatever changes you make to the template's components.
Make sure to check these adjustments on tablet and mobile responsive views as well to make sure the layouts appear correct on all screen sizes.
Table of Contents
Add a header to begin generating the table of contents
View Demo Download Template
Package Template Includes: Main Query: Product Archive Grid Filterable, Singular Product | Custom Query: Featured Products Module, Product Categories Module
Download Package