
Post Singular Docs – Sidebar, Table of Contents, Social
Category: Post Singular | Components: Sidebar, Social Share, Table of Contents, Themer Modules
Template Details
Use cases
Use this layout for sites where the posts are very lengthy or have many headings/subheadings and sections and would benefit from an easy auto-generated anchorlink system to jump between these sections e.g. journal or publisher sites, informational sites, medical or educational sites, etc.
Feel free to adjust/rearrange or remove items as needed depending on the kind of content that’s being posted about or based on specific requests to do so. If you add any items to the layout, just make sure they are set via field connection, unless its something that must be repeated across all posts that share the layout.

Component breakdown
- Post Hero – this template’s hero area consists of the following elements:
- Featured Image – template uses a column with top padding set to 150px and adjusted for smaller screens, with its background image set to the featured image of the post via field connection. This column contains a dark overlay on top of the featured image and holds the post title and post info. Since this is a site with more content-oriented posting, it is assumed that the featured image need not be emphasized and any emphasis-worthy images are to be placed in the post content area. However, if the featured image should not be overlayed or covered with the post title, it can be rearranged as seen fit. The colors of the post title and post info are set in their respective module settings.
- Heading – standard heading module set to post title via field connection
- Post Info – standard themer module for post info, set to show post date, categories and author
- Post Body – this template’s post body area consists of the following elements:
- Post Content – standard text editor module set to post content via field connection
- Social Share Icons – template is using the PowerPack social share module with 5 common social platforms enabled
- Post Tags – standard text editor module with field connection shortcode to display post terms list for post tags. This module is set to display only if post tags are added, else it will remain hidden
- Post Navigation – standard themer module for post navigation
- Sidebar – this template’s sidebar consists of the following element:
- Table of Contents – template is using the UABB table of contents module set to create anchors for H3, H4 and H5 heading types. H1, H2 and H6 can be enabled as well if needed, however, most subheadings fall within the H3-H5 range. This module automatically recognizes any of the enabled heading types present on a page and creates a list of these titles with no manual work required. The option for “smooth scroll” is enabled, however, the scroll to top button is disabled since there’s already such a button included in beaver builder core. If the header of the site is set to overlay, make sure to add the height of the header plus about an extra 10px to the field called “smooth scroll offset.”
Custom code
This layout does not make use of any custom HTML or CSS. All items have been styled within the modules or are using default styling from the customizer.
If you want the sidebar to stick while using the table of contents to anchor between headings, this can be done, however, make sure these criteria are met:
- The CSS must only apply to large screen sizes
- The sidebar must be shorter than the full height of the screen
To do this, place the following CSS snippet in the customizer:
@media screen and (min-width: 769px){

/*makes documentation page sidebar sticky---large screens only*/
.post-sing-main .fl-row-content .fl-col-group {
	display: flex;
	justify-content: space-between;
}
.post-sing-main .fl-row-content .fl-col-group .pst-sdbr {
	height: 100vh;
	position: -webkit-sticky;
	position: sticky;
	top: 0;
}

}
How to Use
Download & Import Templates
- Choose one of the available template packages to download from the sidebar to the right
- Click the button to download the .xml for the desired template package
- Go to the site you want to import the template on, once you've installed GD Core and set up all the required plugins
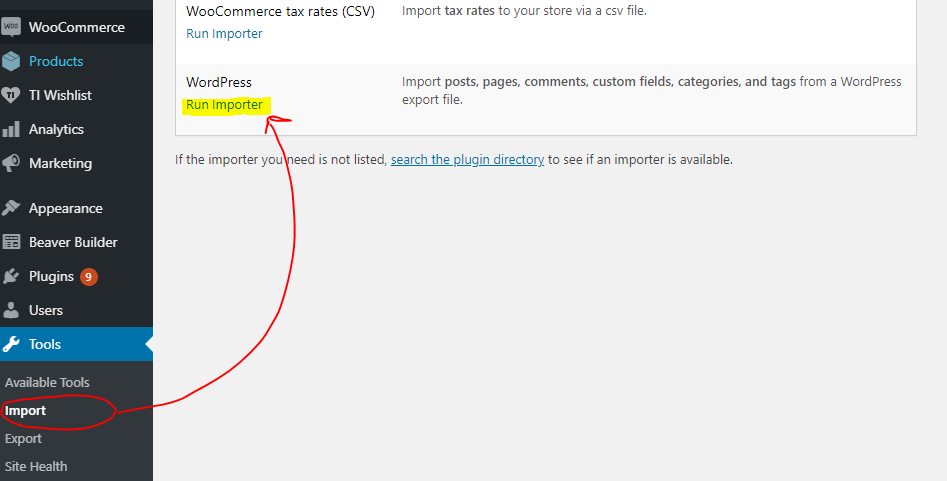
- Go to the dashboard > tools > import - then at the bottom, under WordPress click "install now" > then click "run importer"
- Select your downloaded template package .xml from the "choose file" button > then click "upload file and import"
Step 1

Step 2
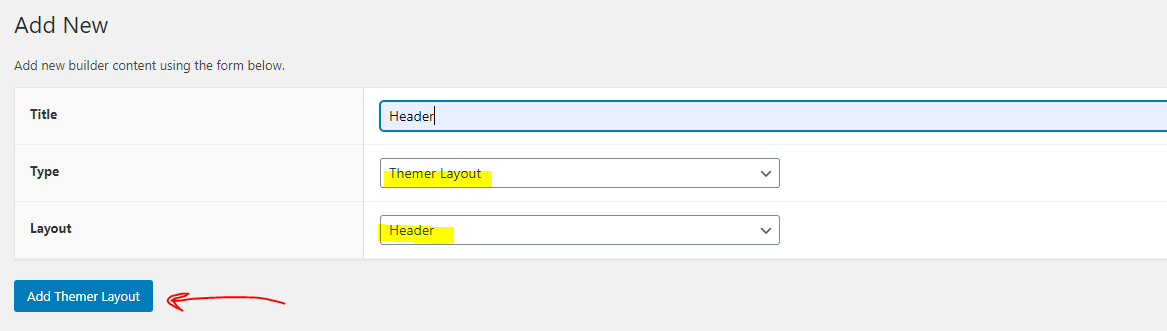
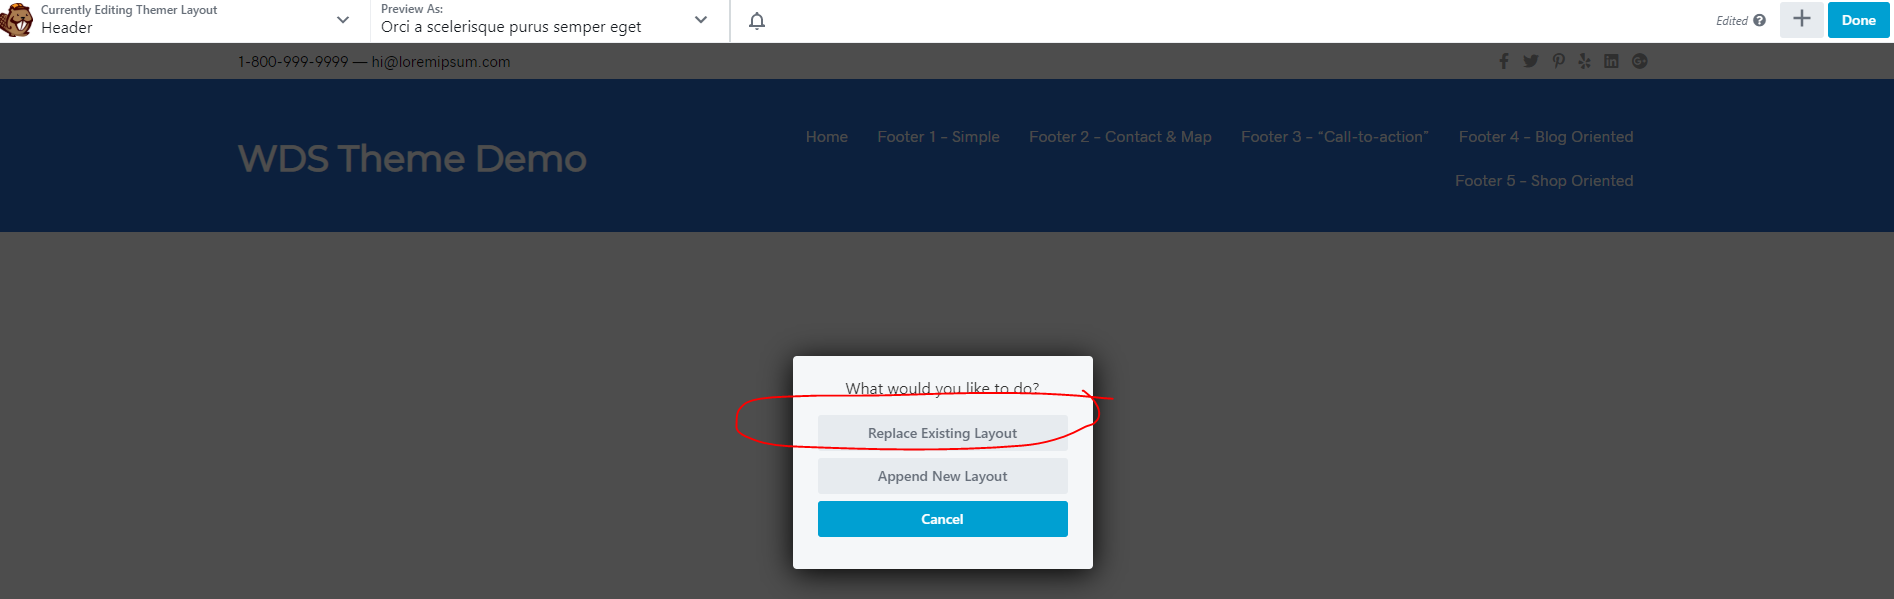
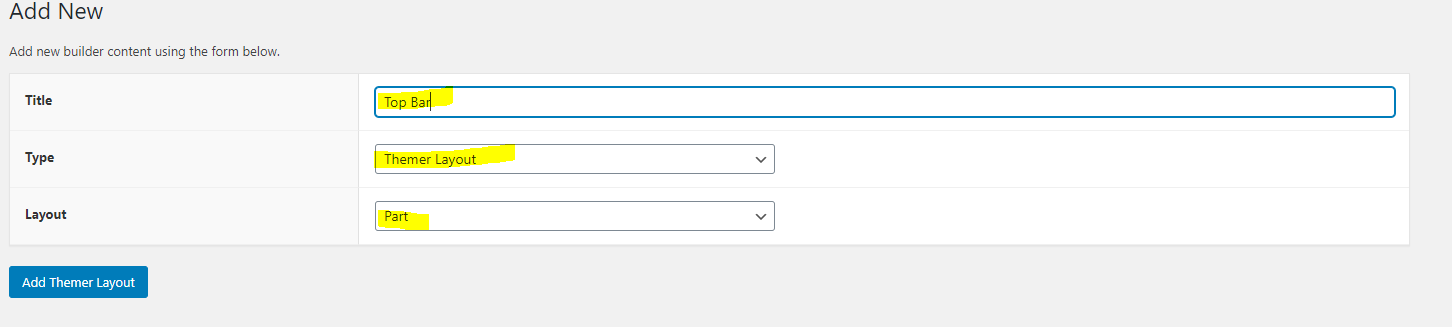
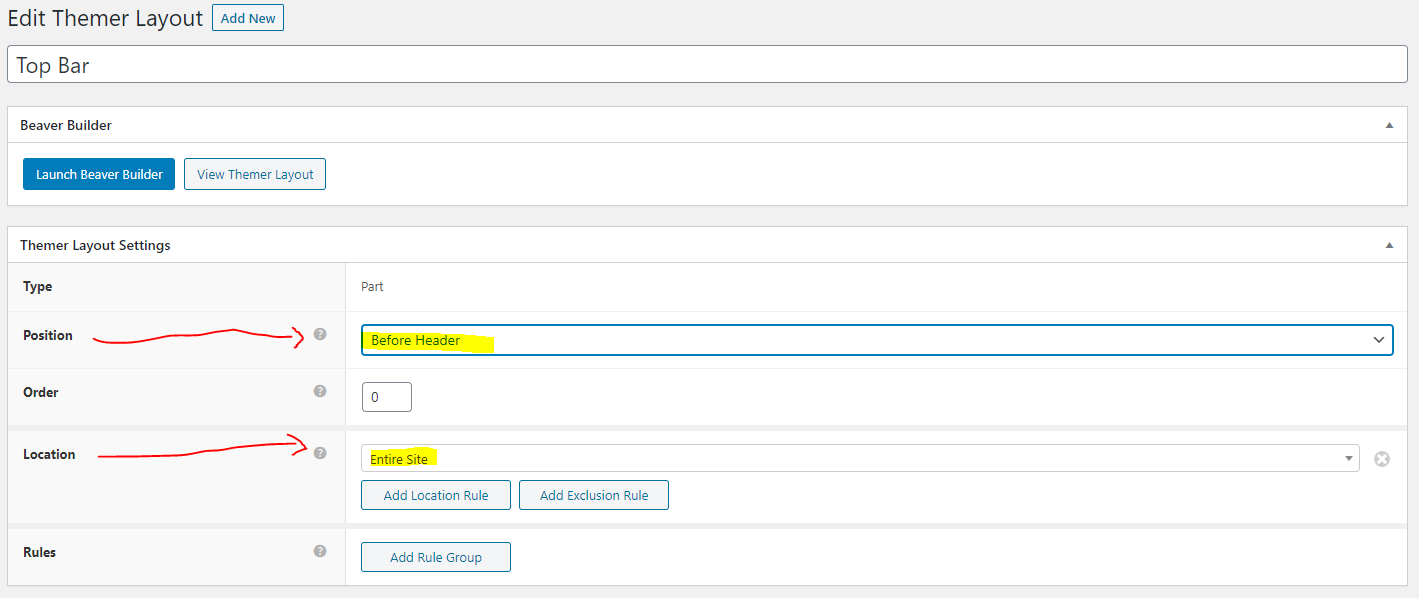
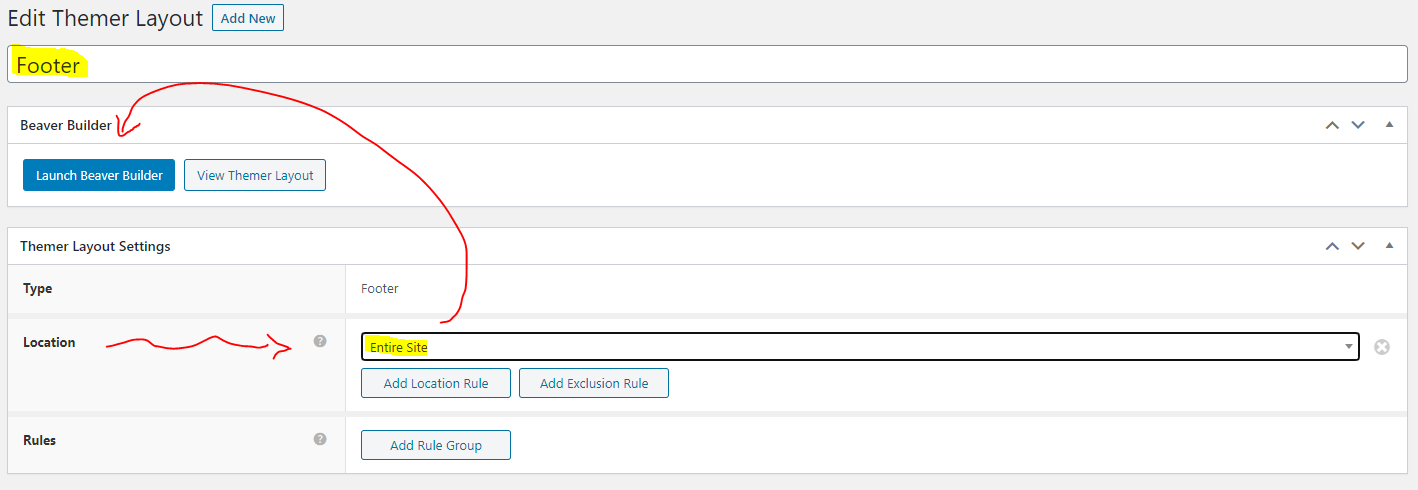
Apply Templates to Layouts

Note:
Feel free to adjust the widths of the columns to work with whatever changes you make to the template's components.
Make sure to check these adjustments on tablet and mobile responsive views as well to make sure the layouts appear correct on all screen sizes.
Table of Contents
Add a header to begin generating the table of contents