
Home Hero – Product Slider
Category: Hero | Components: Call-to-Action, Posts Module
Template Details
Use Cases
Use this hero layout if you have a premium shop with many products that get regularly added, and you would like for your latest or featured products to be the first thing people see on the site.
- Use it only if the desired main call-to-action is to view or buy the latest product on the site. For any other call-to-action needs, use a different hero layout.
- Avoid using this layout if the site has a shop that doesn’t get updated often OR if the featured images on the shop are too low in quality to make a good impression on first-time site viewers.
To Create this Hero
- Add a row with padding and give it a color/texture/gradient/image with overlay background (depending on how busy the product images are) and a minimum height.
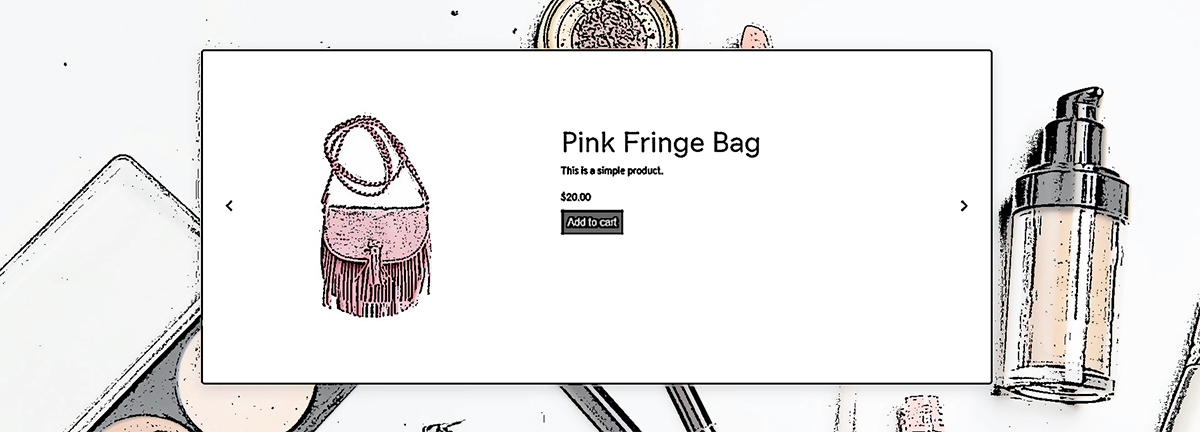
- In the hero row, add the PowerPack content grid module set to carousel.
- Set the content to custom query and choose products or the desired post type for the query source.
- The demo and template are using layout style 8 which floats the image to the left of the product content, however, this can be changed to a custom layout if desired and more WooCommerce classes can be added such as ratings and other details via field connection – these would need to be styled via custom CSS though.
This hero works at any hero height, and depends on the media provided as well as the hero specs in the design research done by vertical.
What’s in the template?
The template for download includes 1 layout option for the product slider hero type. You can choose to create the hero yourself OR download and import the template for use instead.
Use the template layout option as a starting point based and style appropriately – swap out the background media and change the fonts/colors/sizing/modules, etc. as needed.
How to Use
Download & Import Templates
- Choose one of the available template packages to download from the sidebar to the right
- Click the button to download the .xml for the desired template package
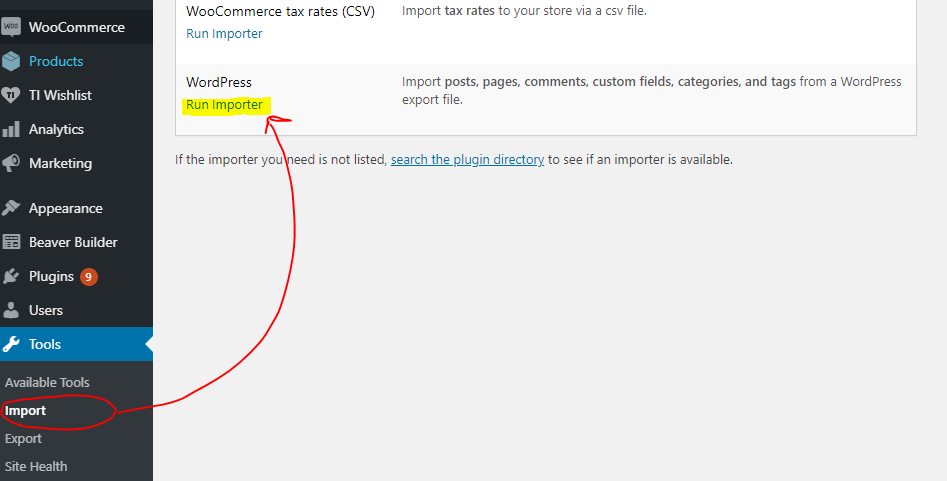
- Go to the site you want to import the template on, once you've installed GD Core and set up all the required plugins
- Go to the dashboard > tools > import - then at the bottom, under WordPress click "install now" > then click "run importer"
- Select your downloaded template package .xml from the "choose file" button > then click "upload file and import"
Step 1

Step 2
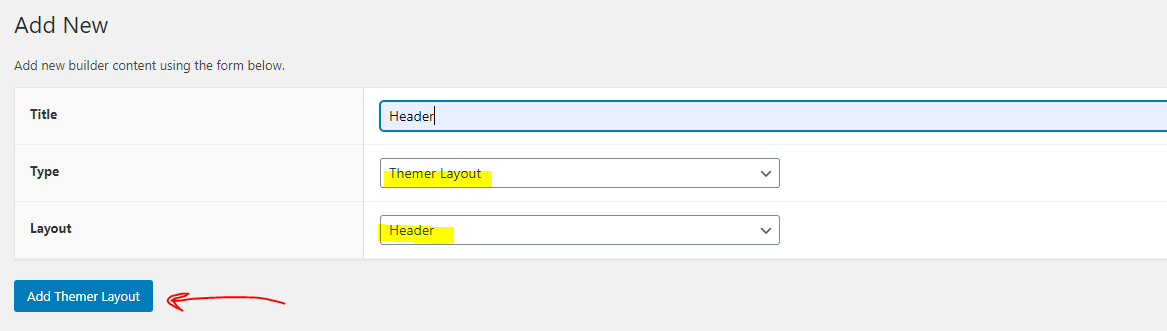
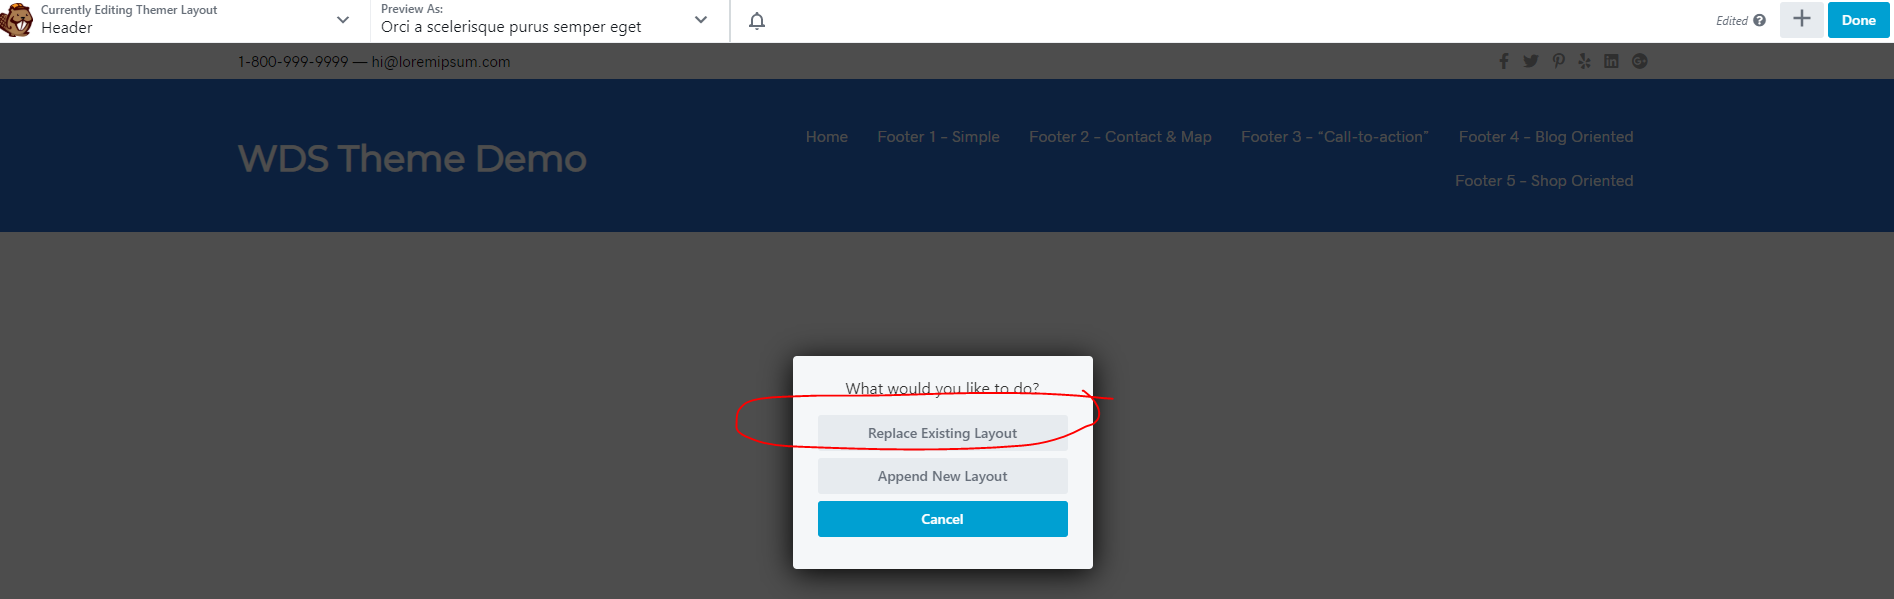
Apply Templates to Layouts

Note:
Feel free to adjust the widths of the columns to work with whatever changes you make to the template's components.
Make sure to check these adjustments on tablet and mobile responsive views as well to make sure the layouts appear correct on all screen sizes.
Table of Contents
Add a header to begin generating the table of contents